It starts with a single, rhythmic drip-drip-drip echoing in your attic during a spring rain. You climb up with a flashlight, expecting a minor leak, only to find a hairline fracture in a stone that was harvested before your great-grandparents were born. This is the paradox of the slate roof: it is the “forever roof,” capable of lasting over a century, yet a single poorly placed footstep or a rusted fastener can compromise the entire structural envelope.
In my decade of traversing steep-slope systems, I’ve seen homeowners panic and replace an entire slate roof with asphalt shingles because a general contractor told them it was “too old.” That is a tragedy of asset management. Slate is not like other roofing; it is a specialized masonry system. Understanding Slate Roof Repair isn’t just about stopping water—it’s about preserving a high-value architectural legacy.
The “Sinking Stone” Analogy: Why Slate Fails
Think of a slate roof like a beautifully tailored suit of armor. Each slate is a protective scale. If one scale falls off, the “knight” (your home) isn’t just vulnerable at that spot; the water can now travel behind the other scales, rotting the wooden “body” underneath.
When we talk about Slate Roof Repair, we aren’t usually fixing the stone itself—natural slate is incredibly durable. We are usually fixing the fastening system or the flashing. Over 80 years, copper nails may undergo “nail sickness” (thinning and snapping), or the wooden lath might decay. If you treat slate like a modern disposable shingle, you will destroy its long-term ROI.
Identifying the Culprits: Common Slate Pathology
Before grabbing a ladder, you need to categorize the failure. In the field, I look for three main technical indicators:
1. Mechanical Impact Damage
This is usually caused by fallen branches, heavy hail, or—most commonly—unqualified tradespeople walking on the roof. Slate is brittle. If you walk on it like you walk on a deck, you will crack the “headlap” (the hidden top portion of the slate), leading to invisible leaks.
2. Nail Sickness and Fastener Fatigue
In older installations, sometimes steel nails were used instead of copper or stainless steel. As these nails rust, they expand and then snap. This causes the slate to slide out of position, leaving a “keyhole” where water enters the building envelope directly.
3. Flashing and Valley Fatigue
The slate might last 200 years, but the copper flashing in the valleys or around chimneys usually lasts 60 to 80. Often, the leak isn’t the slate at all; it’s the metal infrastructure that has reached the end of its lifecycle.
Technical Execution: The “Rip and Hook” Strategy
If you are a beginner or intermediate DIYer, I must be firm: Never walk directly on slate. To perform a Slate Roof Repair, we use roof ladders or hook ladders that distribute weight evenly across the rafters.
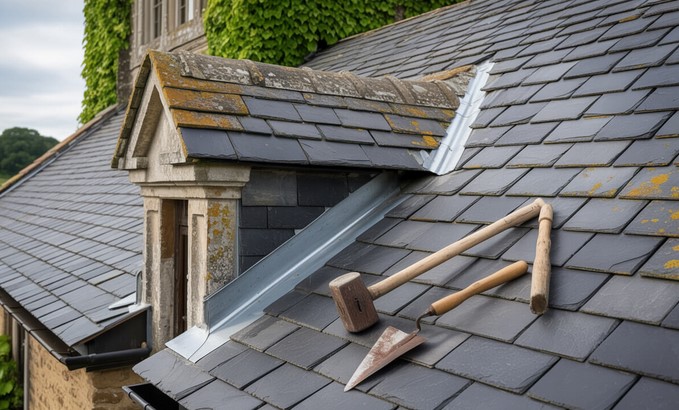
The Specialized Toolkit
You cannot perform this repair with a standard hammer and pry bar. You need:
-
Slate Ripper: A long, flat tool used to slide under slates and cut the nails.
-
Slate Cutter: For trimming replacement stones to size.
-
Copper Slate Hooks: The primary hardware for permanent “invisible” repairs.
The Repair Process
-
Extraction: Slide the slate ripper up under the broken slate, hook the nails, and strike the handle to shear them off.
-
Insertion: Select a replacement slate that matches the lithology (type of stone) and “patina” of the original roof.
-
Securing: Since you cannot nail the new slate (because the nails would be covered), drive a copper slate hook into the roof sheathing between the two slates below. The hook cradles the bottom of the new slate, holding it firmly in place while allowing for thermal expansion.
Strategic Asset Management: The ROI of Maintenance
Maintaining a slate roof is an exercise in Asset Lifecycle Extension. While the upfront cost of a specialist is higher, the return on investment is found in the property’s valuation. A well-maintained slate roof is a premium asset; a neglected one is a liability.
-
Annual Audits: Check for “slipping” slates every autumn.
-
Gutter Integrity: Ensure Gutter Hanger Screws are tight so heavy, clogged gutters don’t pull on the eave slates.
-
Biological Mitigation: Use a specialized Roof Moss Remover if you notice green growth, as moss holds moisture against the stone, leading to freeze-thaw delamination.
Expert Advice: The “Invisible” Warning
Here is an insight that separates the experts from the amateurs: The “Ring” Test.
⚠️ Tips Pro: Peringatan Tersembunyi (Hidden Warning)
Never, under any circumstances, use Roof Patch Cement (tar) to fix a slate leak. It is a “hack” that creates a permanent nightmare. Tar traps moisture against the wood, accelerates rot, and makes it impossible to perform a mechanical repair later. If you aren’t sure if a replacement slate is high quality, hang it by one corner and tap it with a knuckle. A healthy stone will produce a clear, crystalline “ring.” If it sounds like a dull thud, the stone is “dead” (internally delaminating) and should be discarded.
Conclusion: Honoring the Stone
Repairing a slate roof is more like being a restorer than a construction worker. It requires patience, specialized copper tools, and a deep respect for the material. When you implement these technical strategies, you aren’t just stopping a leak; you are preserving a building envelope that was designed to protect your home for centuries.
Does your roof have the “ring of quality,” or are you starting to see the signs of nail sickness? Don’t let a small slip turn into a structural disaster.
What’s the most intimidating part of working with stone for you—the height or the fragility? Let’s talk about steep-slope safety and tool selection in the comments below!