Bookshelf Bonanza: Cool and Creative Ideas for Bookshelves

Source : https://www.westernliving.ca

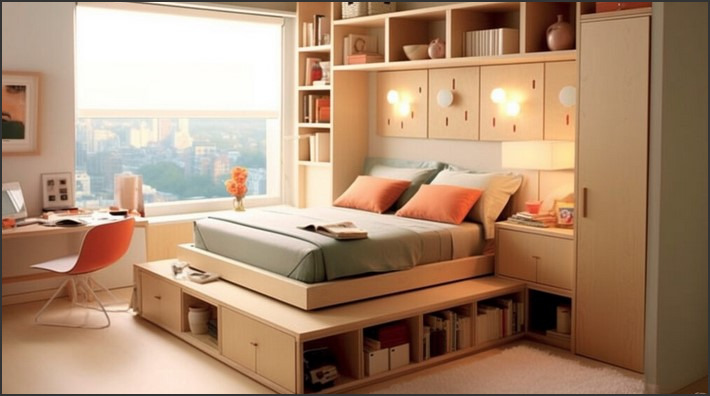
Bookshelf Bonanza: Cool and Creative Ideas for Bookshelves is a comprehensive guide to creating unique and stylish bookshelves for any room in your home. From traditional to modern, this book provides step-by-step instructions for building and decorating bookshelves that will add character and charm to any space. With detailed illustrations and helpful tips, this book is perfect for anyone looking to add a personal touch to their home library. Whether you’re a beginner or an experienced woodworker, Bookshelf Bonanza has something for everyone. So grab your tools and get ready to create the perfect bookshelf for your home!

10 Unique and Creative Bookshelves to Transform Your Home Library

The home library is a place of refuge and relaxation, a place to escape the hustle and bustle of everyday life. To make the most of this special space, it is important to choose the right bookshelves. Here are ten unique and creative bookshelves that will transform your home library into a stylish and inviting retreat.

1. The Ladder Shelf: This modern and minimalist design is perfect for small spaces. The ladder shelf is made of wood and metal and can be used to store books, magazines, and other items.

2. The Wall-Mounted Shelf: This shelf is perfect for those who want to maximize their space. The wall-mounted shelf is made of wood and metal and can be used to store books, magazines, and other items.

3. The Floating Shelf: This shelf is perfect for those who want to add a touch of modern style to their home library. The floating shelf is made of wood and metal and can be used to store books, magazines, and other items.

4. The Corner Shelf: This shelf is perfect for those who want to make the most of their corner space. The corner shelf is made of wood and metal and can be used to store books, magazines, and other items.

5. The Modular Shelf: This shelf is perfect for those who want to customize their home library. The modular shelf is made of wood and metal and can be used to store books, magazines, and other items.

6. The Cube Shelf: This shelf is perfect for those who want to add a touch of modern style to their home library. The cube shelf is made of wood and metal and can be used to store books, magazines, and other items.

7. The Tree Shelf: This shelf is perfect for those who want to add a touch of nature to their home library. The tree shelf is made of wood and metal and can be used to store books, magazines, and other items.

8. The Wall-Mounted Bookcase: This bookcase is perfect for those who want to maximize their space. The wall-mounted bookcase is made of wood and metal and can be used to store books, magazines, and other items.

9. The Rolling Shelf: This shelf is perfect for those who want to move their books around easily. The rolling shelf is made of wood and metal and can be used to store books, magazines, and other items.

10. The Hanging Shelf: This shelf is perfect for those who want to add a touch of modern style to their home library. The hanging shelf is made of wood and metal and can be used to store books, magazines, and other items.

These unique and creative bookshelves will transform your home library into a stylish and inviting retreat. With the right bookshelves, you can create a space that is both functional and aesthetically pleasing.

How to Maximize Space and Style with Bookshelves: Tips and Tricks for Bookshelf Bonanza

Bookshelves are a great way to maximize space and style in any room. Whether you’re looking to add a touch of sophistication to your living room or create a cozy reading nook in your bedroom, bookshelves can be a great addition to any home. Here are some tips and tricks to help you make the most of your bookshelves:

1. Choose the Right Size: When selecting a bookshelf, make sure to choose one that fits the space you have available. Measure the area you plan to place the bookshelf in and make sure to leave enough room for the bookshelf to fit comfortably.

2. Utilize Vertical Space: Bookshelves are great for utilizing vertical space. Place taller bookshelves against walls to make the most of the space you have available.

3. Mix and Match: Don’t be afraid to mix and match different styles of bookshelves. This will add visual interest to the room and create a unique look.

4. Add Accessories: Bookshelves don’t have to be just for books. Add some decorative accessories such as plants, vases, and sculptures to add a touch of style to your bookshelves.

5. Use Color: Use color to create a cohesive look. Choose bookshelves in a color that complements the other furniture in the room.

6. Create a Theme: Create a theme for your bookshelves. This could be a color scheme, a style, or a specific type of book. This will help create a cohesive look and make your bookshelves stand out.

By following these tips and tricks, you can maximize space and style with bookshelves. With a little creativity and planning, you can create a beautiful and functional bookshelf bonanza in any room of your home.Bookshelf Bonanza: Cool and Creative Ideas for Bookshelves is an excellent resource for anyone looking to spruce up their home library. It provides a wide range of ideas for bookshelves, from traditional to modern, and from simple to complex. Whether you’re looking for a unique way to display your books or just want to add a touch of style to your home, this book has something for everyone. With its helpful tips and inspiring photos, Bookshelf Bonanza is sure to help you create the perfect bookshelf for your home.

Tiny Tranquility: Maximizing Space in Tiny Bedrooms

Source : https://quatest2.com.vn

Tiny Tranquility is a company that specializes in maximizing space in tiny bedrooms. We understand that living in a small space can be challenging, and we are here to help you make the most of your space. Our team of experienced designers and craftsmen will work with you to create a custom design that fits your needs and budget. We offer a wide range of products and services, from custom furniture to storage solutions, to help you make the most of your tiny bedroom. We believe that even the smallest of spaces can be transformed into a tranquil and comfortable retreat. With our help, you can create a space that is both functional and beautiful.

How to Create a Tranquil Space in a Tiny Bedroom: Tips and Tricks for Maximizing Space

Creating a tranquil space in a tiny bedroom can be a challenge, but with the right tips and tricks, it is possible to maximize the space and create a peaceful retreat. Here are some tips and tricks for creating a tranquil space in a tiny bedroom:

1. Declutter: The first step to creating a tranquil space in a tiny bedroom is to declutter. Remove any unnecessary items and organize the remaining items in a way that maximizes the space. This will help create a sense of calm and order in the room.

2. Choose a Neutral Color Palette: Choosing a neutral color palette for the walls and furniture will help create a tranquil atmosphere. Neutral colors such as white, beige, and gray will help create a sense of calm and serenity.

3. Add Natural Elements: Adding natural elements such as plants, wood, and stone can help create a tranquil atmosphere. Natural elements will help bring the outdoors inside and create a sense of peace and tranquility.

4. Use Mirrors: Mirrors can help create the illusion of more space and can also help reflect light, making the room appear brighter and more open.

5. Utilize Vertical Space: Utilizing vertical space is key when it comes to maximizing a tiny bedroom. Invest in furniture that can be hung on the wall or use shelves to store items. This will help create more floor space and make the room appear larger.

By following these tips and tricks, it is possible to create a tranquil space in a tiny bedroom. With a little creativity and effort, it is possible to create a peaceful retreat in even the smallest of spaces.

Designing a Tiny Bedroom for Maximum Comfort and Tranquility: Ideas for Making the Most of Your Space

Designing a tiny bedroom for maximum comfort and tranquility can be a challenge. However, with careful planning and creative use of space, it is possible to create a cozy and peaceful retreat. Here are some ideas for making the most of your small bedroom:

1. Choose a calming color palette. Soft, neutral colors such as light blues, grays, and whites can help create a tranquil atmosphere. Avoid bright colors and patterns, which can be overwhelming in a small space.

2. Utilize vertical space. Make use of the walls and ceiling by adding shelves, hanging artwork, and installing floating shelves. This will help to create the illusion of more space.

3. Invest in multi-functional furniture. Look for pieces that can serve multiple purposes, such as a bed with storage drawers or a desk that doubles as a vanity. This will help to maximize the available space.

4. Add a few plants. Plants can help to purify the air and add a touch of nature to the room. Choose low-maintenance varieties that don’t require too much care.

5. Incorporate natural light. If possible, install a window or skylight to let in natural light. This will help to make the room feel larger and more inviting.

6. Utilize mirrors. Mirrors can help to create the illusion of more space and reflect light around the room.

7. Keep it clutter-free. A cluttered room can be overwhelming and make the space feel smaller. Make sure to keep the room organized and free of unnecessary items.

By following these tips, you can create a tiny bedroom that is both comfortable and tranquil. With careful planning and creative use of space, you can make the most of your small bedroom and create a cozy retreat.Tiny Tranquility is a great resource for anyone looking to maximize the space in their tiny bedroom. With its helpful tips and tricks, it can help you create a cozy and comfortable space that is both functional and aesthetically pleasing. Whether you are looking to make the most of a small bedroom or just want to create a more organized and efficient space, Tiny Tranquility can help you achieve your goals.

Orb of Light: Creating a DIY Chandelier Masterpiece

Source : https://stylecaster.com

Orb of Light is a unique and creative way to create a stunning DIY chandelier masterpiece. With a few simple materials and a bit of imagination, you can create a beautiful and unique lighting fixture that will be the envy of your friends and family. This guide will provide you with step-by-step instructions on how to create your own Orb of Light chandelier. With a few simple tools and materials, you can create a beautiful and unique lighting fixture that will be the perfect addition to any room. So, let’s get started and create your own Orb of Light chandelier masterpiece!

How to Make a DIY Orb Chandelier: A Step-by-Step Guide

Creating a DIY orb chandelier is a great way to add a unique and stylish touch to any room. This step-by-step guide will walk you through the process of making your own orb chandelier.

Materials Needed:

-Wooden dowels

-Wood glue

-Paint

-Paintbrush

-Drill

-Screws

-Light kit

-Wire cutters

-Wire strippers

-Wire nuts

-Light bulbs

Step 1: Cut the Dowels. Cut the wooden dowels into pieces that are the same length. The number of pieces you need will depend on the size of the chandelier you want to make.

Step 2: Glue the Dowels Together. Use wood glue to attach the pieces of dowel together in a circular shape. Make sure the pieces are tightly secured together.

Step 3: Paint the Dowels. Once the glue has dried, paint the dowels with the color of your choice. Allow the paint to dry completely before moving on to the next step.

Step 4: Drill Holes. Use a drill to make holes in the dowels for the screws. Make sure the holes are evenly spaced and large enough for the screws to fit through.

Step 5: Attach the Light Kit. Use the screws to attach the light kit to the dowels. Make sure the screws are securely fastened.

Step 6: Wire the Light Kit. Use wire cutters and wire strippers to strip the ends of the wires. Connect the wires to the light kit using wire nuts.

Step 7: Install the Light Bulbs. Install the light bulbs in the light kit. Make sure the bulbs are securely fastened.

Step 8: Hang the Chandelier. Hang the chandelier from the ceiling using the appropriate hardware. Make sure the chandelier is securely fastened.

Your DIY orb chandelier is now complete! Enjoy your unique and stylish addition to your home.

Crafting a Unique Chandelier with Orb of Light: Tips and Tricks for a Professional Look

Creating a unique chandelier with an Orb of Light can be a daunting task for even the most experienced DIYer. However, with the right tips and tricks, you can create a professional-looking chandelier that will be the envy of your friends and family. Here are some tips and tricks to help you craft a unique chandelier with an Orb of Light.

First, choose the right size of Orb of Light for your chandelier. The size of the Orb of Light should be proportional to the size of the room in which it will be hung. If the Orb of Light is too small, it will not provide enough light to illuminate the room. On the other hand, if it is too large, it will overpower the room.

Second, select the right type of Orb of Light for your chandelier. There are many different types of Orbs of Light available, including LED, halogen, and incandescent. Each type of Orb of Light has its own advantages and disadvantages, so it is important to choose the one that best suits your needs.

Third, choose the right type of mounting hardware for your chandelier. The mounting hardware should be strong enough to support the weight of the Orb of Light and should be able to withstand the vibrations of the chandelier.

Fourth, select the right type of wiring for your chandelier. The wiring should be able to handle the voltage of the Orb of Light and should be able to withstand the vibrations of the chandelier.

Finally, choose the right type of finish for your chandelier. The finish should be able to withstand the elements and should be able to provide a professional look.

By following these tips and tricks, you can create a unique chandelier with an Orb of Light that will be the envy of your friends and family. With the right materials and tools, you can create a professional-looking chandelier that will be the centerpiece of your home.The Orb of Light DIY Chandelier Masterpiece is a great way to add a unique and beautiful touch to any room. It is easy to assemble and customize, and the end result is a stunning and eye-catching piece of art. With its unique design and customizable features, the Orb of Light is sure to be a conversation starter and a great addition to any home.

Pool Pleasantries: Exploring the Price of Pools

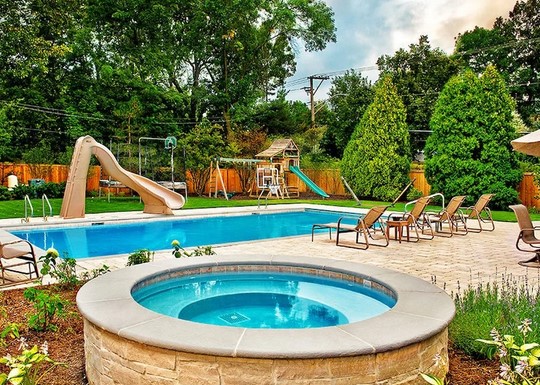
Welcome to Pool Pleasantries, a blog dedicated to exploring the price of pools. Whether you’re looking to build a pool in your backyard or just curious about the cost of owning one, this blog is here to provide you with all the information you need. We’ll cover topics such as the cost of materials, labor, and maintenance, as well as tips for getting the most out of your pool. We’ll also discuss the various types of pools available and the pros and cons of each. So, if you’re ready to dive into the world of pool ownership, let’s get started!

What Factors Impact the Price of a Pool? Exploring the Different Costs Involved in Installing a Pool

The cost of installing a pool can vary greatly depending on a variety of factors. These factors include the size and shape of the pool, the type of pool, the materials used, the location, and the labor costs. Understanding these factors can help homeowners make informed decisions when it comes to installing a pool.

Size and Shape: The size and shape of the pool will have a major impact on the cost. Larger pools require more materials and labor, and more complex shapes can also increase the cost.

Type of Pool: The type of pool will also affect the cost. In-ground pools are typically more expensive than above-ground pools, and fiberglass pools are more expensive than vinyl-lined pools.

Materials: The materials used to construct the pool will also affect the cost. Concrete pools are more expensive than vinyl-lined pools, and the type of tile used to finish the pool can also add to the cost.

Location: The location of the pool can also affect the cost. Installing a pool in an area with difficult access or in a location with a high water table can increase the cost.

Labor Costs: The labor costs associated with installing a pool can also vary greatly. The cost of labor will depend on the complexity of the project and the experience of the contractor.

By understanding the different factors that can affect the cost of installing a pool, homeowners can make informed decisions when it comes to selecting the right pool for their needs.

How to Get the Most Value for Your Money When Shopping for a Pool: Tips for Finding the Best Deals on Pool Installation and Maintenance

When shopping for a pool, it is important to get the most value for your money. To ensure that you get the best deal on pool installation and maintenance, there are several tips to consider.

First, research the different types of pools available and determine which type best suits your needs. Consider factors such as size, shape, and cost. Additionally, research the different pool installation and maintenance companies in your area to compare prices and services.

Second, ask for quotes from multiple companies. Make sure to get detailed quotes that include all costs associated with the installation and maintenance of the pool. This will help you compare prices and services between companies.

Third, consider the long-term costs associated with the pool. This includes the cost of chemicals, filters, and other maintenance items. Additionally, consider the cost of energy to heat the pool and the cost of repairs and replacements.

Fourth, ask for references from the pool installation and maintenance companies. Speak with previous customers to get an idea of the quality of the company’s work.

Finally, consider the warranties offered by the pool installation and maintenance companies. Make sure to read the fine print and understand the terms of the warranty before signing any contracts.

By following these tips, you can ensure that you get the most value for your money when shopping for a pool. Researching the different types of pools, getting quotes from multiple companies, considering long-term costs, asking for references, and understanding the warranties offered are all important steps to take when shopping for a pool.In conclusion, the cost of owning a pool can be quite expensive, but the benefits of having a pool can far outweigh the costs. Pool owners can enjoy the convenience of having a pool in their backyard, the health benefits of swimming, and the social benefits of having a place to gather with friends and family. Pool owners should also be aware of the potential risks associated with owning a pool, such as drowning and other safety hazards. With proper maintenance and safety precautions, owning a pool can be a great way to enjoy the summer months.

Farmhouse Finesse: Rustic Charm with DIY Farmhouse Table Plans

Welcome to Farmhouse Finesse! We are a one-stop shop for all your rustic charm needs. Whether you’re looking for a unique farmhouse table plan or a DIY project to spruce up your home, we have you covered. Our plans are designed to be easy to follow and provide you with the perfect rustic look for your home. We also offer a variety of other farmhouse-inspired items, such as furniture, decor, and more. With our help, you can create a cozy and inviting atmosphere in your home. So, let’s get started and create the perfect farmhouse look for your home!

How to Create a Rustic Farmhouse Table with DIY Plans

Creating a rustic farmhouse table is a great way to add a unique and stylish piece of furniture to any home. With the right materials and tools, it is possible to build a beautiful and sturdy table that will last for years to come. This guide will provide step-by-step instructions on how to create a rustic farmhouse table with DIY plans.

The first step in creating a rustic farmhouse table is to gather the necessary materials and tools. This includes wood, screws, nails, saws, sandpaper, and a drill. It is important to select the right type of wood for the project. Hardwoods such as oak, walnut, and cherry are ideal for creating a rustic look. Softwoods such as pine and cedar are also suitable for the project, but they may not be as durable.

Once the materials and tools have been gathered, the next step is to create a plan for the table. This plan should include the dimensions of the table, the type of wood to be used, and the type of joinery to be used. It is important to take into account the size of the room where the table will be placed, as well as the number of people who will be using it.

Once the plan has been created, the next step is to cut the wood to the desired size. It is important to use a saw that is designed for cutting wood, as this will ensure that the cuts are precise and even. After the wood has been cut, it is time to assemble the table. This involves attaching the legs to the top of the table, as well as attaching the sides and the bottom.

Once the table is assembled, it is time to sand and finish the wood. Sanding will help to smooth out any rough edges and create a more uniform look. Finishing the wood will help to protect it from moisture and wear and tear.

Finally, the table can be decorated with a variety of accessories. This could include a tablecloth, placemats, and other decorative items. With a little creativity, it is possible to create a unique and stylish rustic farmhouse table that will be the centerpiece of any room.

Adding Charm to Your Home with DIY Farmhouse Table Plans

The farmhouse table is a classic piece of furniture that has been around for centuries. It is a timeless piece that adds charm and character to any home. With the right DIY farmhouse table plans, you can create a beautiful and functional piece of furniture that will be the centerpiece of your home.

Farmhouse tables are typically made from solid wood, such as pine, oak, or cherry. They are usually rectangular in shape and feature a simple, rustic design. The table top is usually made from a single piece of wood, while the legs are usually made from four pieces of wood. The table is usually finished with a natural stain or paint.

When it comes to DIY farmhouse table plans, there are a few things to consider. First, you need to decide on the size of the table. You should also consider the type of wood you want to use and the type of finish you want to apply. Additionally, you should consider the type of hardware you will need to assemble the table.

Once you have decided on the size and type of wood, you can begin to create your DIY farmhouse table plans. You can find a variety of plans online or in books. You can also find plans in magazines or in home improvement stores.

When creating your DIY farmhouse table plans, you should consider the type of hardware you will need. You should also consider the type of finish you want to apply. Additionally, you should consider the type of stain or paint you want to use.

Once you have created your DIY farmhouse table plans, you can begin to assemble the table. You should use a drill and screws to attach the legs to the table top. You should also use a saw to cut the wood to the desired size. Once the table is assembled, you can apply the finish and stain or paint.

Creating a DIY farmhouse table is a great way to add charm and character to your home. With the right plans, you can create a beautiful and functional piece of furniture that will be the centerpiece of your home.Farmhouse Finesse is a great resource for anyone looking to add a touch of rustic charm to their home. With DIY farmhouse table plans, you can easily create a beautiful and unique piece of furniture that will be the centerpiece of any room. With the help of Farmhouse Finesse, you can create a timeless and classic look that will last for years to come.

Small Space Serenity: Design Ideas for a Charming Small Patio

Welcome to Small Space Serenity: Design Ideas for a Charming Small Patio! If you’re looking for ways to make the most of your small patio, you’ve come to the right place. Here, you’ll find creative and inspiring ideas to help you transform your outdoor space into a cozy and inviting retreat. From furniture and accessories to lighting and landscaping, we’ll show you how to make the most of your small patio. With a few simple changes, you can create a beautiful and functional outdoor space that you’ll love spending time in. So let’s get started!

How to Create a Serene Small Patio Oasis: Tips and Tricks for Designing a Cozy Outdoor Space

Creating a serene small patio oasis can be a great way to enjoy the outdoors in a cozy and comfortable setting. With the right design elements, you can create a tranquil outdoor space that is perfect for relaxing and entertaining. Here are some tips and tricks for designing a small patio oasis that will help you create a peaceful and inviting atmosphere.

1. Choose the Right Furniture: Selecting the right furniture for your patio is essential for creating a serene atmosphere. Choose pieces that are comfortable and inviting, such as a cozy sofa or armchair. If space is limited, opt for a bistro set or a small dining table and chairs.

2. Add Soft Lighting: Soft lighting is key for creating a tranquil atmosphere. Consider adding string lights, lanterns, or candles to your patio to create a warm and inviting ambiance.

3. Incorporate Nature: Incorporating natural elements into your patio design can help create a peaceful atmosphere. Consider adding plants, flowers, or a water feature to your patio to bring a sense of serenity to the space.

4. Create a Cozy Seating Area: Creating a cozy seating area is essential for creating a serene atmosphere. Choose comfortable seating and add pillows and throws for extra comfort.

5. Add a Fire Feature: Adding a fire feature to your patio can help create a cozy atmosphere. Consider adding a fire pit or a chiminea to your patio to create a warm and inviting atmosphere.

By following these tips and tricks, you can create a serene small patio oasis that is perfect for relaxing and entertaining. With the right design elements, you can create a tranquil outdoor space that is perfect for enjoying the outdoors in a cozy and comfortable setting.

Maximizing Your Small Patio: Ideas for Making the Most of Your Limited Outdoor Space

Having a small patio can be a challenge when it comes to making the most of your limited outdoor space. However, with a few creative ideas, you can maximize your patio and make it a comfortable and inviting outdoor area. Here are some tips for making the most of your small patio.

First, consider the layout of your patio. If you have a small patio, it is important to make sure that the furniture and other items are arranged in a way that maximizes the space. For example, you can use folding chairs and tables that can be easily stored when not in use. Additionally, you can use vertical space by hanging planters or shelves on the walls.

Second, use bright colors and patterns to make your patio look larger. Bright colors can help to create the illusion of a larger space, while patterns can help to break up the space and make it look more interesting.

Third, use furniture that is multi-functional. For example, you can use an ottoman that can be used as a coffee table or a bench that can be used for seating. This will help to maximize the space and make it more functional.

Fourth, use lighting to create a cozy atmosphere. String lights, lanterns, and candles can all help to create a warm and inviting atmosphere on your patio.

Finally, add some greenery to your patio. Plants and flowers can help to make your patio look more inviting and can also help to create a sense of privacy.

By following these tips, you can make the most of your small patio and create a comfortable and inviting outdoor space. With a few creative ideas, you can maximize your patio and make it a great place to relax and enjoy the outdoors.Small Space Serenity: Design Ideas for a Charming Small Patio provides a wealth of creative and practical ideas for transforming a small patio into a beautiful and inviting outdoor space. With the right design elements, a small patio can be transformed into a cozy and inviting outdoor oasis. From adding a few pieces of furniture to creating a lush garden, there are many ways to make a small patio feel larger and more inviting. With a little bit of creativity and planning, a small patio can be transformed into a beautiful and tranquil outdoor space.

Pegboard Paradise: Organizational Ideas with Garage Pegboards

Pegboard Paradise: Organizational Ideas with Garage Pegboards is a comprehensive guide to organizing your garage with pegboards. It provides step-by-step instructions on how to install pegboards, as well as ideas for organizing tools, supplies, and other items. It also includes tips on how to maximize the use of pegboards and make the most of your space. Whether you’re a DIYer or a professional, this guide will help you create an organized and efficient garage.

How to Maximize Your Garage Storage with Pegboard Paradise: Creative Ideas for Organizing Your Space

Garage storage can be a challenge, but with the right tools and creative ideas, it can be transformed into a functional and organized space. Pegboard is an ideal solution for maximizing garage storage, as it provides a versatile and customizable way to store items of all shapes and sizes. This article will provide creative ideas for organizing your garage with pegboard, helping you to make the most of your space.

First, consider the layout of your garage and the items you need to store. This will help you determine the size and shape of the pegboard you need. Once you have the pegboard in place, you can begin to customize it to fit your needs. Start by adding hooks and baskets to store items like tools, sports equipment, and gardening supplies. You can also use pegboard to hang bikes, ladders, and other large items.

Next, consider adding shelves and drawers to your pegboard. This will provide additional storage space for items like paint cans, cleaning supplies, and other small items. You can also use pegboard to hang shelves for items like books, magazines, and other items that need to be kept off the floor.

Finally, consider adding accessories to your pegboard. This could include a magnetic strip for holding small tools, a chalkboard for labeling items, or a corkboard for displaying photos and artwork. These accessories can help to make your pegboard more functional and attractive.

By following these creative ideas for organizing your garage with pegboard, you can maximize your storage space and create a functional and organized space. With the right tools and accessories, you can transform your garage into a paradise of storage and organization.

Get Organized in Style: Decorative Pegboard Ideas for Your Garage from Pegboard Paradise

Garages are often the most cluttered and disorganized spaces in a home. To help keep your garage neat and organized, consider using decorative pegboard. Pegboard is a great way to store and organize tools, sports equipment, and other items in an attractive and efficient manner. Pegboard Paradise offers a wide selection of decorative pegboard ideas for your garage that will help you get organized in style.

Pegboard is a great way to maximize storage space in your garage. It is easy to install and can be used to hang items such as tools, sports equipment, and other items. Pegboard is also a great way to add a decorative touch to your garage. Pegboard Paradise offers a variety of decorative pegboard options that can be used to create a unique and stylish look in your garage.

The selection of decorative pegboard from Pegboard Paradise includes a variety of colors, patterns, and textures. You can choose from classic woodgrain, modern metallic, and colorful designs. The pegboard is also available in a variety of sizes to fit any space. With the wide selection of decorative pegboard from Pegboard Paradise, you can easily create a stylish and organized look in your garage.

Pegboard Paradise also offers a variety of accessories to help you get the most out of your decorative pegboard. You can choose from a variety of hooks, baskets, and shelves to help you organize your items. The accessories are designed to fit securely on the pegboard and are available in a variety of colors and styles to match your decorative pegboard.

Decorative pegboard from Pegboard Paradise is a great way to get organized in style. With the wide selection of colors, patterns, and textures, you can easily create a unique and stylish look in your garage. The accessories are designed to fit securely on the pegboard and are available in a variety of colors and styles to match your decorative pegboard. With the help of Pegboard Paradise, you can easily get organized in style and create a beautiful and organized look in your garage.Pegboard Paradise is an excellent resource for anyone looking to get organized and make the most of their garage space. With a variety of pegboard sizes, colors, and accessories, it’s easy to find the perfect solution for any storage need. The website also provides helpful tips and tricks for installation and maintenance, making it a great resource for anyone looking to get organized.

Mirror Magic: DIY Frame Ideas to Enhance Your Space

Mirror Magic: DIY Frame Ideas to Enhance Your Space is a guide to help you create beautiful and unique frames for your mirrors. Whether you’re looking to add a touch of elegance to your bathroom, or you want to create a statement piece for your living room, this guide will provide you with the tools and inspiration you need to create the perfect frame for your mirror. With step-by-step instructions and helpful tips, you’ll be able to create a frame that will add a unique touch to your space. So, let’s get started and explore the world of mirror frames!

Creative Ways to Frame Your Mirror: A Guide to DIY Mirror Magic

Mirrors are a great way to add a touch of style and sophistication to any room. But why settle for a plain, boring mirror when you can create something unique and eye-catching? With a few simple tools and materials, you can transform your mirror into a work of art. This guide will provide you with creative ideas and step-by-step instructions for framing your mirror in a variety of ways.

One of the simplest ways to frame a mirror is to use a picture frame. This is a great option if you want to add a touch of elegance to your mirror without spending a lot of money. All you need is a picture frame that is slightly larger than the mirror, some glue, and a few nails. Start by gluing the frame to the mirror, then use the nails to secure it in place. You can also use decorative molding to create a more elaborate frame.

If you’re looking for something a bit more unique, consider using fabric to frame your mirror. This is a great way to add a pop of color and texture to your space. Start by measuring the mirror and cutting the fabric to size. Then, use a hot glue gun to attach the fabric to the mirror. You can also use ribbon or trim to add a decorative touch.

Another creative way to frame your mirror is to use tiles. This is a great option if you want to add a bit of texture and color to your space. Start by measuring the mirror and cutting the tiles to size. Then, use a strong adhesive to attach the tiles to the mirror. You can also use grout to fill in any gaps between the tiles.

Finally, you can use wood to frame your mirror. This is a great option if you want to add a rustic touch to your space. Start by measuring the mirror and cutting the wood to size. Then, use a strong adhesive to attach the wood to the mirror. You can also use wood stain or paint to give the frame a unique look.

No matter which framing option you choose, you’ll be sure to create a beautiful and unique piece of art. With a little creativity and some basic tools, you can transform your mirror into a work of art.

Transform Your Home with Mirror Magic: Easy DIY Frame Ideas to Enhance Your Space

Mirror magic is a great way to transform any home. Mirrors can be used to create a sense of space, light, and style in any room. With a few simple DIY frame ideas, you can easily enhance your home’s décor and create a unique look.

One of the easiest ways to add a touch of mirror magic to your home is to frame a large mirror. This can be done with a variety of materials, such as wood, metal, or even fabric. You can choose a frame that complements the existing décor in your home, or you can create a unique look by using a contrasting material. For example, if you have a modern home, you could choose a metal frame to add a contemporary touch. If you have a more traditional home, you could choose a wooden frame to add a classic look.

Another great way to use mirrors to transform your home is to create a feature wall. This can be done by using multiple mirrors of different sizes and shapes. You can arrange them in a pattern or simply hang them in a random order. This will create an eye-catching focal point in any room.

If you’re looking for a more subtle way to add mirror magic to your home, you can use smaller mirrors to create a unique look. For example, you could hang several small mirrors in a hallway or entryway to create a stunning visual effect. You could also use small mirrors to create a unique backsplash in your kitchen or bathroom.

Finally, you can use mirrors to create a unique look in any room. For example, you could hang a large mirror above a fireplace to create a dramatic effect. You could also use mirrors to create a unique look in a bedroom or living room.

No matter how you choose to use mirrors to transform your home, these DIY frame ideas will help you create a unique look that will enhance any space. With a few simple materials and a bit of creativity, you can easily create a stunning look that will make your home look and feel like new.Mirror Magic: DIY Frame Ideas to Enhance Your Space is a great resource for anyone looking to add a unique and personal touch to their home. With a variety of frame styles and materials to choose from, you can easily create a one-of-a-kind piece that will add a touch of elegance and style to any room. Whether you’re looking for a simple frame to hang in your hallway or a more elaborate design to hang in your living room, Mirror Magic has the perfect frame for you. With a little creativity and some DIY know-how, you can create a beautiful and unique frame that will be the envy of all your friends.

Tub Transformations: Rust Oleum Tub and Tile Revamps

Tub Transformations: Rust Oleum Tub and Tile Revamps is a revolutionary product that can help you transform your bathroom in no time. This product is designed to help you quickly and easily update the look of your tub and tile without the hassle of a full remodel. With Rust Oleum Tub and Tile Revamps, you can quickly and easily give your bathroom a fresh, new look. This product is easy to use and provides a durable finish that will last for years. With Rust Oleum Tub and Tile Revamps, you can quickly and easily give your bathroom a makeover without breaking the bank.

How to Transform Your Bathroom with Rust Oleum Tub and Tile Revamps

Bathroom remodeling can be a daunting task, but with the help of Rust-Oleum Tub and Tile Revamps, you can easily transform your bathroom in no time. Rust-Oleum Tub and Tile Revamps is a revolutionary product that allows you to refinish your bathtub, shower, sink, and tile surfaces with a durable, long-lasting finish. This product is easy to use and provides a professional-looking finish that will last for years.

To begin, you will need to prepare the surface by cleaning it thoroughly with a mild detergent and water. Once the surface is clean and dry, you can apply the Rust-Oleum Tub and Tile Revamps. This product comes in a variety of colors and finishes, so you can choose the one that best suits your bathroom. Once you have chosen the color and finish, you can apply the product with a brush or roller. Make sure to follow the instructions on the product label for best results.

Once the product is applied, you will need to wait for it to dry. Depending on the temperature and humidity of the room, this can take anywhere from two to four hours. Once the product is dry, you can apply a second coat if desired. After the second coat is dry, you can enjoy your newly transformed bathroom.

Rust-Oleum Tub and Tile Revamps is an easy and affordable way to give your bathroom a fresh, new look. With its durable finish and easy application, you can quickly and easily transform your bathroom in no time.

Creative Ideas for Rust Oleum Tub and Tile Transformations

1. Create a Faux Marble Look: Use Rust-Oleum Tub and Tile Transformations to create a faux marble look in your bathroom. Start by applying a base coat of the product in a light color, such as white or cream. Once the base coat is dry, use a sponge to apply a darker color, such as gray or black, in a swirling pattern. Finish with a top coat of the product for a beautiful, marble-like finish.

2. Create a Two-Tone Look: Use Rust-Oleum Tub and Tile Transformations to create a two-tone look in your bathroom. Start by applying a base coat of the product in a light color, such as white or cream. Once the base coat is dry, use a sponge to apply a darker color, such as gray or black, in a horizontal or vertical pattern. Finish with a top coat of the product for a unique, two-tone look.

3. Create a Metallic Look: Use Rust-Oleum Tub and Tile Transformations to create a metallic look in your bathroom. Start by applying a base coat of the product in a light color, such as white or cream. Once the base coat is dry, use a sponge to apply a metallic color, such as gold or silver, in a swirling pattern. Finish with a top coat of the product for a beautiful, metallic finish.

4. Create a Textured Look: Use Rust-Oleum Tub and Tile Transformations to create a textured look in your bathroom. Start by applying a base coat of the product in a light color, such as white or cream. Once the base coat is dry, use a sponge to apply a darker color, such as gray or black, in a random pattern. Finish with a top coat of the product for a unique, textured look.Tub Transformations: Rust Oleum Tub and Tile Revamps is an excellent product for anyone looking to give their bathroom a quick and easy makeover. It is easy to use, affordable, and provides a long-lasting finish that will make your bathroom look like new. With its wide range of colors and finishes, you can easily customize your bathroom to match your style and taste. Whether you are looking to give your bathroom a fresh new look or just want to spruce it up a bit, Tub Transformations: Rust Oleum Tub and Tile Revamps is the perfect solution.

Pinterest Perfection: DIY Headboard Ideas from Pinterest

Welcome to Pinterest Perfection: DIY Headboard Ideas from Pinterest! If you’re looking for a unique and creative way to spruce up your bedroom, then you’ve come to the right place. Here, we’ll be exploring some of the best DIY headboard ideas from Pinterest that you can easily make yourself. From rustic wood headboards to upholstered headboards, we’ve got you covered. So, grab your tools and get ready to make your own Pinterest-perfect headboard!

10 DIY Headboard Ideas to Transform Your Bedroom from Pinterest

Creating a unique and stylish headboard for your bedroom can be a fun and rewarding DIY project. With a few simple materials and a bit of creativity, you can transform your bedroom into a cozy and inviting space. Here are 10 DIY headboard ideas from Pinterest that can help you get started.

1. Upholstered Headboard: An upholstered headboard is a great way to add texture and color to your bedroom. You can use fabric, foam, and batting to create a custom headboard that fits your style.

2. Pallet Headboard: A pallet headboard is a great way to add a rustic touch to your bedroom. You can use old pallets to create a unique headboard that will add character to your space.

3. Tufted Headboard: A tufted headboard is a classic look that will never go out of style. You can use fabric, foam, and buttons to create a luxurious headboard that will make your bedroom look like a million bucks.

4. Canvas Headboard: A canvas headboard is a great way to add a modern touch to your bedroom. You can use a canvas drop cloth and some paint to create a unique headboard that will make your bedroom look like a work of art.

5. Leather Headboard: A leather headboard is a great way to add a touch of sophistication to your bedroom. You can use leather scraps to create a headboard that will add a luxurious feel to your space.

6. Reclaimed Wood Headboard: A reclaimed wood headboard is a great way to add a rustic touch to your bedroom. You can use old wood to create a unique headboard that will add character to your space.

7. Wallpaper Headboard: A wallpaper headboard is a great way to add a touch of glamour to your bedroom. You can use wallpaper to create a unique headboard that will make your bedroom look like a million bucks.

8. Mirrored Headboard: A mirrored headboard is a great way to add a touch of luxury to your bedroom. You can use mirrors to create a headboard that will make your bedroom look like a palace.

9. Fabric Headboard: A fabric headboard is a great way to add texture and color to your bedroom. You can use fabric to create a custom headboard that fits your style.

10. Painted Headboard: A painted headboard is a great way to add a unique touch to your bedroom. You can use paint to create a headboard that will make your bedroom look like a work of art.

These 10 DIY headboard ideas from Pinterest are sure to help you create a unique and stylish headboard for your bedroom. With a few simple materials and a bit of creativity, you can transform your bedroom into a cozy and inviting space.

How to Create the Perfect Pinterest-Inspired Headboard for Your Bedroom

Creating the perfect Pinterest-inspired headboard for your bedroom can be a fun and creative way to add a unique touch to your space. With a few simple steps, you can create a beautiful and stylish headboard that will be the focal point of your bedroom.

First, decide on the size and shape of your headboard. Measure the width of your bed and the height of the wall behind it to determine the size of the headboard. Consider the overall design of your bedroom and choose a shape that will complement the existing decor.

Next, choose the material for your headboard. Wood is a popular choice, but you can also use fabric, metal, or even wallpaper. Consider the color and texture of the material to ensure it will match the rest of your bedroom.

Once you have chosen the material, you can begin to assemble the headboard. If you are using wood, you will need to cut the pieces to the desired size and shape. If you are using fabric, you will need to measure and cut the fabric to fit the frame. If you are using wallpaper, you will need to measure and cut the wallpaper to fit the frame.

Finally, attach the headboard to the wall. If you are using wood, you will need to use screws and nails to secure the headboard to the wall. If you are using fabric, you will need to use staples or glue to attach the fabric to the frame. If you are using wallpaper, you will need to use wallpaper paste to attach the wallpaper to the frame.

Once the headboard is attached to the wall, you can add any additional decorations or accessories to complete the look. Consider adding a few throw pillows or a blanket to add a cozy touch to your bedroom.

Creating the perfect Pinterest-inspired headboard for your bedroom can be a fun and creative way to add a unique touch to your space. With a few simple steps, you can create a beautiful and stylish headboard that will be the focal point of your bedroom.Pinterest Perfection: DIY Headboard Ideas from Pinterest is a great resource for anyone looking to create a unique and stylish headboard for their bedroom. With a variety of styles and materials to choose from, there is something for everyone. Whether you are looking for a modern, rustic, or vintage look, you can find the perfect headboard to fit your style. With the help of Pinterest, you can easily create a beautiful and unique headboard that will be the perfect addition to your bedroom.