You’re sitting on your sofa on a quiet Tuesday evening when you feel it—a ghost-like finger of ice-cold air stroking the back of your neck. You check the thermostat; it’s set to a cozy 72°F, yet the furnace is groaning like it’s running a marathon. In many homes, the cumulative gaps around windows and doors are equivalent to leaving a medium-sized window wide open all year round. You aren’t just heating your home; you are literally paying to heat the neighborhood.
In my decade of traversing drafty attics and performing energy audits, I’ve learned that “energy efficiency” isn’t always about expensive solar panels or triple-pane windows. Sometimes, the most powerful tool in my arsenal is a simple Weatherstrip Tape Roll. I’ve seen $20 worth of high-quality foam and rubber save homeowners hundreds in seasonal utility bills. It is the “low-hanging fruit” of home improvement—the invisible shield that keeps your expensive conditioned air exactly where it belongs.
The Physics of the Leak: Why Your House “Breathes” Wrong
To understand why a Weatherstrip Tape Roll is vital, we have to talk about pressure. Your home is a pressurized vessel. In the winter, warm air rises and escapes through the top of the house (the stack effect), which creates a vacuum that sucks cold air in through the gaps in your doors and windows.
When we apply weatherstripping, we aren’t just “blocking a breeze.” We are stabilizing the internal pressure of the building envelope. By sealing these micro-apertures, you allow your HVAC system to reach its “set point” faster and stay there longer, reducing mechanical wear and tear.
The Winter Jacket Analogy
Think of your home’s insulation like a thick wool sweater. It keeps you warm, but if a gust of wind hits you, the air goes right through the knit. You need a windbreaker over that sweater to stop the air movement. A Weatherstrip Tape Roll is that windbreaker—it provides the airtight seal that makes the insulation actually do its job.
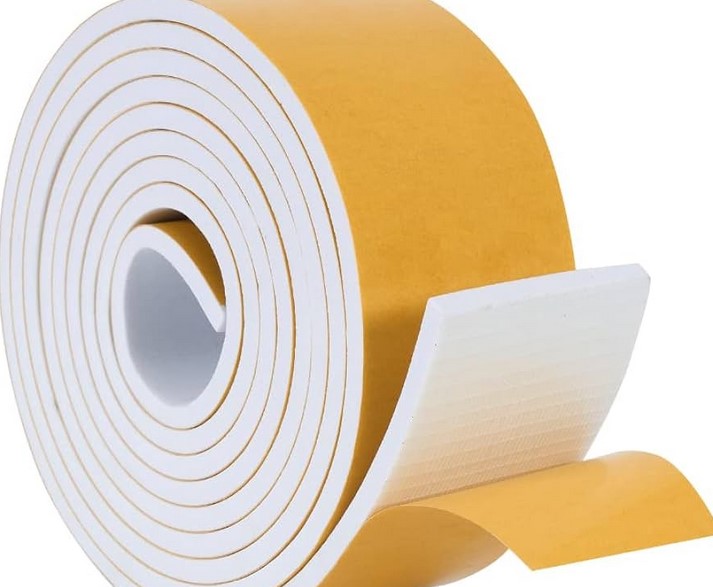
Navigating the Material Logistics: Foam, Rubber, or Silicone?
When you walk into a hardware store and grab a Weatherstrip Tape Roll, you’ll see a dizzying array of materials. Over the years, I’ve developed a “cheat sheet” for which material belongs in which tactical position.
-
Open-Cell Foam: The most affordable and easiest to compress. It’s great for interior doors or windows that stay shut. However, it’s like a sponge; it absorbs water and degrades quickly in the sun.
-
Closed-Cell Foam: Much more durable than open-cell. It resists water, making it an excellent intermediate choice for window sashes.
-
EPDM Rubber (D-Profile or P-Profile): This is my professional go-to. It’s incredibly resilient and “bounces back” to its original shape after years of being squashed in a door frame.
-
Silicone Tape: The premium option. It remains flexible even in -40°F weather and offers the best long-term UV resistance.
Tactical Installation: Mastering the “Invisible Seal”
Applying a Weatherstrip Tape Roll looks easy, but there is a logistical sequence you must follow to ensure the adhesive doesn’t fail within the first month.
1. The Surgical Clean
I have seen more weatherstripping fail because of dust than because of poor adhesive. You must clean the “stop” of the door or the window track with denatured alcohol or a high-strength degreaser. If there is even a hint of old adhesive or household oils, your tape will peel off the moment the temperature changes.
2. Compression Calibration
The goal is a “snug” fit, not a “struggle.” If you choose a tape that is too thick, you will have to slam your door to latch it, which puts immense stress on the hinges and the strike plate.
-
The Paper Test: Close the door on a single sheet of paper. If you can pull the paper out with no resistance, the seal is too thin. If the paper rips, it’s too thick. You want a “firm drag.”
3. Measuring Twice, Cutting Once
When working with a Weatherstrip Tape Roll, always start with the vertical sides. Ensure the tape is one continuous piece. Gaps at the corners are the primary failure points where air “whistles” through.
Expert Advice: The “Hidden” Hinge Gap
Here is an insight that only comes from years of chasing drafts: Most people forget the hinge side.
Homeowners usually seal the top and the “handle side” of the door, but the gap behind the hinges is often the largest. However, if you place thick weatherstripping directly behind the hinge, you create a “fulcrum” that can actually bend your hinges or prevent the door from closing.
Tips Pro: The “Offset” Strategy
On the hinge side, don’t place the tape on the flat face of the door stop. Instead, place it on the corner of the stop so the door “kisses” it as it closes rather than squashing it flat. This provides a seal without the mechanical resistance that ruins door alignment.
The Adhesive Temperature Trap
This is the most common mistake for beginners. Most Weatherstrip Tape Roll adhesives are pressure-sensitive and temperature-dependent. If you try to apply the tape when the door frame is 40°F or colder, the glue will “freeze” rather than bond.
-
The Fix: If you must seal your home in the dead of winter, use a heat gun or a hair dryer to warm up the door frame to at least 60°F before applying the tape. Once the bond is set, it can handle the cold, but it needs warmth to “introduce” itself to the surface.
Scaling Energy Efficiency: Beyond the Front Door
While we focus on doors, a Weatherstrip Tape Roll is a versatile infrastructure tool. In my decade of practice, I’ve used it to solve problems that have nothing to do with drafts:
-
Attic Hatch Sealing: The attic door is often the biggest “chimney” in the house. Sealing this hatch is the single most effective 10-minute job you can do.
-
Vibration Dampening: I’ve used thin foam tape under vibrating appliances or between rattling HVAC ducts to silence a noisy house.
-
Light Blocking: For home theaters or bedrooms, weatherstripping is the perfect solution to kill that annoying light bleed from under the door.
Maintenance: The “Seasonal Pinch”
Rubber and foam are organic materials that degrade. I recommend a “Tactical Inspection” twice a year—once before the heating season and once before the cooling season.
-
Check for Memory: If the rubber stays flat when the door is open, it has “taken a set” and lost its elasticity. It’s no longer sealing.
-
Clean the Seal: Wipe your weatherstripping with a damp cloth. Dirt and grit act like sandpaper, slowly grinding away the seal every time you open the door.
Conclusion: Reclaiming Your Climate
Mastering the Weatherstrip Tape Roll is about more than just “saving money”—it’s about reclaiming the comfort of your sanctuary. When you understand the logistics of compression, the chemistry of the adhesive, and the physics of the stack effect, you move from being a victim of the weather to a master of your environment.
Don’t let your hard-earned money leak out through the cracks. Take a roll of tape, find the “ghosts” in your hallway, and seal them out for good.
Can you hear the wind whistling through your front door tonight, or do you feel a cold spot near your windows? What’s the biggest gap you’ve found in your home’s “armor” lately? Let me know in the comments—I’m here to help you get that perfect, airtight seal!