Sustainable Utility Access: Ensuring Reliable Flow with the Rain Barrel Spigot

Source:https://rapidroofing.com

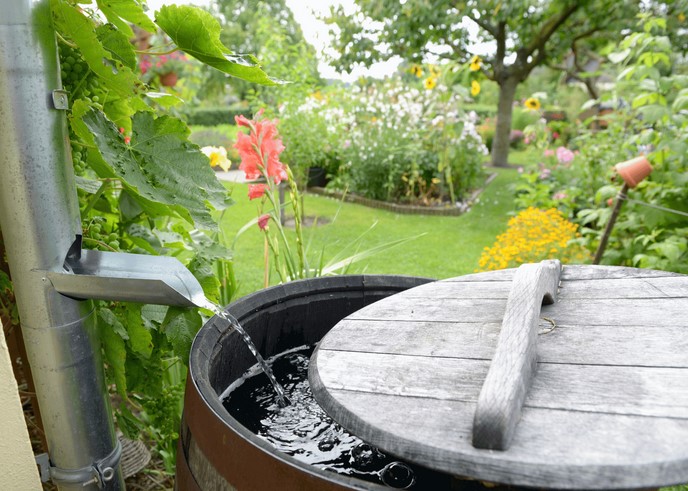
Imagine a sweltering July afternoon. Your garden is parched, the local municipality has just announced a Stage 2 water restriction, and your expensive ornamental shrubs are starting to curl. You walk over to your catchment system, turn the handle, and… nothing. Or worse, a slow, pathetic dribble that wouldn’t quench the thirst of a single tomato plant. All that free water is trapped inside the drum because a $10 component—the Rain Barrel Spigot—has failed or was installed with poor mechanical logic.

In my decade of designing sustainable landscapes and off-grid utility systems, I’ve seen hundreds of rain barrels. Most homeowners focus on the size of the tank or the color of the plastic. But after years of troubleshooting “dry” gardens, I can tell you that the spigot is the heart of the system. If the heart doesn’t pump, the system is just a stagnant mosquito breeder. Mastering the installation and physics of your output valve is the difference between a decorative hobby and a reliable secondary utility.


The Physics of Gravity-Fed Flow: Why Your Spigot Struggles

To understand the Rain Barrel Spigot, you must first understand that you are fighting a battle against low pressure. Unlike your indoor plumbing, which is pressurized by city pumps to about 40–60 PSI, a rain barrel relies entirely on gravity.

For every foot you raise a water barrel off the ground, you only gain about 0.43 PSI. This means that if your barrel is sitting flat on the dirt, the water pressure at the spigot is nearly non-existent.

The Straw Analogy

Think of your rain barrel like a giant soda cup and the spigot like a straw. If you try to drink through a tiny, crimped straw (a low-quality, narrow-bore spigot), you have to work incredibly hard to get any liquid. But if you use a wide boba straw (a full-port ball valve spigot), the liquid flows effortlessly. In a gravity system, you want the “widest straw” possible to maximize the limited pressure you have.


Choosing Your Hardware: Brass vs. Plastic Logistics

When you’re shopping for a Rain Barrel Spigot, you’ll generally see two materials. In my professional experience, this choice dictates the lifespan of your entire sustainability project.

  • Zinc/Plastic Spigots: These often come “free” with DIY kits. They are prone to UV degradation and the handles tend to snap after one icy winter.

  • Heavy-Duty Brass Spigots: This is the professional standard. Brass is corrosion-resistant and has the structural integrity to handle the “torque” of a heavy garden hose being pulled.

  • Quarter-Turn Ball Valves: Always look for a “ball valve” design rather than a “gate valve” (the kind you have to twist multiple times). A ball valve offers a straight-through path for the water, which is critical for maintaining flow in gravity-fed systems.


Tactical Installation: The Art of the Watertight Seal

I’ve crawled inside more 55-gallon drums than I care to admit to fix “mysterious leaks.” The point where the Rain Barrel Spigot meets the barrel wall is the most common failure point in residential water harvesting.

The “Bulkhead” Advantage

Never just screw a spigot into a hole you drilled in plastic. The plastic walls of a drum are too thin to hold threads securely. You must use a Bulkhead Fitting. This is a threaded pipe with a wide flange and a high-grade EPDM or silicone gasket. It “sandwiches” the barrel wall, creating a mechanical seal that won’t wiggle loose.

Positioning for Maximum Yield

I see many beginners install their spigot at the very bottom of the barrel to get every drop of water. This is a mistake. Peringatan Tersembunyi: Every rain barrel accumulates “bio-sludge” or sediment at the bottom. If your spigot is too low, you will constantly clog your valve or your soaker hoses with gunk. Install your spigot about 2 to 3 inches from the bottom to allow a “settling zone” for debris.


Step-by-Step Logistics for the Intermediate DIYer

If you are ready to upgrade your utility access, follow this professional workflow:

  1. Drill the Pilot: Use a hole saw bit that matches the outer diameter of your bulkhead fitting. Go slow; high-speed drilling can melt the plastic, leaving a ragged edge that won’t seal.

  2. The Fishing Technique: If you don’t have long arms, tie a string to a heavy nut and drop it through the top of the barrel and out the hole. Slide your bulkhead fitting onto the string and “fish” it down to the hole.

  3. Gasket Logic: The gasket always goes on the inside of the barrel. The nut on the outside provides the compression.

  4. Reverse Threads: Be aware that many bulkhead fittings are left-hand threaded to prevent them from loosening when you screw the spigot into them. Check the markings!


Expert Advice: Scaling Your Flow Rate

Here is an insight that separates a “bucket-filler” from a “garden-irrigator”: Standard garden hoses are the enemy of gravity water.

A 50-foot garden hose creates immense friction loss. Even with a perfect Rain Barrel Spigot, you might find the flow at the end of the hose is disappointing.

Tips Pro: The “Short and Fat” Strategy

Use a high-flow, short-length “utility hose” (usually 5/8″ or 3/4″ diameter) to connect your barrel to your watering can or your garden bed. If you need to run water further away, you must elevate your barrel onto a platform of cinder blocks—at least two feet high—to give the water the “head pressure” it needs to overcome hose friction.


Maintenance: The Winterization Protocol

In my ten years of practice, I’ve replaced more split spigots in April than at any other time of year. If water stays inside a brass Rain Barrel Spigot during a hard freeze, the expanding ice will split the metal like a peanut shell.

  • Drain and Open: Before the first frost, drain the barrel completely.

  • The “Half-Cocked” Valve: Leave the ball valve spigot in a 45-degree open position. If it’s fully closed, water trapped inside the ball mechanism will freeze and crack the valve body. If it’s fully open, it can still trap moisture in the seals. 45 degrees is the safety sweet spot.


Enhancing Reliability: Screens and Overflows

Your Rain Barrel Spigot is only as reliable as the water entering the tank.

  • Debris Screening: Always use a fine mesh screen at the intake. If a single leaf gets through and makes its way to the spigot, it can act as a “flap valve,” randomly cutting off your flow.

  • The Overflow Logistics: Ensure your overflow pipe is larger than your intake. If the barrel overfills and puts pressure on the top seal, it can create a vacuum or a surge that stresses the spigot’s bulkhead connection.


Conclusion: Mastering Your Micro-Utility

Building a sustainable home is about mastering the small details of resource management. The Rain Barrel Spigot might seem like a minor piece of hardware, but it is the interface between your stored resource and your living landscape. By selecting high-quality brass, utilizing bulkhead fittings, and respecting the laws of gravity and sediment, you ensure that your “reliable flow” is there when the heat is on and the taps are dry.

There is a unique satisfaction in turning a handle and watching “captured” water nourish your garden. It’s a closed-loop success story that starts with one well-installed valve.

Is your rain barrel currently sitting on the ground, or have you elevated your system for better pressure? Are you struggling with a leaky connection or a slow drip? Let’s troubleshoot your sustainable water setup in the comments—I’m here to help you get the water moving!

High-End Residential Amenity Branding: Integrating the Outdoor Pizza Oven

Source:https://fornopiombo.com

The sun is setting, a bottle of Sangiovese is breathing on the counter, and your guests are gathered around a glowing hearth. In less than 90 seconds, a hand-stretched Margherita slides off a floured peel, boasting a perfectly charred “leopard-spotted” crust that no indoor kitchen could ever replicate. This isn’t just dinner; it’s a performance.

In my decade of designing high-end exterior living spaces, I’ve seen trends come and go—from outdoor kitchens that look like stainless steel showrooms to fire pits that nobody actually sits around. But nothing transforms a backyard from a “yard” into a “destination” quite like an Outdoor Pizza Oven. It is the ultimate anchor for residential amenity branding, shifting the focus from mere property value to a curated lifestyle experience.


The “Hearth” of the Modern Home: Why It’s More Than an Appliance

I often tell my clients that adding an Outdoor Pizza Oven is like adding a fireplace to a living room; it provides a primal, visual center of gravity. However, for the beginner, the technical barrier can feel steep. You aren’t just buying a grill; you are investing in a high-thermal-mass cooking instrument.

From a branding perspective, an oven tells a story of craftsmanship and hospitality. In the luxury real estate market, a built-in wood-fired oven signals that the homeowner values “slow food” and authentic social interaction. It’s an emotional ROI that standard BBQ islands simply can’t touch.

The Battery Analogy

Think of an Outdoor Pizza Oven like a high-capacity battery. You spend time “charging” it (pre-heating the refractory bricks), and once it’s full of thermal energy, it releases that heat consistently to cook your food. If you have a “leaky” battery (poor insulation), you’ll burn through fuel and never hit those critical 800°F+ temperatures.


Technical Foundations: Choosing Your Heat Source

When you start your deep-dive into the world of outdoor ovens, you’ll face the classic dilemma: Wood-fired, Gas, or Hybrid? After 10 years in the field, I’ve developed a “use-case” framework to help you decide.

1. The Purist’s Path: Wood-Fired

This is the gold standard for “Residential Amenity Branding.” There is a specific aroma and a “dry heat” that only hardwood (like oak or maple) can provide.

  • The Insight: It requires a learning curve. You have to manage the “flame lick” and understand coal bed management.

  • The Brand Appeal: It looks stunning. A stone-clad wood oven is a permanent architectural statement.

2. The Modernist’s Choice: Gas-Powered

If you value convenience and precision, gas is your best friend. With the turn of a dial, you’re ready to cook in 20 minutes.

  • The Technical Edge: Gas ovens provide a constant, predictable BTU output. This is perfect for the intermediate cook who wants to focus on dough hydration rather than wood chopping.

3. The Hybrid System: The Best of Both Worlds

Many high-end builds now utilize dual-fuel kits. You start the heat with gas to save time, then add a few sticks of wood for that signature smoky finish. In my professional opinion, this is the smartest investment for long-term versatility.


Engineering the Zone: Strategic Placement and Safety

I’ve seen too many $5,000 ovens tucked away in a dark corner where the chef is isolated from the party. Integration is about Social Flow Engineering.

  • The “Landing Zone”: You need at least 3 feet of prep space immediately next to the oven. Stretching dough and “peeling” the pizza requires elbow room.

  • Prevailing Winds: This is a technical detail beginners often miss. If your oven mouth faces the wind, the heat will be blown out of the dome, and smoke will be pushed into your guests’ faces.

  • Thermal Clearance: Even if an oven is “well-insulated,” the exterior can get warm. Ensure you have the proper non-combustible hearth and clearance from wooden pergolas or siding.


💡 Tips Pro: The “Floor Temp” Secret

Beginners often obsess over the air temperature gauge on the door. Ignore it. The air temperature doesn’t cook the bottom of your pizza; the floor temperature does. Invest $20 in an Infrared Laser Thermometer. You want your cordierite or firebrick floor to be between 700°F and 750°F (370°C – 400°C) before the first pie hits the deck.


Materials Matter: Refractory Strength vs. Portable Convenience

There are two main categories of Outdoor Pizza Oven construction, and your choice depends on whether you want a “landmark” or a “tool.”

Stainless Steel Domes

These are often portable or countertop models. They heat up incredibly fast (15-20 minutes) because they use high-density ceramic fiber insulation between sheets of steel. They are great for “immediate gratification” but lose heat quickly once the flame dies down.

Traditional Refractory/Brick Ovens

These are the heavyweights. They take 1-2 hours to “heat soak,” but once they are hot, they stay hot for a long time.

  • The “Leftover” Benefit: I love telling my clients that a brick oven is a 24-hour tool. You cook pizza at 800°F at night. By morning, the oven is still at 350°F—perfect for baking artisan sourdough bread. By the afternoon, it’s at 225°F—ideal for slow-roasting a lamb shoulder.


The “Soot” Factor

If you are building your oven under a roof or a covered pavilion, you MUST account for the chimney flue and spark arrestor. I once saw a gorgeous cedar tongue-and-groove ceiling ruined in a single summer because the homeowner didn’t extend the chimney high enough. Creosote and soot will settle on everything if your ventilation isn’t engineered for the specific draft of your oven.


Scannable Integration Checklist

Feature Wood-Fired Gas-Fired
Pre-heat Time 45 – 90 Minutes 15 – 30 Minutes
Flavor Profile Authentic Smoky/Char Clean/Neutral
Maintenance Ash removal required Minimal
Skill Level Intermediate/Advanced Beginner/Intermediate
Visual Impact High (Atmospheric) Sleek/Modern

Conclusion: Crafting Your Exterior Legacy

Integrating an Outdoor Pizza Oven into your home isn’t just about food; it’s about “Branding” your lifestyle. It signals a move away from the frantic pace of modern life toward a more intentional, tactile way of entertaining. Whether you choose a sleek stainless-steel unit for your balcony or a massive, hand-built brick dome for your patio, you are creating a theater of flavor.

In my 10 years of experience, I’ve found that the best “amenities” are the ones that actually bring people together. The pizza oven does this better than any other outdoor feature I know. It turns a meal into an event and a backyard into a sanctuary.

Are you a Wood-Fired Purist or a Gas-Powered Modernist? The choice of fuel dictates the design of your entire outdoor kitchen. If you’re struggling to figure out how to vent an oven under your existing deck or which stone veneer will withstand the heat, drop a comment below. Let’s build your legacy, one slice at a time.

Hardening Perimeter Safety: Navigating Pathways with the Landscape Step Light

Source:https://images.ctfassets.net

Picture this: You’ve just finished a beautiful evening hosting friends on your new backyard patio. The wine was excellent, the laughter was loud, but as your guests head toward their cars, the mood shifts. They start doing the “stumble-shuffle”—that awkward, tentative dance where they use their phone flashlights to navigate the three stone steps leading to the driveway. One minor misstep, and your perfect evening turns into an insurance claim and a trip to the ER.

In my decade-plus of transforming outdoor spaces, I’ve found that homeowners often prioritize “glamour lighting” like spotlights on oak trees while completely ignoring the “safety lighting” at their feet. It’s a classic mistake. I’ve walked onto countless job sites where the perimeter was a literal black hole. The solution isn’t just a brighter porch light; it’s the strategic integration of the Landscape Step Light.


The Invisible Guide: Why Step Lights are Non-Negotiable

A Landscape Step Light serves a dual purpose that most fixtures can’t match: it provides architectural depth while “hardening” your home’s safety perimeter. I often tell my clients that step lighting is like the rumble strips on a highway. You don’t necessarily notice them when everything is going right, but they are the critical feedback loop that prevents a disaster when visibility is low.

From a technical standpoint, we aren’t just throwing light at a staircase. We are managing glare-to-lumen ratios. If you put a bright, unshielded bulb at eye level, you actually make the steps more dangerous by blinding the person walking. A proper step light directs 100% of its output downward, illuminating the tread (the part you step on) while keeping the source hidden.

The Runway Analogy

Think of your outdoor staircase like an airport runway. Pilots don’t need a giant sun hanging over the tarmac; they need clear, low-profile markers that define the boundaries of the path. That is exactly what a high-quality Landscape Step Light does for your shins and ankles.


Technical Anatomy of a Professional Installation

When I started in this industry, we were stuck with power-hungry halogen bulbs that burned hot and required massive transformers. Today, the landscape has shifted entirely to Low Voltage LED systems. If you’re looking to upgrade your perimeter, you need to understand the “guts” of the system.

1. Lumens and Color Temperature

For a Landscape Step Light, more is not better. I typically recommend a light output of 50 to 100 lumens per fixture. Anything more creates “hot spots” that ruin the ambiance.

  • Color Temperature: Aim for 2700K to 3000K (Warm White). This mimics the cozy glow of indoor lighting and prevents your backyard from looking like a high-security prison or a cold hospital wing.

2. Voltage Drop and Wire Gauge

This is where many intermediate DIYers get tripped up. Because we use 12V-15V AC power for safety, the electricity loses “push” the further it travels from the transformer.

Expert Insight: If you have a long run of steps, use 12/2 low-voltage wire. It’s thicker and ensures the last light on the path is just as bright as the first. There is nothing that screams “amateur hour” like a string of lights that get progressively dimmer as you move away from the house.


Placement Strategy: Where the Magic Happens

Placement isn’t just about symmetry; it’s about Visual Continuity. After ten years of trial and error, I’ve developed a “staggered” approach that I use on almost every premium project.

  • The Staggered Pattern: Instead of placing lights on both sides of every single step (which can look like a ladder), I place them on alternating sides. This creates a rhythmic “Z” pattern of light that leads the eye naturally up the path.

  • Mounting Heights: If you are using “eyebrow” style fixtures (recessed into the riser), aim to place them about 2 inches below the nosing of the step above. This protects the fixture from being kicked and maximizes the spread of light across the tread.

Integration with Hardscaping

For those with concrete or stone steps, you have two main options:

  1. Recessed Lights: These are bored directly into the stone or wood. They are sleek and virtually indestructible.

  2. Under-Cap Lights: These are thin, “wafer” style lights that slide under the overhanging lip of a stone step. They are my personal favorite because they are nearly invisible during the day but provide a gorgeous, ethereal glow at night.


Materials Matter: Standing Up to the Elements

Your Landscape Step Light is going to live a hard life. It will be hit by weed-whackers, soaked by sprinklers, and baked by the sun.

  • Die-Cast Brass: In my professional opinion, brass is the only way to go for the “forever home.” It develops a beautiful patina over time and will never rust or corrode.

  • Composite/Plastic: Fine for a quick budget fix, but in three years, the sun will make the plastic brittle, and a stray foot will snap it like a cracker.

  • IP Ratings: Look for an IP65 or higher rating. This ensures the fixture is “dust-tight” and protected against water jets from your garden hose.


Tips Pro: The “Shadow Test”

Before you commit to a permanent installation by drilling holes into your expensive masonry, buy a few cheap battery-powered puck lights. Tape them to your steps at night and walk up and down.

Look for shadows. If the light from one step creates a long, dark shadow over the edge of the next step, you’ve created a “trip hazard.” Adjust the height until the transition between light and dark is soft and predictable.


The “Bug Magnet” Factor

A common complaint I hear is that step lights attract every moth in the neighborhood. To mitigate this, avoid “cool blue” LED chips. Insects are naturally drawn to the UV spectrum found in cooler lights. By sticking to the 2700K warm white range, you’ll find your pathways stay significantly clearer of uninvited six-legged guests.


Summary of Technical Considerations

Feature Recommended Specification Why?
Voltage 12V (Low Voltage) Safe for DIY, pets, and children.
Wattage 1W – 3W LED Energy efficient and runs cool.
Material Solid Brass or Copper Longevity in wet environments.
Beam Spread Wide Flood (120°) Covers the entire width of the step.
Control Astronomical Timer/Photocell Ensures lights are on exactly when the sun goes down.

Conclusion: Investing in the Journey

Hardening your perimeter safety doesn’t have to look industrial. By choosing the right Landscape Step Light, you are making a strategic investment that pays dividends in both home value and personal peace of mind. You’re not just installing “lights”; you’re installing confidence for every guest who visits your home after sunset.

I’ve seen $100,000 landscapes look cheap because of poor lighting, and I’ve seen modest backyards look like five-star resorts because the owner took the time to highlight the pathways correctly. It’s all about the details.

Ready to light the way? What’s the biggest challenge you’re facing with your outdoor stairs—is it a tricky material like slate, or are you worried about the wiring? Leave a comment below, and let’s get your perimeter hardened and your pathways glowing!

Elevating Exterior Hospitality Zones: Strategic Placement of the Outdoor Rug Large

Source:https://www.edwardmartin.com

I’ve spent over a decade walking onto sun-drenched patios and windsourced decks, and I’ve noticed a recurring “crime” in exterior design. Homeowners spend thousands on weather-resistant teak furniture and ambient LED lighting, yet the entire space feels like a collection of floating islands. The chairs feel disconnected, the table looks lonely, and the transition from the sliding door to the deck feels jarring.

In my experience, the missing ingredient isn’t another potted plant or a fancy fire pit—it’s the anchor. Specifically, the Outdoor Rug Large. Think of your patio as a stage; without a rug, your furniture is just wandering around without a script. A large-format outdoor rug acts as the “connective tissue” that transforms a cold slab of concrete into a legitimate hospitality zone.


Why Scale Matters: The Psychology of the Large Format

When I consult on residential projects, I often see people make the mistake of buying a rug that is “just enough” to fit under a coffee table. This is what I call the “Postage Stamp Syndrome.” If the rug is too small, it actually makes your outdoor area look cramped and cluttered.

An Outdoor Rug Large serves a psychological purpose: it defines boundaries without building walls. In an open-air environment, your eyes need visual cues to understand where the “lounging zone” ends and the “traffic zone” begins. By choosing a larger footprint—typically an 8×10, 9×12, or even larger—you are telling your guests, “This is the sanctuary.”

The “All Legs On” Rule

One of the most important technical insights I can share is the All Legs On principle. In professional staging, we strive to have every piece of furniture—or at least the front two legs—resting comfortably on the rug.

  • The Benefit: This creates a unified visual weight.

  • The Feel: It prevents that annoying “wobble” when a chair is half-on and half-off the rug, which is a subtle but constant irritant for guests.


Strategic Placement: More Than Just Centering

Placement isn’t just about finding the middle of the deck. It’s about Traffic Flow Engineering. After ten years in the field, I’ve learned that a rug can actually dictate how people move through your home.

1. The Anchored Dining Suite

If you are placing an Outdoor Rug Large under a dining table, you need to account for “chair travel.” This is the distance a chair moves when someone pulls it out to sit down.

Expert Advice: Always measure your table and add at least 24 to 36 inches on all sides. If the chair legs drop off the edge of the rug when someone sits down, the rug is too small. A 9×12 rug is usually the “Goldilocks” size for a standard 6-person dining set.

2. The Modular Lounge Configuration

For sectional sofas, the rug should be the foundation. Instead of centering the rug in the middle of the “U” shape, tuck the rug about 6 to 10 inches under the sofa. This “tucking” technique locks the furniture in place and creates a cozy, “sunken-pit” feel even on a flat surface.

3. The Transitional Threshold

I often use large outdoor rugs to bridge the gap between the indoors and outdoors. By placing a rug near the sliding glass doors, you create a visual “runway” that pulls the eye outward. It tricks the brain into thinking the living room has doubled in size.


Material Science: Choosing the Right “Weave” for Longevity

Not all rugs are created equal. Since we are dealing with high-traffic hospitality zones, the technical specs of the fiber matter more than the pattern. In my early years, I saw too many “outdoor” rugs succumb to mold and UV degradation within a single season.

  • Polypropylene (Olefin): This is the gold standard for an Outdoor Rug Large. It is chemically treated to be UV-resistant and, most importantly, it is hydrophobic. It doesn’t soak up water; it lets it pass through.

  • PET (Recycled Polyester): A fantastic sustainable option. These rugs often feel softer—almost like wool—but are made from recycled plastic bottles. They are incredibly stain-resistant, making them perfect for zones where wine or BBQ sauce might spill.

  • Jute and Sisal (The Natural Trap): While they look beautiful in magazines, I generally advise against natural fibers for uncovered areas. They act like sponges. If you live in a humid climate, a natural fiber rug will become a science experiment of mildew within months.


The Invisible Foundation: Why You Need a Rug Pad

Many beginners think a rug pad is only for indoor comfort. That is a dangerous myth. In the world of home improvement, the rug pad is the “unsung hero” of safety and maintenance.

  1. Drainage and Airflow: A quality outdoor rug pad creates a small gap (a “micro-void”) between the rug and the deck. This allows moisture to evaporate, preventing wood rot or stone discoloration.

  2. Surface Protection: If you have a composite deck (like Trex), the backing of some rugs can be abrasive. A pad acts as a buffer.

  3. The “Trip Factor”: Large rugs can bunch up. A pad keeps the edges crisp and flat, ensuring your summer cocktail party doesn’t end in a trip to the ER.


Pro Tips for Maintenance and “Seasoning”

I always tell my clients that an outdoor rug is an investment, not a disposable item. If you treat it like a piece of equipment, it will last you 5 to 7 years.

  • The Power Wash Secret: Most polypropylene rugs can be cleaned with a mild dish soap and a garden hose. Don’t use a high-pressure power washer at point-blank range, as it can fray the fibers. A gentle “fan” spray is all you need.

  • The Rotation Rule: Just like tires on a car, rotate your Outdoor Rug Large every six months. UV rays are relentless. Even the best “UV-stabilized” rugs will fade slightly over years. Rotating ensures the fading is uniform rather than leaving a “shadow” where the sofa sits.

  • Off-Season Storage: If you live in a climate with snow or heavy winter rains, roll it up. Never fold an outdoor rug. Folding creates permanent creases in the synthetic backing that are nearly impossible to flatten out once the sun hits them again.


Troubleshooting Common Placement Errors

Sometimes, even with the best intentions, a rug placement feels “off.” Here is a quick checklist to diagnose your exterior zone:

Problem Likely Cause Solution
Rug keeps moving No rug pad or slick surface Install a rubberized outdoor-rated grip pad.
Edges are curling Heat expansion or poor backing Reverse-roll the rug for 24 hours, then apply heavy planters to the corners.
Water pooling Rug is “clogged” with dirt Deep clean with a hose to clear the drainage pores in the weave.

Conclusion: Setting the Stage for Memories

At the end of the day, an Outdoor Rug Large isn’t just a piece of decor; it’s a strategic tool. It softens the acoustics of a noisy backyard, provides a safe place for bare feet, and creates the visual boundaries necessary for true relaxation.

I’ve seen dozens of patios transformed from “unfinished construction projects” to “luxury retreats” simply by adding the right-sized rug. It is the single most cost-effective way to upgrade your exterior hospitality zone without hiring a contractor.

What’s holding you back from defining your space? If you’re struggling with choosing the right dimensions for your specific deck layout, drop a comment or reach out—I’ve likely seen your exact floor plan before and would love to help you anchor your sanctuary.

Preserving High-Value Roofing Assets: Technical Strategies for Slate Roof Repair

Source:https://jgleadworkroofing.co.uk

It starts with a single, rhythmic drip-drip-drip echoing in your attic during a spring rain. You climb up with a flashlight, expecting a minor leak, only to find a hairline fracture in a stone that was harvested before your great-grandparents were born. This is the paradox of the slate roof: it is the “forever roof,” capable of lasting over a century, yet a single poorly placed footstep or a rusted fastener can compromise the entire structural envelope.

In my decade of traversing steep-slope systems, I’ve seen homeowners panic and replace an entire slate roof with asphalt shingles because a general contractor told them it was “too old.” That is a tragedy of asset management. Slate is not like other roofing; it is a specialized masonry system. Understanding Slate Roof Repair isn’t just about stopping water—it’s about preserving a high-value architectural legacy.


The “Sinking Stone” Analogy: Why Slate Fails

Think of a slate roof like a beautifully tailored suit of armor. Each slate is a protective scale. If one scale falls off, the “knight” (your home) isn’t just vulnerable at that spot; the water can now travel behind the other scales, rotting the wooden “body” underneath.

When we talk about Slate Roof Repair, we aren’t usually fixing the stone itself—natural slate is incredibly durable. We are usually fixing the fastening system or the flashing. Over 80 years, copper nails may undergo “nail sickness” (thinning and snapping), or the wooden lath might decay. If you treat slate like a modern disposable shingle, you will destroy its long-term ROI.


Identifying the Culprits: Common Slate Pathology

Before grabbing a ladder, you need to categorize the failure. In the field, I look for three main technical indicators:

1. Mechanical Impact Damage

This is usually caused by fallen branches, heavy hail, or—most commonly—unqualified tradespeople walking on the roof. Slate is brittle. If you walk on it like you walk on a deck, you will crack the “headlap” (the hidden top portion of the slate), leading to invisible leaks.

2. Nail Sickness and Fastener Fatigue

In older installations, sometimes steel nails were used instead of copper or stainless steel. As these nails rust, they expand and then snap. This causes the slate to slide out of position, leaving a “keyhole” where water enters the building envelope directly.

3. Flashing and Valley Fatigue

The slate might last 200 years, but the copper flashing in the valleys or around chimneys usually lasts 60 to 80. Often, the leak isn’t the slate at all; it’s the metal infrastructure that has reached the end of its lifecycle.


Technical Execution: The “Rip and Hook” Strategy

If you are a beginner or intermediate DIYer, I must be firm: Never walk directly on slate. To perform a Slate Roof Repair, we use roof ladders or hook ladders that distribute weight evenly across the rafters.

The Specialized Toolkit

You cannot perform this repair with a standard hammer and pry bar. You need:

  • Slate Ripper: A long, flat tool used to slide under slates and cut the nails.

  • Slate Cutter: For trimming replacement stones to size.

  • Copper Slate Hooks: The primary hardware for permanent “invisible” repairs.

The Repair Process

  1. Extraction: Slide the slate ripper up under the broken slate, hook the nails, and strike the handle to shear them off.

  2. Insertion: Select a replacement slate that matches the lithology (type of stone) and “patina” of the original roof.

  3. Securing: Since you cannot nail the new slate (because the nails would be covered), drive a copper slate hook into the roof sheathing between the two slates below. The hook cradles the bottom of the new slate, holding it firmly in place while allowing for thermal expansion.


Strategic Asset Management: The ROI of Maintenance

Maintaining a slate roof is an exercise in Asset Lifecycle Extension. While the upfront cost of a specialist is higher, the return on investment is found in the property’s valuation. A well-maintained slate roof is a premium asset; a neglected one is a liability.

  • Annual Audits: Check for “slipping” slates every autumn.

  • Gutter Integrity: Ensure Gutter Hanger Screws are tight so heavy, clogged gutters don’t pull on the eave slates.

  • Biological Mitigation: Use a specialized Roof Moss Remover if you notice green growth, as moss holds moisture against the stone, leading to freeze-thaw delamination.


Expert Advice: The “Invisible” Warning

Here is an insight that separates the experts from the amateurs: The “Ring” Test.

⚠️ Tips Pro: Peringatan Tersembunyi (Hidden Warning)

Never, under any circumstances, use Roof Patch Cement (tar) to fix a slate leak. It is a “hack” that creates a permanent nightmare. Tar traps moisture against the wood, accelerates rot, and makes it impossible to perform a mechanical repair later. If you aren’t sure if a replacement slate is high quality, hang it by one corner and tap it with a knuckle. A healthy stone will produce a clear, crystalline “ring.” If it sounds like a dull thud, the stone is “dead” (internally delaminating) and should be discarded.


Conclusion: Honoring the Stone

Repairing a slate roof is more like being a restorer than a construction worker. It requires patience, specialized copper tools, and a deep respect for the material. When you implement these technical strategies, you aren’t just stopping a leak; you are preserving a building envelope that was designed to protect your home for centuries.

Does your roof have the “ring of quality,” or are you starting to see the signs of nail sickness? Don’t let a small slip turn into a structural disaster.

What’s the most intimidating part of working with stone for you—the height or the fragility? Let’s talk about steep-slope safety and tool selection in the comments below!