Critical Plumbing Restoration: Maintaining System Utility via Shower Valve Repair

Source:https://sandiegoplumbingandpipelining.com

You turn the shower handle, expecting a soothing, hot stream of water after a grueling day at work. Instead, you are greeted by an icy blast that refuses to warm up, or worse, a violent, high-pressure screeching sound inside the wall. Even when you crank the handle to the off position with all your might, a rhythmic drip… drip… drip echoes against the fiberglass stall, keeping you awake all night.

According to plumbing industry data, a single leaky shower head can waste more than 3,000 gallons of water per year—enough water to run more than 150 loads of laundry.

Over my ten-plus years troubleshooting residential plumbing networks, I have seen countless homeowners jump straight to the conclusion that they need to rip out their beautiful tile work and replace the entire shower enclosure. They panic, imagining a massive invoice from a master plumber.

But here is a field insight that only experienced contractors will tell you: nine times out of ten, the problem isn’t your pipes, your hot water tank, or your structural tile. The culprit is a tiny, hidden plastic cylinder sitting right behind your decorative metal trim handle, waiting for a basic shower valve repair.

The Heart of the Shower: How the Valve System Operates

To successfully diagnose your plumbing failure, you must understand what is happening inside the wet wall. Your shower valve is the traffic controller of your bathroom’s water distribution infrastructure.

Think of your shower valve system like a high-performance mixing console used by a music producer. Instead of balancing bass lines and vocal tracks, it takes two high-pressure, raw inputs—scalding hot water and freezing cold water—and blends them smoothly to create the perfect output track for your comfort.

[Hot Water Intake]  \
                     -> [Internal Valve Cartridge] -> [Blended Output to Shower Head]
[Cold Water Intake] /

When you perform a shower valve repair, you are usually addressing the mechanical wear and tear of the valve cartridge. Over months of daily use, dissolved minerals like calcium and magnesium scratch the rubber O-rings and clog the internal pressure-balancing spools, throwing the entire hydraulic system out of balance.

Technical Architecture: Identifying Your Valve Type

Before you run to the home improvement center for replacement parts, you must identify the mechanical design operating inside your wall. Standard residential systems generally fall into two categories:

1. Pressure-Balancing Valves (The Standard Setup)

These units monitor the relative pressure of the hot and cold supply lines. If someone flushes a toilet downstairs, causing the cold water pressure to drop sharply, a sliding spool inside this cartridge instantly shifts to restrict the hot water flow, preventing you from getting scalded.

2. Thermostatic Valves (The Luxury Standard)

These advanced systems feature a built-in element that measures actual water temperature rather than just balancing mechanical pressure. They allow you to set your exact desired temperature once, maintaining it flawlessly regardless of what other plumbing fixtures are running in the home.

Signs Your Bathroom Infrastructure Needs a Shower Valve Repair

How do you know it is time to open up the wall panel? Watch out for these three unmistakable mechanical warning flags:

  • The Temperature Swing: You experience sudden, uncontrolled bursts of freezing or boiling water whenever an appliance runs elsewhere in the house.

  • The Unstoppable Drip: Water continuously slips past the shower head or tub spout even when the handle is turned completely to the “off” position.

  • The Stuck Handle: The trim handle becomes incredibly stiff, gritty, or loose, indicating that the internal plastic stem has fractured or accumulated severe lime scale.

Step-by-Step Execution: R&R (Remove and Replace) Protocol

Performing a shower valve repair is an excellent benchmark project for intermediate DIYers. By following a structured mechanical sequence, you can execute this fix in under an hour.

Step 1: Isolate the Main Hydronic Supply

Never skip this step. Locate your home’s main water shutoff valve or the localized bathroom isolation valves and turn them completely off. Open the shower handle fully to drain any residual water trapped inside the vertical riser pipe.

Step 2: Extract the Trim and Escutcheon Plate

Remove the decorative index button on your handle, unscrew the retaining hex screw, and pull the handle straight off the splined stem. Unscrew the metallic escutcheon faceplate from the wall to expose the valve body cavity.

Step 3: Remove the Retaining Clip or Nut

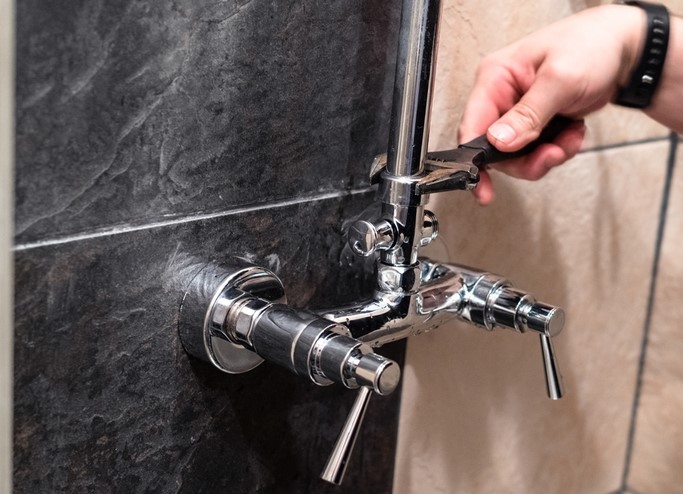
Depending on your brand (such as Moen, Delta, or Kohler), you will see either a large brass bonnet nut or a small, u-shaped stainless-steel retaining clip holding the cartridge inside the brass housing. Use needle-nose pliers to pull the clip straight up, or an adjustable wrench to back off the bonnet nut.

Step 4: Extract and Swap the Cartridge

Attach a specialized cartridge puller tool to the stem, grip firmly, and pull the old unit straight out of the brass housing. Slide the exact manufacturer-matched replacement cartridge into the bore, making sure the “hot side” indicator matches the hot plumbing lines on the left. Reassemble the retaining clip, bonnet nut, and trim faceplate.

💡 Pro Tip: The Silicon Grease Imperative

When you purchase a replacement cartridge, it usually comes with a tiny packet of clear, plumbers’ silicone grease. Do not throw this away. Liberally coat the black rubber O-rings on the new cartridge before sliding it into the brass valve body. This grease stops the rubber seals from twisting, pinching, or tearing during installation, guaranteeing a leak-free seal for the next decade.

Scorched Valve Bores

A common trap that catches intermediate home improvement enthusiasts occurs when removing a cartridge that has been seized inside the wall for fifteen years. In your frustration, you might be tempted to stick a flathead screwdriver into the housing to pry it free.

Do not do this. Brass is a relatively soft metal. If you scratch or gouge the inside walls of the permanent valve housing, the new rubber O-rings will never be able to seat correctly against the metal surface. Water will constantly bypass the seals, forcing you to cut open the drywall from behind to solder a completely new brass valve structure in place. Patience and a dedicated pulling tool are your best friends here.

Securing Your Home’s Plumbing Integrity

Mastering the art of a precision shower valve repair is an empowering milestone in any homeowner’s home improvement journey. It teaches you to look past surface-level symptoms and solve structural issues at their mechanical core. By executing this clean, straightforward swap, you protect your home’s infrastructure from hidden moisture damage, lower your monthly utility costs, and restore luxurious utility to your daily routine.

Are you ready to silence that annoying drip in your bathroom this weekend? What specific symptoms has your shower been displaying lately? Let me know in the comments below, and let’s troubleshoot your plumbing project together!

Ergonomic Executive Furniture: Enhancing Comfort with the Nursery Rocking Chair

Source:https://www.vecelo.com

It is 2:00 AM, and you are pacing back and forth on a cold hardwood floor, cradling a fussy infant who refuses to drift off to sleep. Your lower back is throbbing from hours of poor posture, your shoulders are locked in a tense shrug, and the stiff, rigid armchair in the corner looks more like a medieval torture device than a place of rest.

Over my ten-plus years as a home improvement and interior space planner, I have noticed that people meticulously calculate the ergonomics of their corporate office chairs, yet completely ignore the most hard-working seat in the entire residential layout: the one in the baby’s room.

When my first child was born, I made the classic rookie home improvement mistake. I focused entirely on the visual aesthetics of the room, picking out a stunning, mid-century modern accent piece that matched the curtains perfectly but offered zero lumbar support.

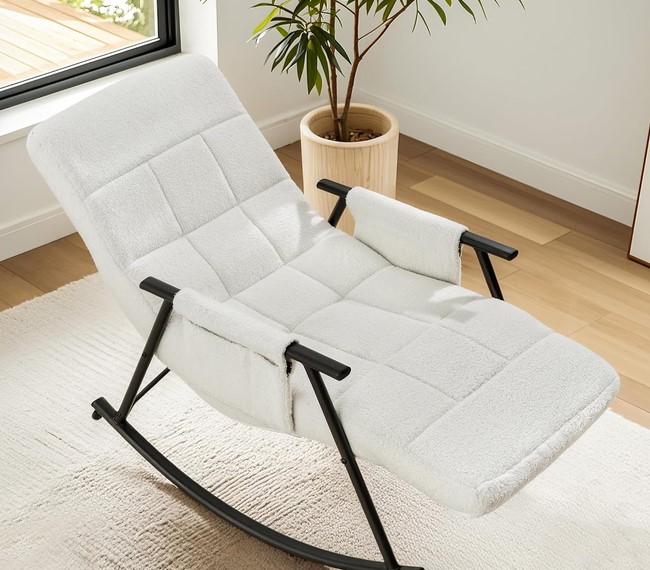
After three weeks of sleep deprivation and agonizing neck strains, I dragged that chair to the curb and engineered a proper solution. Upgrading to a technically sound nursery rocking chair transformed our nightly routine from a physical endurance test into a deeply therapeutic experience.

Here is the deep-dive ergonomic breakdown of how integrating the right kinetic furniture can save your spine, elevate your room’s asset value, and maximize long-term comfort.

The Biomechanics of Motion: Why Rhythmic Swaying Works

To appreciate the design engineering behind a high-performance nursery rocking chair, we have to look at the human body’s response to low-frequency vestibular stimulation. The rhythmic back-and-forth motion isn’t just comforting to a newborn baby; it actively lowers the adult occupant’s cortisol levels, reduces muscle tension, and stimulates the parasympathetic nervous system.

Think of an un-ergonomic chair like a rigid, stationary concrete retaining wall. When your body is tired and stressed, it absorbs every ounce of gravity and resistance directly into the intervertebral discs.

[Rigid Accent Chair]   -> Static Lumbar Load -> Muscle Spasms & Back Fatigue
[Ergonomic Rocker]     -> Kinetic Load Distribution -> Dynamic Support -> Spinal Decompression

An engineered rocking chair acts more like a high-performance vehicle suspension system. By allowing for continuous, fluid micro-movements, the chair dynamically redistributes your center of gravity, taking the continuous load off your lower lumbar region and distributing it evenly across the skeletal frame.

Technical Specifications: The Anatomy of an Ergonomic Rocker

When you are sourcing a nursery rocking chair, you need to look past the fabric color and evaluate the structural framework and mechanical engineering. A premium piece of kinetic furniture requires precise dimensional metrics to ensure long-term physical sustainability.

1. The Critical Lumbar Angle and Seat Depth

The seat pan must feature a slight backward pitch (roughly 3 to 5 degrees) to naturally guide your pelvis into the rear lumbar support pad. Look for a seat depth between 18 and 22 inches. If the seat is too deep, the edge will cut off blood circulation behind your knees; if it is too shallow, your thighs won’t receive adequate structural support.

2. Armrest Height and R-Value Arm Contours

When feeding or holding a child, your elbows should rest comfortably at a 90-degree angle without forcing your shoulders to shrug upward. Look for wide, heavily padded armrests that feature dense, high-resiliency foam. This mechanical clearance eliminates carpal tunnel strain and upper thoracic fatigue.

3. Kinetic Foundations: Traditional Bow Rockers vs. Mechanical Gliders

  • Traditional Bow Rockers: These utilize curved wooden skis. They offer a classic, long-amplitude rocking motion that is highly effective for soothing, but they require a larger spatial footprint to avoid scuffing your baseboards.

  • Ball-Bearing Gliders: These operate on a sealed internal mechanical track, moving in a smooth, linear horizontal plane. They take up less physical space and often include a swivel base, making them excellent for tight room layouts.

Materials Matter: Sourcing High-Performance Textiles

Because a nursery environment is highly prone to spills, spit-up, and chemical off-gassing, the material composition of your chair is just as important as its mechanical frame.

  • Performance Weave Fabrics: Look for commercial-grade textiles rated for at least 50,000 double rubs on the Wyzenbeek scale. Fabrics treated with moisture-repellent, stain-resistant technology allow liquid spills to bead up on the surface rather than soaking into the internal foam cushioning.

  • CertiPUR-US and OEKO-TEX Certifications: Ensure the internal polyurethane foam layer is certified free from harmful flame retardants, heavy metals, and formaldehydes to safeguard the indoor air quality of your home.

Step-by-Step Spatial Integration Protocol

Properly positioning your new kinetic furniture within the room layout determines whether it functions as a luxury asset or a frustrating spatial bottleneck. Here is the field checklist I use during interior installations:

Step 1: Calculate the Clearance Envelope

Measure the full displacement arc of the chair. A traditional nursery rocking chair needs at least 12 to 18 inches of clearance from the rear wall and adjacent furniture to prevent structural wall damage during full extension.

Step 2: Establish the Anchor Footprint

If your room features sleek hardwood or laminate flooring, do not place the wooden rockers directly onto the slick surface. Slide a heavy, high-pile area rug underneath the unit. This provides the necessary friction coefficient to prevent the chair from slowly creeping across the floor during use.

Step 3: Align the Kinetic Ottoman

If your rocker features a matching footrest, position the ottoman exactly 14 inches away from the front edge of the seat pan. This distance maintains the ideal ergonomic knee flexion angle when you prop your feet up to decompress your lower back.

💡 Pro Tip: The Invisible Pivot Hazard

If you select a modern glider chair that features a 360-degree swivel mechanism, always check the bottom framework for an integrated travel lock. When your child transitions into a toddler and begins exploring the room independently, locking the swivel and rocking motion prevents tiny fingers and toes from accidentally getting pinched inside the heavy steel undercarriage.

The Long-Term Return on Design Investment

The beauty of a high-quality, ergonomically engineered nursery rocking chair is its incredible longevity beyond the infant years. Unlike plastic changing tables or tiny cribs that outlive their usefulness within 24 months, a well-built structured rocker easily transitions into a primary living space, a home office reading nook, or a master bedroom lounge chair. It is a premium health asset disguised as beautiful residential furniture.

Are you ready to stop sacrificing your spinal health for the sake of standard accent furniture? What kind of layout challenges are you currently facing in your home’s seating zones? Drop your thoughts, questions, and design dilemmas in the comments below—let’s build your perfect comfort zone!