Scaling Culinary Throughput: Operational Benefits of the Double Wall Oven

Source:https://topovenpicks.com

It is 5:30 PM on Thanksgiving, or perhaps you are hosting a large milestone dinner party. Your 12-pound prime rib needs another 45 minutes of slow-roasting at 325°F. Meanwhile, your garlic parmesan roasted potatoes are sitting on the counter, getting cold and soggy because they require a crisping blast at 425°F. You are forced into a stressful game of culinary chess—swapping pans in and out, constantly adjusting the dial, and watching your hard work degrade by the minute. This is the classic “kitchen bottleneck,” a logistical traffic jam that ruins the joy of cooking for thousands of homeowners every single week.

Over my past ten years designing, remodeling, and engineering high-performance residential kitchens, I have noticed that homeowners will easily drop thousands of dollars on exotic marble countertops or commercial-grade, multi-burner cooktops. Yet, they leave themselves completely hamstrung by relying on a single, solitary traditional range oven. They view baking capacity as a luxury reserved for professional chefs or massive catering halls.

But from a structural and operational perspective, separating your cooktop from your baking stations by implementing a dedicated Double Wall Oven is the ultimate layout optimization. It fundamentally scales your kitchen’s culinary throughput, entirely shifting how you manage meal preparation, home entertaining, and daily time logistics.

The Highway Analogy: Understanding Parallel Culinary Processing

To truly appreciate the operational benefits of a multi-cavity cooking layout, we have to look at the concept of parallel processing.

Think of a standard single-cavity oven like a narrow, one-lane country road. No matter how fast your high-end sports car can go, if there is a slow-moving tractor (like a massive, slow-roasting turkey) right in front of it, the entire flow of traffic grindingly drops down to that single tractor’s speed. You simply cannot run two different speeds or directions on that single lane simultaneously.

Upgrading to a Double Wall Oven is the exact equivalent of expanding that country road into a modern, two-lane dual highway. By decoupling your baking spaces, you establish two entirely independent thermal environments. You can run one upper cavity with a moisture-rich, low-temperature convection bake for delicate pastries, while the lower cavity fires away with a dry, high-heat radiant broil for proteins. The two processes run perfectly in parallel, slashing your total kitchen preparation time by up to 50%.

Thermal Engineering: Architectural Perks of the Double Wall Oven Ecosystem

When we integrate a premium Double Wall Oven into a structural kitchen remodel, we aren’t just doubling your baking real estate; we are introducing advanced thermal engineering to your culinary routine.

True European Convection Systems

Most high-end double wall units feature True European Convection in at least one, if not both, of their cavities. Unlike standard traditional radiant ovens that rely on a simple heating element at the floor of the unit, true convection incorporates a dedicated third heating element positioned directly around an internal fan matrix. This fan actively circulates heated air continuously throughout the entire cavity chamber. This continuous airflow eliminates ambient “hot spots,” ensuring perfectly uniform heat distribution across multiple baking racks simultaneously.

Cross-Contamination Mitigation

One of the most overlooked technical benefits of a dual-cavity system is flavor isolation. When you roast a salmon fillet covered in garlic and citrus in a single oven, those volatile organic aroma compounds evaporate and permeate the air inside the chamber. If you attempt to bake a delicate vanilla cake at the exact same time, that cake will absorb those airborne fish oils, ruining your dessert. A dual-cavity layout creates an absolute physical barrier, allowing you to cook high-aroma seafood and delicate desserts at the exact same moment with zero flavor cross-contamination.

Step-by-Step Logistics: Ergonomics and Structural Installation

Unlike a standard slide-in range that simply slides into a gap between your lower base cabinets, installing a wall-mounted unit requires specialized carpentry and precise spatial calculations.

1. Ergonomic Placement and Visual Sightlines

The primary benefit of a wall oven is that it brings the cooking cavity up to eye level, entirely eliminating the need to constantly bend down to check on heavy roasts.

  • The Action: The ideal installation height places the center control panel of the unit exactly at eye level for the primary chef (typically around 55 to 60 inches from the finished floor). This ensures you can easily slide heavy roasting pans straight out at waist level, reducing strain on your lower back and knees.

2. Dedicated Electrical Infrastructure Upgrades

A dual-cavity oven is a massive power draw that cannot run on a standard household outlet or share a circuit breaker with other kitchen appliances.

  • The Specification: Most modern double units require a dedicated 220/240-volt, 40-amp or 50-amp circuit wired directly with heavy-gauge copper lines from your home’s main electrical panel. Always verify the manufacturer’s exact kilowatt (kW) rating during the structural framing phase so your electrician can pull the correct wire gauge.

3. Thermal Clearances and Cabinet Reinforcement

A double wall unit can easily weigh upwards of 200 to 300 pounds empty. When fully loaded with heavy cast iron Dutch ovens and large proteins, that weight increases significantly.

  • The Fix: The tall kitchen cabinet housing the oven must be structurally reinforced with heavy-duty interior corner bracing and a minimum 3/4-inch plywood deck platform. Additionally, you must strictly follow the manufacturer’s specified air clearance cutouts behind the cabinet to allow the internal cooling fans to vent heat away from your home’s drywall framing.

🛠️ Pro Tips from the Field

  • The Preheating Bottleneck: Many homeowners don’t realize that large double ovens draw an immense amount of electricity during their initial preheating cycles as the elements work to bring two massive steel cavities up to temperature. To optimize your home’s energy load, turn on your secondary cavity only 10 to 15 minutes before you actually need it, rather than firing both chambers up at the exact same time.

  • The Clean-Up Caveat: If you choose a unit with a high-heat Pyrolytic Self-Cleaning cycle, avoid running it immediately before a major holiday or dinner party. The self-cleaning cycle subjects the oven’s delicate electronic control boards to extreme temperatures upwards of 900°F. If a hidden component or thermal fuse is on the verge of failing, it will almost always blow during this high-heat cycle, leaving you without an oven right when you need it most. Save your deep cleaning for the week after your big event!

Maximizing Your Long-Term Interior ROI

Investing in a high-quality Double Wall Oven yields immediate dividends in lifestyle flexibility, but it also heavily bolsters your home’s future market equity.

When modern home buyers tour a kitchen, they look specifically for architectural cues that suggest luxury and functional efficiency. A beautifully integrated wall oven unit creates an upscale, built-in aesthetic that instantly elevates the perceived value of your entire home. It signals to buyers that the kitchen was thoughtfully engineered for seamless entertaining rather than just basic meal preparation.

Elevating Your Home’s Culinary Engine

At the end of the day, transforming your kitchen isn’t just about updating color palettes or picking out trendy tile backsplashes. It is about identifying structural bottlenecks and optimizing your daily operational workflow. Integrating an advanced Double Wall Oven into your home frees you from the rigid constraints of a single-cavity layout, allowing you to process multiple dishes effortlessly, protect delicate flavor profiles, and cook with absolute culinary precision.

Are you currently planning a kitchen renovation, or are you struggling to balance cooking times in your current single-oven setup? What features matter most to you when choosing kitchen appliances? Let me know your thoughts in the comments below, and let’s engineer the perfect kitchen layout for your home!


Optimizing Executive Wellness: The Impact of Bedroom Mood Lighting on Interior ROI

Source:https://bedhut.com

You have spent $5,000 on an Italian-engineered mattress, custom-fitted Egyptian cotton sheets, and state-of-the-art blackout curtains. Yet, you still wake up at 6:00 AM feeling like you just survived a transatlantic flight. You crawl out of bed, flip a switch, and are instantly blinded by a 15-watt overhead LED downlight that floods your retinas with harsh, uncalibrated white light. In that single, jarring fraction of a second, your body’s cortisol levels spike, your natural melatonin production plummets, and your morning executive focus is compromised before you even pour your first cup of coffee.

During my ten-plus years consulting on luxury residential retrofits and high-end home improvements, I have noticed a fascinating, costly blind spot among high-achieving homeowners. They will gladly over-index on structural square footage and high-end furniture, but completely starve their lighting budgets. They treat illumination as a utility—a simple binary choice between “on” and “off.”

But the truth known only to master interior builders is that lighting is a biological architectural material. Strategically engineering your Bedroom Mood Lighting is one of the highest-yielding interior investments you can make, directly impacting both your home’s equity and your personal human capital.

The Circadian Ledger: The Technical Science Behind Mood Lighting

To understand the tangible ROI of light, we have to look past the superficial interior design catalogs and dive straight into human photobiology.

Think of your brain’s internal clock like an old-fashioned primitive sundial. For hundreds of thousands of years, our bodies relied on the slow, golden shifts of the sun to tell us when to hunt, when to digest, and when to enter deep, restorative REM sleep. When you install a poorly placed, cool-white overhead light fixture, it is the equivalent of spinning that sundial manually at midnight. Your brain registers the blue-spectrum light wave and thinks it is 12:00 PM on a clear summer day.

When we design a high-performance Bedroom Mood Lighting scheme, we are intentionally manipulating color temperatures and angles to match our natural ancestral rhythms. By replacing harsh blue light with low-frequency, warm-spectrum tones, we facilitate the body’s natural transition into recovery mode.

From a home improvement perspective, this isn’t just about feeling cozy; it is about building a high-efficiency sleep sanctuary that pays dividends in daily mental clarity and long-term cognitive performance.

Designing the Matrix: Layering Your Bedroom Mood Lighting

A successful lighting ecosystem is never built around a single central fixture. If your bedroom relies solely on a dome light in the center of the ceiling, your design is fundamentally flawed. To achieve true spatial depth and wellness optimization, you must implement a three-tiered architectural layout.

1. Ambient Foundations via Indirect Coves

Ambient light should act like a gentle fog that rolls into the room—omnipresent but without a visible, glaring source.

  • The Technical Setup: Install high-density, dimmable LED tape lights (minimum 120 LEDs per meter to prevent visible hot-spotting) inside a dropped ceiling cove or behind a custom bed headboard valance.

  • The Specification: Ensure the light washes up against the ceiling or back against the wall surface. This indirect bounce diffuses the glare, reducing eye strain and instantly lowering your heart rate.

2. Low-Kelvin Task Lighting for Evening Transitions

Bedside lamps should be highly functional but entirely restricted to the warm end of the color spectrum.

  • The Metric: Look for smart bulbs or fixtures calibrated between 1800K and 2400K (Kelvin). This temperature range mimics the amber, soothing wavelength of candlelight.

  • The Architecture: Mount adjustable wall sconces exactly 24 inches above the mattress surface. This positioning allows you to review executive briefs or read a book without casting long, harsh shadows across your partner’s half of the bed.

3. Safety-First Accent Illumination

The worst thing you can do during a 3:00 AM wake-up call is turn on a bright overhead light to find the bathroom. It instantly resets your sleep cycle.

  • The Fix: Deploy low-voltage, motion-activated LED strips underneath the floating perimeter of your bed frame or nightstands. Calibrate them to turn on at a mere 5% brightness when your feet touch the floor, illuminating your walking path without activating your central nervous system.

Calculating the Tangible ROI of Smart Luminescence

How exactly does a set of dimmers and warm bulbs translate into a financial return on investment? In the competitive home improvement market, “wellness real estate” is fetching a premium.

  • Smart Home Valuation: Properties integrated with automated, circadian-aligned lighting systems see an increased velocity on the market. Buyers are no longer just looking at granite countertops; they are looking for integrated wellness infrastructure.

  • Energy Infrastructure Savings: Transitioning your bedroom to a smart, zoned LED matrix drastically reduces power consumption compared to old-school halogen pots. By utilizing low-wattage accent lines rather than massive overhead groupings, you shave immediate numbers off your monthly operational costs.

  • The Executive Performance Multiplier: If a $2,000 lighting renovation improves your deep sleep efficiency by even 15%, the resulting boost to your daytime productivity, decision-making speed, and emotional regulation yields an invaluable professional return.

Technical Integration: Controls and Automation Logistics

To maximize your system’s human-centric ROI, you cannot rely on manual toggle switches. The modern wellness bedroom requires seamless, automated scenes.

  • Pulse-Width Modulation (PWM) Dimmers: Ensure your smart dimmers utilize high-frequency PWM or forward-phase dimming tech. Cheap dimmers cause invisible micro-flickering in LED bulbs. While your eyes might not register it consciously, your brain does, often leading to mysterious evening headaches and hidden eye fatigue.

  • Automated Ephemeris Programming: Program your smart ecosystem to tie into local astronomical time. As the sun sets outside, your bedroom lights should automatically, imperceptibly dim and shift from a crisp 3000K down to a rich, fire-toned 2000K over a two-hour window. This hands-off logistical automation ensures your body naturally prepares for rest without you ever having to open an app.

Engineering Your Ultimate Sanctuary

Optimizing your home isn’t just about updating aesthetic styles; it is about calibrating your physical environment to support your highest-performing self. Implementing an intentional, multi-layered Bedroom Mood Lighting architecture corrects a critical biological flaw found in most modern homes. By respecting the subtle relationship between light spectrums and human performance, you turn your bedroom into an elite recovery asset that yields measurable personal and structural dividends.

What does your current evening bedroom lighting setup look like? Are you ready to ditch the harsh overhead glare for a more sophisticated, wellness-focused design? Let me know your thoughts in the comments below, and let’s troubleshoot your space together!

High-ROI Exterior Aesthetics: Strategic Implementation of Inexpensive Deck Decor

Source:https://www.realsimple.com

According to real estate data, a well-executed outdoor living space can yield a return on investment (ROI) of over 60% to 70% during a home resale. Yet, walk around almost any neighborhood, and you will see the exact same tragic sight: gorgeous, multi-thousand-dollar pressure-treated wood or composite decks sitting completely barren, save for a lone, rusting barbecue grill in the corner. Homeowners stretch their budgets to build the platform, leaving nothing in the bank for the actual experience of outdoor living. They assume that creating a magazine-worthy oasis requires a luxury budget.

Over my past ten years in home improvement and exterior styling, I have watched people make the mistake of over-scaffolding their outdoor budgets. I have seen tiny, budget-conscious styling choices completely eclipse a $20,000 structural footprint simply because the smaller details made the space feel alive.

You do not need an elite contractor or designer showroom prices to maximize your backyard’s potential. By understanding spatial design principles and strategically deploying inexpensive deck decor, you can engineer a high-yield aesthetic transition that feels premium but costs remarkably little.

The Illusion of Luxury: The Visual Physics of Outdoor Staging

To successfully elevate an outdoor platform on a budget, you must master the art of visual weight and focal points.

Think of your bare deck like a blank sheet of paper. If you place a tiny stamp in the very center, the page still looks empty. But if you draw a bold, sweeping border around the edges and put a splash of color in one corner, your eye registers a complete composition. In the home improvement niche, we call this zoning.

When we select inexpensive deck decor, our goal isn’t to clutter the deck with small trinkets. Instead, we use highly affordable, large-format visual anchors—like outdoor textiles, strategic lighting matrixes, and vertical greenery—to trick the human brain into registering luxury. We are focusing on high-impact zones that immediately capture the eye when stepping through the backdoor.

The Low-Cost, High-Impact Blueprint: Transforming Your Deck Step-by-Step

Let’s break down the exact, field-tested hierarchy of budget-friendly exterior styling that I use with my private consulting clients.

1. Hardscape Warmth Through Textual Zoning

The quickest way to make raw wood planks or polymer capped-composites feel like an indoor living room is to ground the seating area with an outdoor polypropylene rug.

  • The Technical Insight: Polypropylene is a thermoplastic polymer that resists hydrophobic damage, UV degradation, and mold.

  • The Budget Strategy: You don’t need a custom designer rug. High-quality, machine-woven geometric polypropylene rugs are highly affordable. Buying a large 8×10 rug creates a defined perimeter, immediately establishing an “outdoor living room” illusion that masks weathered deck boards beneath it.

2. Micro-Lighting Systems and Ambient Architecture

Standard exterior floodlights are harsh, blinding, and instantly kill an evening mood. They throw flat, flattening light that exposes every imperfection on a surface.

  • The Fix: Implement a low-voltage solar or plug-in string lighting grid. Look for commercial-grade S14 LED Edison bulbs with heavy-duty weatherproofing.

  • The Layout: Hang them in a clean “Z” or “X” pattern overhead using simple timber extension poles fastened to your deck railing. The warm, low-temperature glow (aim for 2200K to 2700K on the Kelvin scale) creates depth, shadow play, and an instant resort-like ambiance for pennies on the dollar.

3. Vertical Botanical Scaling

A flat deck feels disconnected from nature. To fix this, you must bring the surrounding landscape onto the structure, using height to create intimacy.

  • The Strategy: Instead of buying expensive, heavy ceramic pots, purchase budget-friendly polyethylene resin planters or fabric grow bags hidden inside DIY wood crates.

  • The Layout: Group planters in odd numbers (groups of three work best) at the corners of your deck steps. Populate them with varying heights: a “thriller” (tall ornamental grass), a “filler” (vibrant geraniums), and a “spiller” (trailing ivy) to mimic a professional botanical installation.

Material Selection: Choosing Budget Decor That Outlasts the Elements

When hunting for inexpensive deck decor, a low price tag should never mean disposable quality. If an item breaks or bleaches under the sun within three months, your ROI drops to zero.

  • Fabrics: Look exclusively for solution-dyed acrylics or polyester treated with UV-inhibitors (Sunbrella alternatives). If the tags do not explicitly state UV-resistance ratings, the colors will fade to a dull grey within one summer season.

  • Metals: Avoid cheap iron or untreated steel lanterns. They will rust upon their first exposure to morning dew, leaving ugly orange stains on your deck surface. Opt for powder-coated aluminum, galvanized steel, or composite plastics.

  • Fasteners: When hanging lights or decor on your structural railings, use stainless steel or silicone-coated hooks. Avoid raw carbon steel nails which cause “nail sickness”—black, chemical rot stains in pressure-treated pine.

🛠️ Pro Tips from the Field

  • The Mildew Trap: Never place cheap, rubber-backed doormats or solid vinyl mats directly onto a wood deck. Trapped moisture underneath the non-breathable backing will cause dark mold rings, wood rot, and structural breakdown of the sealer within a single season. Always ensure your outdoor textiles are 100% breathable woven polymers.

  • The Railing Illusion: If your budget doesn’t allow for a complete railing replacement, simply repaint your existing wood balusters or spindles a matte dark charcoal or deep black, leaving the top cap handrail a natural stained wood color. This color contrast creates a sleek, modern architectural silhouette that makes cheap, standard balusters look like custom ironwork.

Maintenance and Seasonal Preservation Logistics

To preserve your high-ROI aesthetic, you must treat your budget decor with proper seasonal care.

Mid-Season Power Cleaning

Do not use heavy industrial pressure washers on your outdoor rugs or delicate resin planters; you will shred the synthetic fibers and crack the plastics. Instead, mix a solution of warm water, oxygenated bleach powder, and a dash of liquid dish soap. Scrub the decor surfaces down with a medium-stiff nylon bristle brush once mid-summer, and rinse thoroughly with a standard garden hose nozzle.

Off-Season Storage Protocol

When the winter frost hits, your inexpensive decor should not be left to brave the freeze-thaw cycle. Freezing water expands, which will split plastic planters, snap thin light cords, and rot fabric throw pillows. Designate a single heavy-duty plastic tote bin in your garage or basement specifically for your deck styling package. Packing it away ensures your small investments look brand new when spring arrives.

Premium Vibe, Practical Budget

Transforming your outdoor space into a striking, high-ROI retreat isn’t a question of financial muscle; it is a game of strategic styling. By leaning into smart textures, warm layered lighting zones, and resilient materials, you can curate a premium exterior experience without breaking the bank. Inexpensive deck decor can yield massive design rewards when you treat the project with the mind of an engineer and the eye of an artist.

What is the biggest design hurdle you are currently facing with your backyard layout? Are you struggling with a small footprint or an awkward angle? Drop your thoughts in the comments below, and let’s engineer a solution for your space!

Asset Protection Engineering: Mitigating Surface Impact with Ladder Mitts Rubber

Source:https://polyurethanelaboratories.com

It takes exactly two seconds to ruin a ten-thousand-dollar exterior paint job, crack a premium vinyl siding panel, or crush a seamless aluminum gutter. I watched it happen early in my career: a technician set up a standard extension ladder against a freshly coated, high-end stucco wall. He climbed up with a tool belt, and as his weight shifted, the raw aluminum rails of the ladder ground directly into the curing surface. The result? Two deep, ugly gouges right at eye level, a furious homeowner, and a costly day of uncompensated repair work.

In my ten-plus years managing home improvement projects and structural retrofits, I have learned that true craftsmanship isn’t just about the work you perform—it is about the collateral damage you prevent. Ladders are essential tools, but by design, they concentrate hundreds of pounds of pressure onto two tiny contact points.

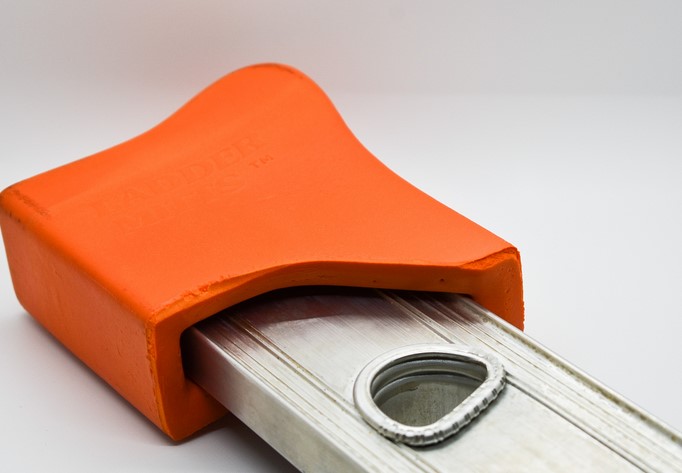
Fortunately, a simple piece of asset protection engineering can eliminate this risk entirely: Ladder Mitts Rubber accessories. Let’s dive deep into why these simple protective covers are a non-negotiable addition to your tool shed or utility truck.

The Physics of Contact Pressure: Why Bare Ladders Destroy Surfaces

To appreciate the value of Ladder Mitts Rubber, you have to understand the mechanical forces at play when a ladder rests against a building. This is a classic problem of load distribution.

Think of a bare aluminum extension ladder like a pair of high-heeled shoes stepping onto soft wood. All the weight of the ladder, plus the dynamic weight of the climber shifting back and forth, is concentrated entirely on the sharp, narrow edges of the rail tops. This creates an incredibly high pounds per square inch (PSI) metric at the contact point.

When you slide a set of engineered rubber mitts over those raw rails, you are effectively swapping those high heels for snowshoes. The flexible rubber construction significantly expands the surface area of the contact points. By widening the footprint, you disperse the force across a much larger area, drastically lowering the PSI and neutralizing the threat of surface indentation.

Material Matters: The Technical Advantage of Ladder Mitts Rubber

Not all ladder bumpers are created equal. You will often see cheap, foam-based alternatives on the market, but in a professional setting, they fail almost instantly under real-world shear stresses.

True Ladder Mitts Rubber accessories are fabricated from heavy-duty, non-marring synthetic rubber compounds (often utilizing urethane or specialized EPDM blends). This material matrix offers three critical engineering advantages:

  • Tear and Abrasion Resistance: Unlike foam, which shreds the moment it is dragged across brick or rough stucco, high-density rubber resists frictional wear, keeping its structural integrity intact over hundreds of uses.

  • High Kinetic Friction (Anti-Slip): Aluminum on vinyl or wet wood is incredibly slick. Specialized rubber provides a high coefficient of friction, meaning it firmly “grips” the surface. This dramatically reduces the risk of the ladder sideways-slipping while you are working up high.

  • Non-Marring Chemistry: Cheap plastics and low-grade rubbers contain oils that can leach out under the sun, leaving permanent dark stains on white siding or trim. True non-marring rubber is chemically stabilized to leave absolutely zero residue behind.

Step-by-Step Logistics: Installing and Deploying Rubber Mitts Safely

Integrating these protective covers into your workflow is incredibly straightforward, but like any piece of safety or asset-protection gear, correct deployment is essential.

1. Inspecting the Ladder Rail Tips

Before sliding your Ladder Mitts Rubber caps onto the ladder, take a close look at the top aluminum profile of your extension ladder. Over time, these edges can become burred, sharp, or jagged from rough handling.

  • The Action: Use a metal file to smooth down any sharp metal burrs. If you don’t, those sharp edges will slowly slice through your rubber mitts from the inside out under the pressure of your weight.

2. Ensuring a High-Tolerance Snug Fit

Slip the mitts completely over the rail tops. They should fit tightly, requiring a bit of a push to seat fully.

  • The Warning: Never use oversized mitts that wobble or slide off easily. If there is play between the rubber and the metal rail, the ladder can shift independently inside the mitt while you are climbing, creating an unstable work platform.

+-------------------------------------------------------------+
|               PROPER LADDER MITT DEPLOYMENT                 |
+-------------------------------------------------------------+
|       [Structure Wall]                                      |
|              ^                                              |
|              |  <- High-friction, non-marring contact       |
|       +--------------+                                      |
|       | Rubber Mitt  |                                      |
|       +--------------+                                      |
|       | Aluminum Rail| <- Deeply seated inside the cap       |
|       +--------------+                                      |
+-------------------------------------------------------------+

3. Setting the Correct Lean Angle

Even with rubber mitts installed, your setup geometry matters. Always adhere to the standard 4:1 ladder safety ratio (for every four feet of vertical height, the base of the ladder should be moved back one foot from the wall). This angle ensures that the weight is distributed properly through the ladder legs while maintaining just enough perpendicular pressure against the wall to allow the rubber to grip firmly without crushing the substrate.

🛠️ Pro Tips from the Field

  • The Debris Trap: Always wipe down the face of your rubber mitts before leaning them against a wall. Because the rubber is grippy, it can easily pick up sand, metal shavings, or coarse grit from the bed of your truck. If you lean a dirty mitt against a smooth surface, that trapped grit acts exactly like coarse sandpaper, scratching the surface you are trying to protect.

  • The Siding Danger Zone: Be incredibly cautious when leaning ladders on hollow vinyl siding during freezing temperatures. Vinyl becomes highly brittle in the cold. While Ladder Mitts Rubber will distribute the weight, you should still attempt to place the contact points directly over the solid framing studs behind the siding rather than right in the middle of a hollow, unbacked panel span.

Maintenance and LifesPAN Logistics

A good set of rubber ladder mitts will last for years if cared for properly. Treat them as safety gear rather than disposable plastic trash.

Cleaning Protocols

If your mitts accumulate paint overspray, caulking residue, or mud, do not clean them with harsh chemical solvents like acetone or paint thinner. These solvents break down the polymer chains within synthetic rubber, causing it to become gummy, soft, and structurally compromised. Instead, use warm water, a mild dish soap, and a stiff nylon brush to restore the rubber’s high-friction surface.

When to Retire Your Mitts

Inspect your gear before every project. Look for deep gouges, dry-rotting cracks from UV exposure, or signs that the inner aluminum rail has finally worn through the rubber barrier. The moment you see the silver glint of aluminum peeking through the interior base of the mitt, discard it immediately and grab a fresh pair.

Small Investment, Industrial-Grade Protection

In the world of property preservation and home renovation, the difference between a clumsy amateur and a seasoned professional always comes down to the details. Spending a few dollars on a high-quality set of Ladder Mitts Rubber accessories saves you thousands of dollars in property damage, protects your professional reputation, and adds an extra layer of structural stability to your high-altitude work. It is asset protection engineering at its simplest and most effective.

Have you ever had a close call or a costly mistake with an unprotected ladder on a job? What surface gives you the most anxiety when setting up your gear? Let’s talk about it in the comments below—I’d love to share some specific site setups with you!

Versatile Facility Logistics: Implementing the Command Hook Set for Damage-Free Organization

Source:https://i5.walmartimages.com

Picture this: You’ve just finished a flawless, satin-finish paint job in your main hallway. It’s pristine. But then comes the urge to organize—hanging the family calendar, a heavy utility organizer, or a sleek welcome sign. In the old days, out came the stud finder, the power drill, and the drywall anchors. And inevitably, a few months later when you decided to rearrange, you were left facing the home renovator’s worst nightmare: a crumbling drywall hole that requires patching, sanding, and three coats of touch-up paint.

Over my past decade managing both residential renovations and commercial facility logistics, I have seen thousands of dollars wasted on repairing “anchor damage.” That was until I started looking at damage-free adhesives not as temporary dorm-room novelties, but as legitimate facility logistics tools.

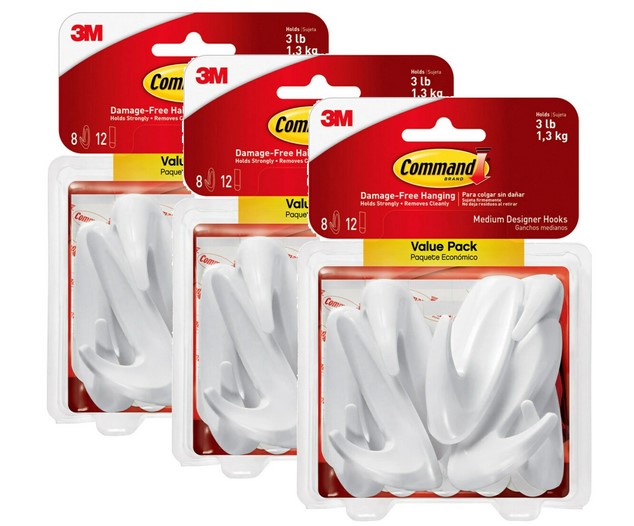
Enter the Command Hook Set. When implemented with a bit of technical know-how, these heavy-duty polymer organizers can completely transform how you manage space. Let’s dive deep into how you can engineer a damage-free organizational system in your home or facility.

The Science of Stress: Understanding How Command Adhesive Actually Works

To successfully deploy a Command Hook Set, you have to understand that you aren’t just “sticking things to a wall.” You are managing shear stress and tensile strength.

Think of standard tape like a handshake—it grips the surface directly, but if you pull hard enough, the grip slips. Command adhesive, conversely, uses a unique stretch-release chemistry engineered with synthetic rubber formulations. It creates a powerful, interlocking microscopic bond with the substrate (your wall). When you pull the pressure-sensitive foam tab vertically downward, it stretches the polymer. This stretching action breaks the microscopic bonds sequentially rather than tearing at the wall material, allowing the hook to release cleanly without pulling the paint or drywall with it.

Shear vs. Tensile Weight Ratings

When reviewing the technical specifications on your Command Hook Set, you’ll notice specific weight ratings (e.g., 3 lbs, 5 lbs, or even jumbo hooks rated for 15 lbs). These numbers assume shear weight—meaning the weight is pulling straight down, parallel to the wall. If you hang an object that juts out significantly from the wall, you introduce tensile weight (pulling away from the wall), which drastically reduces the hook’s load capacity.

Step-by-Step Logistics: Deploying Your Command Hook Set Like a Pro

Most failures with damage-free hanging aren’t the fault of the product; they are failures of execution. In my years on site, I’ve developed a foolproof deployment protocol that ensures your hooks will hold until the day you decide to take them down.

1. Substrate Preparation (The Non-Negotiable Step)

Never trust a visually “clean” wall. Airborne oils, dust, and microscopic residue from cooking or cleaning products act as a barrier between the adhesive and the substrate.

  • The Fix: Clean the surface thoroughly using Isopropyl Rubbing Alcohol. Do not use commercial glass cleaners or surface wipes, as they often leave behind a slick silicone residue that destroys adhesive performance.

  • Surface Texture: Command strips require a flat, non-porous or semi-porous surface. Standard drywall, smooth wood, tile, and glass are ideal. If you are dealing with orange-peel texture or heavy stucco, the adhesive cannot make 100% surface contact, reducing its weight capacity by up to 70%.

2. The 30-Second Pressure Curing Window

Once you apply the strip to the wall, you cannot just hang your item immediately. The adhesive is pressure-sensitive.

  • The Action: Press the entire base plate firmly against the wall for at least 30 seconds. I tell my team to use their thumbs to apply localized, heavy pressure across the top, middle, and bottom of the plate.

3. The 1-Hour Chemical Bonding Grace Period

This is where most beginners fail. After pressing the base plate, slide the hook body up and off the wall mounting base. Leave just the plastic base plate and the adhesive strip on the wall. Let it sit completely undisturbed for one hour. This allows the polymer chains in the adhesive to settle and maximize their chemical bond with the surface. After 60 minutes, slide the hook back onto the base, and you are ready to load it.

Advanced Facility Layouts: Creative Logistics for Home and Office

Once you master the mechanics, you can look beyond just hanging pictures. A comprehensive Command Hook Set is a secret weapon for advanced spatial logistics.

+-------------------------------------------------------------+
|               FACILITY LOGISTICS LAYOUT GUIDE               |
+-------------------------------------------------------------+
|  APPLICATION AREA   |  HOOK TYPE SUGGESTION |  BENEFIT      |
+---------------------+-----------------------+---------------+
|  Tech Closet        |  Small Wire Hooks     |  Cable Routing|
|  Kitchen Pantry     |  Medium Utility Hooks |  Door Storage |
|  Entryway Mudroom   |  Jumbo Metallic Hooks |  Heavy Coats  |
+---------------------+-----------------------+---------------+

Strategic Cable Management and Tethering

In modern workspaces, cable clutter is a safety hazard and a visual mess. By utilizing small wire hooks from your Command Hook Set inside desk wells or along the back edges of server racks, you can create customized routing channels. This keeps power bricks and data lines organized without zip-tying them to permanent structures.

Vertical Door Optimization

The back of closet and pantry doors represents massive unutilized real estate. I often use a grid pattern of medium utility hooks on hollow-core doors to hang measuring cups, utility bags, or cleaning tools. Because hollow-core doors have very thin wood veneers, screwing traditional hooks into them often strips the wood. Adhesive hooks completely bypass this structural limitation.

🛠️ Pro Tips from the Field

  • The Temperature Trap: Never apply Command strips to walls that drop below 50°F (10°C) or exceed 105°F (40°C) during application. If you’re organizing a cold garage or a sun-drenched sunroom, the adhesive won’t cure correctly. Once cured, however, standard strips hold steady between 15°F and 125°F.

  • The Fresh Paint Rule: Just finished painting? Wait a minimum of 28 days before applying a Command Hook Set. Even if the paint feels dry to the touch, it takes up to a month for modern latex paint to fully cure and outgas. Applying adhesive too early will trap moisture, liquefy the paint layer underneath, and ruin your wall when removed.

Troubleshooting and Clean Removal Mechanics

When it’s time to decommission a layout or reconfigure your facility logistics, removal must be executed with precision to maintain that “damage-free” promise.

       [Wall Surface]
             |
             |  <- (Do NOT pull away at a 90° angle!)
             |
             v  <- Pull STRAIGHT DOWN, parallel to the wall
             |
       [Adhesive Tab]

How to Handle a Snapped Pull-Tab

It happens to the best of us: you pull too fast, and the exposed foam tab snaps off, leaving the plastic hook base firmly bonded to the wall with no tab to pull. Do not pry it off with a screwdriver! You will gouge the drywall.

  • The Professional Recovery Method: Take a piece of dental floss or thin fishing line. Slip it behind the plastic base plate right against the wall surface. Using a sawing motion, work the line downward through the foam core of the strip. This will cleanly slice the plastic hook away from the wall. Once the hook is off, simply roll the remaining adhesive residue off the wall with your thumb. It’s clean, safe, and saves your drywall every single time.

Transforming Space Without the Footprint

Implementing a Command Hook Set is about more than just avoiding a trip to the hardware store for drywall anchors. It’s about building a flexible, adaptable environment that can evolve as quickly as your storage needs do. By respecting the chemical limitations of the adhesive, prepping your surfaces like a professional painter, and understanding weight distribution, you can achieve industrial-grade organization with zero structural footprint.

What space are you looking to optimize next? Are you dealing with a tricky wall surface or an awkward layout? Drop a comment below or share your facility organization wins—I’d love to help you troubleshoot your next project!

Systematic Space Optimization: Maximizing Operational Capacity with the Wall Track System

Source:https://www.kardex.com

You step into your garage, workshop, or utility closet, intending to pull off a quick 10-minute fix. Instead, you spend 20 minutes stepping over tangled extension cords, dodging a falling rake, and shifting heavy plastic bins just to find a single screwdriver. It is a universal law of homeownership: clutter expands to fill the available floor space until your square footage feels entirely choked out.

Over my ten-plus years in the home improvement industry, I have organized everything from cramped inner-city storage lockers to massive commercial workshops. Early in my career, I used to build heavy, static wooden shelves for clients battling clutter. But I quickly noticed a glaring design flaw—the moment their storage needs shifted a year down the road, those permanent wooden shelves became obsolete, leaving them stuck with rigid, wasted space. That all changed when I shifted my layout strategy from fixed horizontal shelving to vertical modular engineering using a heavy-duty wall track system.

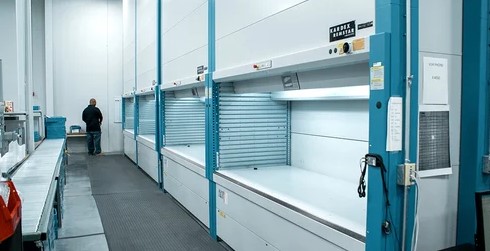
Think of this hardware configuration like a physical smartphone screen for your walls. The track system serves as the core operating system, while the various hooks, bins, and shelves act as individual apps. If you get a new tool or change your hobby, you don’t throw away the whole system; you simply swipe out an old hook for a new basket. Today, we will explore the engineering mechanics behind this vertical workspace upgrade, break down the structural choices, and walk through a foolproof installation process to maximize your home’s operational capacity.

The Physics of Vertical Storage: Why Floor Space is an Illusion

When we complain about a small garage or a packed utility room, we are usually focusing entirely on footprint area—the literal floor dimensions. However, the true volume of a room extends all the way to your ceiling.

Defeating Gravity with Shear Strength

Leaving heavy equipment sitting on your floor isn’t just disorganized; it actually damages your home’s workflow efficiency. It forces you to constantly bend down, risking lower back strain, and creates dark, dust-collecting corners that invite pests.

By transitioning your storage to a heavy-duty wall track system, you convert dead vertical space into active, functional storage. The core principle at play here is changing the distribution of physical force. Instead of a single nail holding an isolated hook under direct tension, a continuous horizontal track spreads the weight load evenly across multiple structural wall studs, transforming the vertical plane into a highly secure load-bearing grid.

The Psychological ROI of Visual Access

There is a massive productivity benefit to having your tools visible at a glance. In the trade, we refer to this as “reducing friction.”

When your weed eater, ladders, and power tools are locked into dedicated, eye-level slots along a track, your brain doesn’t have to waste cognitive energy searching for things. You grab what you need instantly, complete the task, and return the item to its designated zone just as quickly.

Decoding the Anatomy of a Premium Wall Track System

If you browse the storage aisle at a local home center, you will encounter various track designs made from different materials. Choosing the wrong configuration can lead to bowing metal, cracked plastic, or a structural collapse that damages your expensive equipment.

1. Extruded Aluminum vs. Heavy-Gauge PVC

  • Extruded Aluminum Tracks: These are the gold standard for high-capacity workshops and automotive garages. They offer incredible structural integrity, do not rust when exposed to damp environments, and can easily support up to 100 pounds per linear foot if anchored properly into wood studs.

  • Heavy-Gauge PVC/Plastic Slatwalls: Excellent for laundry rooms, pantries, and indoor utility closets. They are entirely waterproof, look incredibly sleek, and easily handle lightweight to medium items like brooms, extension cords, and hand tools.

2. The Locking Interlock Mechanism

The most critical part of any track configuration is how the accessories interface with the rail. Look for systems that feature an active locking tab or a positive engagement click.

Cheaper friction-fit hooks can slide out of alignment or lift completely off the rail when you try to pull a heavy tool down, creating a hazardous drop zone.

Material Substrate Weight Capacity Best Environment Primary Benefit
Extruded Aluminum Extremely High (Up to 100 lbs/ft) Garages, Heavy Workshops Zero bowing, commercial durability
Heavy-Duty PVC Medium (Up to 50 lbs/ft) Laundries, Home Gyms 100% Waterproof, easily wiped clean
Stamped Steel High (Up to 75 lbs/ft) Industrial Sheds, Closets Cost-effective strength for dry zones

Step-by-Step Engineering: Executing a Flawless Structural Installation

Installing a wall track system is an incredibly rewarding intermediate project, but it requires strict attention to detail. If you try to mount a high-capacity track using plastic drywall anchors, the entire system will rip out the moment you hang a heavy leaf blower or ladder.

Tools and Materials Required

  • Premium horizontal wall track kit

  • Heavy-duty 2.5-inch or 3-inch structural wood screws

  • Electronic stud finder (with deep scan capability)

  • 4-foot bubble level or laser level

  • Power drill and impact driver

Step 1: Mapping the Structural Framework

Your drywall is nothing more than compressed chalk and paper; it has zero structural load capacity. You must anchor the track directly into the underlying wood framing.

Use your electronic stud finder to locate the center of every vertical stud along the installation zone (typically spaced 16 inches apart on center). Mark these exact center lines clearly with a pencil.

Step 2: Establishing the True Horizontal Line

Never assume your floor or ceiling is perfectly flat. If your house has settled even slightly, aligning your track with the floor line will result in a crooked storage system where round tools roll constantly to one side.

Use a 4-foot bubble level to draw a perfectly level reference line across your pencil stud marks at your desired mounting height.

Step 3: Secure the Core Rail

Hold the first piece of the track up against your level line. Drill a pilot hole through the track and directly into the center of the first wood stud to prevent the structural timber from splitting.

Drive your first 3-inch structural screw into place, but do not tighten it completely down just yet. Recheck your bubble level, adjust the opposite side of the track until it sits flawlessly plumb, and then drive your remaining screws into every single intersecting stud line.

   [Drywall Face]
=========================[ Level Reference Line ]=========================
     | Check Center |                  | Check Center |
     v              v                  v              v
+----+--------------+----+--------+----+--------------+----+--------+
|    |  Pilot Hole  |    |        |    |  Pilot Hole  |    |        |
|    |  & 3" Screw  |    |        |    |  & 3" Screw  |    |        |
|    +--------------+    |        |    +--------------+    |        |
|      WOOD STUD         |        |      WOOD STUD         |        |
|    (16" On Center)     |        |    (16" On Center)     |        |

Pro-Level Customization Tips and Safety Warnings

Once your rail is locked flat against the wall, you can begin the satisfying process of arranging your accessories.

  • The Staggered Load Principle: To maximize the lifespan of your system, avoid placing all your heaviest assets (like lawnmowers, sledgehammers, and car tires) on one single section of the track. Stagger your heavy items across different stud spans, utilizing the spaces in between for lightweight items like extension cords, safety gear, and spray bottles.

  • The Vertical Clearance Calculator: Before mounting multiple parallel tracks on top of each other, measure the total height of your tallest tool. Leave at least 6 to 8 inches of clearing space above the hook mechanism so you can lift the tool up and off the attachment point without slamming into the upper rail level.

Always check the back of your wall before driving long 3-inch screws into studs, especially in utility rooms or walls shared with a bathroom. Plumbers and electricians frequently run PVC drain pipes and copper electrical lines right through the center of studs. If you feel your drill bit hit a hard, metallic resistance inside the stud, stop drilling immediately. You have likely hit a steel safety plate protecting a live utility line.

Conclusion: Reclaiming Your Workspace Freedom

Implementing a modular wall track system is more than just an aesthetic cleanup; it is a systematic investment in your home’s operational efficiency. By rescuing your tools from chaotic floor piles and organizing them onto an adaptable vertical grid, you eliminate project frustration, protect your expensive gear, and instantly gain back valuable floor space you forgot you even had.

What area of your home is currently losing the battle against clutter and disorganization? Are you looking to reclaim a parking spot in your garage or clean up a messy garden shed? Let me know your space-saving goals in the comments below, and let’s build an optimized storage blueprint for your home!