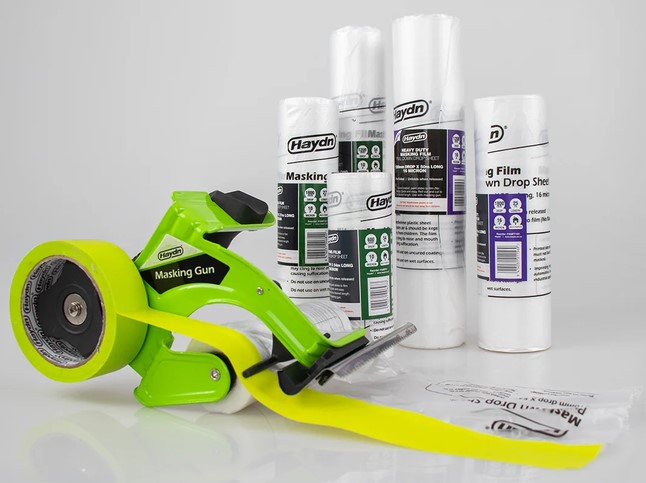
Have you ever spent hours meticulously cutting tape, laying down old newspapers, and convincing yourself that your temporary prep setup would hold up against a spray gun or a fresh coat of paint—only to peel it off and discover ruined trim, bleed-through, or stubborn adhesive residue?
I’ve been there, and in my 10+ years working on job sites and refining home renovation techniques, I see DIYers and even growing contractors make this exact mistake time and again. We focus so much energy on picking the perfect paint finish, the highest-grade sprayer, or the sleekest stain, yet we neglect the single most influential factor in achieving a crisp, factory-like edge: surface protection.
If you want professional results without spending half your project timeline on cleanup, mastering the masking film roll is your ultimate game-changer. Let’s break down how this humble tool elevates your work from amateur to immaculate.
The Hidden Science of the Modern Masking Film Roll
Many beginners assume that a masking film roll is simply thin plastic wrapped around a cardboard core. In reality, modern masking film is an engineered barrier designed to solve the two biggest enemies of any finishing project: overspray drift and static cling failure.
Think of traditional paper masking like a cotton t-shirt—it absorbs liquid, but if hit with enough moisture or high-pressure spray, paint bleeds through to the layer underneath. A premium masking film roll, by contrast, acts like a technical raincoat. It provides an impermeable poly-barrier while utilizing static attraction to stick directly to surfaces without requiring endless yards of heavy tape.
Static Electricity: Your Invisible Assistant
The real magic of a high-tier masking film roll lies in its corona treatment or electrostatically charged polyethylene layer:
-
Self-Adherence: The static charge pulls the film flat against walls, glass, cabinets, and furniture, preventing air pockets from blowing open during spraying.
-
Overspray Retention: Paint mist and dry dust are attracted to the charged film surface rather than flaking off into the air and settling on your freshly coated floor.
-
Speed: Because the film “hugs” the surface naturally, a single operator can cover an entire dining room wall or multi-panel window in under two minutes.
Choosing the Right Masking Film Roll for Your Project
Not all masking films are built the same, and picking the wrong thickness or tape integration can lead to frustrating tears or residue buildup. Here is how I categorize them when planning a job.
1. Pre-Taped vs. Standard Un-Taped Film
| Feature | Pre-Taped Masking Film Roll | Standard Masking Film Roll |
| Best For | Windows, baseboards, door frames, kitchen cabinets | Full wall coverage, large furniture drops, outdoor siding |
| Setup Speed | Ultra-Fast: Tape and film deploy in one single motion | Moderate: Requires applying painter’s tape first |
| Flexibility | High precision along straight trim edges | High versatility across wide, irregular areas |
| Cost | Slightly higher per linear foot | Cost-effective for large square footage |
2. Film Thickness and Mil Rating
For internal residential painting, a 0.3 mil to 0.5 mil thickness is ideal. It is lightweight enough to maintain strong electrostatic cling while remaining durable against normal ladder movement and light air draft. If you are working outdoors, sandblasting, or using solvent-based industrial coatings, step up to a 0.7 mil to 1.0 mil heavy-duty film to prevent chemical breakdown and wind tearing.
Step-by-Step Guide: How to Mask Like a 10-Year Pro
Deploying a masking film roll efficiently comes down to muscle memory and procedural flow. Here is the exact system my crew uses on site.
Step 1: Deep Clean the Anchor Edge
Tape will not stick to dust, grease, or drywall powder. Before unrolling anything, wipe down your trim, crown molding, or window frames with a lightly damp microfiber cloth (or isopropyl alcohol mix for grease) and let it dry completely.
Step 2: Establish the Primary Seal
If using a pre-taped masking film roll, position the roll at the top corner of your starting surface. Press the tape firmly onto the edge with your thumb, unrolling horizontally along the line while maintaining medium tension.
Pro Tip: Never pull the tape too tight! Over-stretching masking tape creates elasticity memory, which causes the edges to lift and snap back hours later, inviting paint bleed.
Step 3: Burnish the Tape Edge
Unrolling isn’t enough. Take a plastic putty knife or a smooth seam roller and firm press along the taped edge. This seals tiny micro-gaps in the adhesive, guaranteeing clean, crisp paint lines when you pull the film off.
Step 4: Drop, Unfold, and Smooth
Once the top border is anchored, cut the film with a sharp utility knife or film dispenser cutter. Pull the folded film downward toward the floor. Watch how the static charge draws the plastic directly against the wall or window glass without needing extra tape along the sides.
Hidden Pitfalls: What Can Go Wrong (and How to Avoid It)
In my early years running job sites, I learned a few lessons the hard way. Avoid these common masking disasters to save yourself hours of remedial work.
Bleed-Through from Curing Paint
-
The Trap: Leaving your masking film on for weeks while you work on other tasks.
-
The Fix: Pay close attention to the tape’s adhesive rating (e.g., 14-day vs. 30-day clean removal). Remove the film while the final coat of paint is tack-free but not fully cured, slicing along the edge with a fresh razor blade if necessary to break the paint bridge cleanly.
The Wind Tunnel Effect
-
The Trap: Using lightweight indoor static film on exterior siding or breezy open-air garages.
-
The Fix: High winds neutralize static pull and will turn thin plastic into an annoying sail. For outdoor jobs, secure the bottom edge of your film with heavy duct tape or brick weights, and opt for a thicker mil rating.
Environmental & Cost Efficiency: Work Smarter, Not Harder
A single masking film roll replacing drop cloths or butcher paper doesn’t just cut down setup time—it drastically cuts labor overhead.
When analyzing project budgets, labor accounts for roughly 70% to 80% of total finishing costs. If a pre-taped film roll saves you two hours of tedious prep work on every room, the tool pays for itself tenfold on your very first job. Additionally, high-density polyethylene (HDPE) film rolls require significantly less material volume than bulky tarps, reducing waste pickup and storage space in your garage or truck.
Bringing Professional Precision to Every Room
Achieving immaculate paint lines and flawless overspray control isn’t about having a secret artistic talent—it’s about respecting the prep process and equipping yourself with the right materials. Incorporating a high-quality masking film roll into your workflow transforms messy, stress-inducing projects into smooth, enjoyable triumphs.
The next time you gear up for a room refresh, cabinet refinishing, or wall transformation, skip the messy newsprint and endless tape rolls. Invest ten minutes in precise surface masking, and enjoy the satisfaction of pulling away your film to reveal sharp, perfect edges every single time.
What’s Your Biggest Masking Challenge?
Have you struggled with paint bleed, stubborn residue, or static film blowing in the wind on your recent projects? Drop a comment or question below! I’d love to hear about your current home improvement setup and share tailored advice to help you hit your project goals.