Electrical Service Integrity: Ensuring Protection with the Service Entrance Cap

Source:https://i.ytimg.com

During an intense summer thunderstorm early in my contracting career, I received a frantic call from a homeowner who reported loud sizzling noises coming from his main circuit breaker panel. When I arrived at the property, water was actively trickling down the main electrical service cable, dripping straight into his breaker enclosure. The culprit wasn’t a damaged roof or a broken window—it was a cracked, decades-old plastic hood sitting high up on his roofline.

Over my ten-plus years in residential contracting and electrical service work, I’ve seen this exact nightmare play out far too many times. Homeowners invest heavily in surge protectors, smart home panels, and backup generators, yet completely overlook the small, hooded fitting perched at the top of their electrical mast.
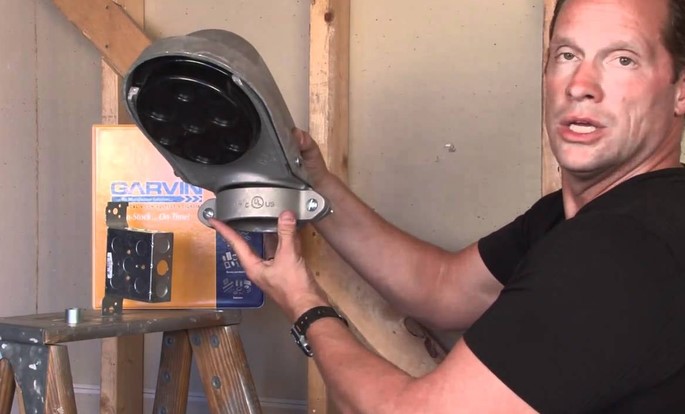
A neglected service entrance cap (often called a weatherhead or service head) is a vulnerable entry point for moisture intrusion, line corrosion, and catastrophic electrical failures. Securing this critical connection point isn’t just a matter of routine maintenance; it is an essential protocol for protecting your home’s entire electrical backbone. Let’s dive into how this fixture works, how to spot failure points early, and how to maintain long-term service integrity.

The Invisible Umbrella: Why Your Service Entrance Cap Matters

To understand why a small fitting carries such massive importance, you have to look at how overhead utility power transitions into your home. Electrical service wires run from a utility pole through the open air before connecting to your home’s vertical conduit mast or service cable.
Think of your home’s electrical conduit like a giant drinking straw sticking straight up into the sky. Without a proper cover on top, every rainstorm would fill that straw with water, sending gallons of rain directly into your home’s main breaker box.
+-----------------------------------------------------------------------+
|                    OVERHEAD UTILITY ENTRY DYNAMICS                    |
|                                                                       |
|   [ Utility Power Lines ] ---> [ Overhead Drip Loop ]                 |
|                                         |                             |
|                                         v (Gravity Water Shed)        |
|   [ Main Breaker Panel ] <---(Dry Conduit)--- [ Service Entrance Cap ]|
+-----------------------------------------------------------------------+
A service entrance cap acts like a specialized, heavy-duty umbrella for that straw. It routes heavy service conductors through insulated knockouts while curving downward at a 180-degree angle to prevent rain, wind-driven snow, and debris from entering the vertical conduit or cable sheath.

Anatomy and Material Breakdown: Aluminum vs. PVC vs. Cast Iron

Walk down the electrical aisle at any trade supply house, and you’ll find weatherheads in various materials and clamping configurations. Choosing the right material dictates your system’s long-term environmental durability.
+-----------------------------------------------------------------+
|                   MATERIAL PERFORMANCE MATRIX                   |
+----------------------+--------------------+---------------------+
| Material Type        | Lifespan Expectancy| Primary Failure Mode|
+----------------------+--------------------+---------------------+
| Polyvinyl Chloride   | 10 – 15 Years      | UV Embrittlement    |
| Cast Aluminum Alloy  | 25 – 40+ Years     | Loose Clamp Screws  |
| Galvanized Iron      | 20 – 30 Years      | Rust & Corrosion    |
+----------------------+--------------------+---------------------+

1. Cast Aluminum Alloy

  • Pros: Highly resistant to rust, lightweight, durable against branch strikes, and widely mandated by modern building codes.
  • Cons: Requires anti-oxidant joint compound when mating with steel conduit to prevent galvanic corrosion.
  • Best Use: Standard rigid metallic conduit (RMC) or intermediate metal conduit (IMC) overhead service masts.

2. PVC (Polyvinyl Chloride) Weatherheads

  • Pros: Completely non-conductive, affordable, and immune to moisture-induced rust.
  • Cons: Vulnerable to long-term ultraviolet (UV) degradation. Over years of intense sun exposure, cheap PVC becomes brittle and prone to cracking under storm stress.
  • Best Use: Schedule 80 PVC conduit runs in non-extreme temperature zones.

3. Phenolic Insulated Faceplates

The most critical sub-component inside any service entrance cap is its phenolic insulator plate. This non-conductive plate contains individual smoothed holes that keep incoming uninsulated service wires safely separated, preventing short circuits and arcs.

The Critical Point of Failure: The Drip Loop Connection

When evaluating an overhead electrical service, the weatherhead works hand-in-hand with a vital installation detail known as the drip loop.
+-----------------------------------------------------------------+
|                    ANATOMY OF A SAFE DRIP LOOP                  |
+-----------------------------------------------------------------+
| UTILITY WIRE         | Comes from the pole at a downward angle  |
+----------------------+------------------------------------------+
| DRIP LOOP (DIP)      | Curves BELOW the bottom of the cap      |
+----------------------+------------------------------------------+
| SERVICE ENTRANCE CAP | Wires enter UPWARD into the hood ports   |
+----------------------+------------------------------------------+
| CONDUIT MAST         | Directs dry wires down to the meter pan  |
+-----------------------------------------------------------------+

The Physics of Water Shedding

Utility wires must sag below the bottom level of the service entrance cap before turning upward to enter the hood ports. This downward dip is the drip loop.
When rain hits the overhead utility wires, gravity pulls water droplets down along the wire jacket. Because the drip loop sits lower than the entry cap, water collects at the bottom of the loop and drips harmlessly onto the ground below, rather than following the wire directly inside the cap housing.
Pro Tip: If you ever notice utility service wires sloping straight down into a weatherhead without a distinct bottom curve, contact your local utility company or a licensed electrician immediately. Without a proper drip loop, rainwater will use your service wires like a highway directly into your electrical meter pan.

Diagnostic Protocol: Spotting Weatherhead Damage Early

You don’t need to climb a ladder to perform an initial safety inspection. A simple ground-level audit using binoculars can reveal early warning signs of service entrance degradation.

Ground-Level Inspection Steps

  1. Check the Hood Orientation: The hooded snout of the cap must point directly downward toward the ground. If storm winds or fallen branches have twisted the hood sideways or upward, rain will blow straight into the opening.
  2. Inspect the Insulator Plate: Look at the faceplate where the wires enter the cap. If you see broken plastic, crumbling Bakelite, or missing dividers between wires, the conductors are at risk of chafing against raw metal edges.
  3. Scan for Rust and Corrosion: Look for reddish rust stains running down the outside of the vertical conduit or tracking down the side of your home’s siding directly below the weatherhead.
Hidden Danger Alert: Never touch, climb near, or attempt to repair an active overhead service wire or service entrance cap yourself! Utility drop lines carry high-amperage current straight from the transformer without fuse protection. Always hire a licensed master electrician and coordinate with your power utility to de-energize the service line before servicing mast components.

Preventative Care and Electrical Integrity Checklist

Keep your home’s electrical point-of-entry safe and dry by following this routine inspection checklist:
  • [ ] Perform a ground-level visual inspection of the service head after severe ice or wind storms.
  • [ ] Verify that utility drop wires form a distinct downward curve (drip loop) below the cap height.
  • [ ] Ensure nearby tree branches are trimmed back at least 10 feet from the service mast and overhead wires.
  • [ ] Confirm that the weatherhead hood is securely clamped and pointing straight down toward the ground.
  • [ ] Replace any cracked PVC or rusted iron service caps with modern corrosion-resistant cast aluminum units.
  • [ ] Inspect the electrical meter pan and main panel for any subtle signs of moisture, chalking, or rust.
Protecting your main electrical entrance with a fully functional service entrance cap is one of the most critical, high-stakes aspects of home maintenance. By ensuring water is shed away from your service mast and keeping incoming conductors isolated, you safeguard your entire home against unexpected power outages, costly panel corrosion, and severe electrical hazards.
When was the last time you looked up at where utility power enters your roofline? Have you ever noticed water or rust near your electrical panel? Drop a comment below with your setup or any questions—I’d love to help you troubleshoot your setup!

Minimalist Executive Storage: Architectural Utility of the Ladder Bookcase Wood

Source:https://hips.hearstapps.com

A few years ago, I was hired to redesign a home study for an executive who was struggling with a claustrophobic workspace. His office was dominated by two massive, dark mahogany traditional bookcases that blocked natural window light, swallowed floor space, and made a 150-square-foot room feel like an underground vault. The moment we swapped those bulky monoliths for a pair of solid wooden leaning shelves, the entire atmosphere shifted. The room suddenly felt airy, sophisticated, and surprisingly twice its original size.

Over my ten-plus years in residential design and custom cabinetry, I’ve seen this exact transformation over and over again. Heavy, boxy furniture is rapidly becoming a relic of the past as modern workspaces prioritize fluid sightlines and intentional spatial organization.
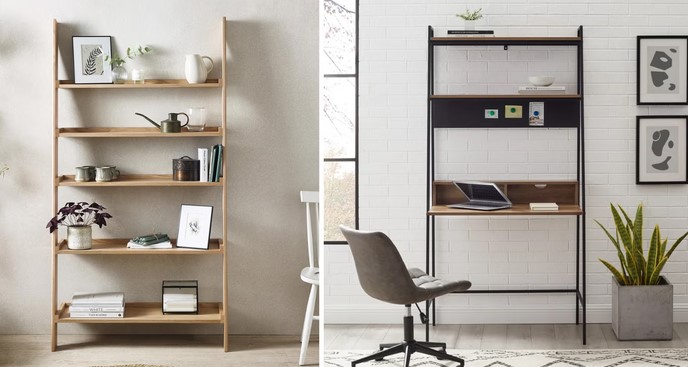
Choosing a ladder bookcase wood structure isn’t just an aesthetic choice for minimalist interior design; it is a smart architectural solution. By capitalizing on vertical wall real estate while reducing visual bulk at eye level, a wooden ladder shelf balances structural integrity with effortless elegance. Let’s explore how to choose, anchor, and style this essential piece of functional decor.

The Spatial Physics of Leaning Design: Why Ladder Shelving Works

To understand why a wooden leaning bookcase feels so light in a room, you have to look at the geometry of sightlines and weight distribution.
Standard bookcases are rectangular boxes that extend straight up, creating a uniform wall of solid wood from floor to ceiling. A leaning ladder shelving unit, however, utilizes a tapered silhouette—wider at the base and narrower at the top.
Think of a traditional bookcase like a tall, solid brick wall, while a wooden ladder bookcase is like an open, step-ladder framework. Light flows around the open sides and angled uprights, allowing your eyes to perceive the full perimeter of the room behind the furniture.
+-----------------------------------------------------------------------+
|                       SPATIAL SIGHTLINE DYNAMICS                      |
|                                                                       |
|   TRADITIONAL BOOKCASE:  [ Solid Box ] =====> (Blocks Light & Sight)  |
|                                                                       |
|   LADDER BOOKCASE:       \ Open Frame \ ====> (Passes Light Through)  |
+-----------------------------------------------------------------------+
Because the top shelves are shallower than the bottom shelves, the unit naturally recedes from your primary field of view as it rises toward the ceiling. This tapering effect tricks the brain into perceiving higher ceilings and a more expansive floor plan.

Material Engineering: Hardwood Species, Joinery, and Load Capacity

When shopping for a ladder bookcase wood piece, you must look beyond surface stains and evaluate the structural integrity of the timber and joinery. Not all wood types handle static shelf loads equally.
+-----------------------------------------------------------------+
|                   TIMBER PERFORMANCE COMPARISON                 |
+----------------------+--------------------+---------------------+
| Wood Species / Type  | Janka Hardness     | Load-Bearing Ability|
+----------------------+--------------------+---------------------+
| Solid White Oak      | High (1,360 lbf)   | Heavy Duty          |
| American Walnut      | Medium (1,010 lbf) | High / Luxury Finish|
| Solid Pine / Cedar   | Low (380-690 lbf)  | Light to Medium     |
| Veneered MDF / PB    | Variable           | Prone to Sagging    |
+----------------------+--------------------+---------------------+

1. Solid Hardwood vs. Engineered Wood

  • Solid Hardwoods (Oak, Walnut, Ash): These offer maximum flexural strength. The natural grain structure resists shelf bowing (deflection) even when packed with heavy legal volumes or art books.
  • Engineered Wood (MDF or Particle Board): While budget-friendly, long shelves made from particle board will sag under moderate weight over time, especially in high-humidity home environments.

2. Joinery Details That Matter

Examine how the horizontal shelf tiers connect to the angled vertical stiles:
  • Mortise and Tenon or Dado Joints: The gold standard in woodworking. The shelf slides directly into a carved groove in the vertical side rail, transferring weight into the solid frame.
  • Simple Pocket Screws: Common in cheaper flat-pack kits. Over time, leaning forces can loosen screw holes in soft materials, causing the frame to wobble.

Gravity and Anchoring Protocols: The Physics of Wall Safety

A common misconception among DIYers is that a leaning shelf relies purely on friction to stay upright. In reality, a ladder bookcase wood unit creates a dynamic vector force pushing down into the floor and back into the wall.
+-----------------------------------------------------------------+
|                    VECTOR FORCE DISTRIBUTION                    |
|                                                                 |
|                 [ Upper Wall Contact Point ]                    |
|                             \                                   |
|                              \  (Downward & Lateral Force)      |
|                               \                                 |
|                      [ Lower Floor Contact Point ]              |
+-----------------------------------------------------------------+

Essential Anchoring Mechanics

Even though gravity presses the top of the frame against the drywall, heavy books or accidental bumps can disrupt the equilibrium and cause a catastrophic tipping incident.
  • Locate Wall Studs: Always secure top mounting brackets into solid wood wall studs using 2.5-inch cabinet screws.
  • Use Heavy-Duty Toggle Bolts: If a stud isn’t aligned with your desired placement, use high-capacity metal toggle anchors rather than plastic dry-wall plugs.
  • Floor Leveling: Garages and older homes often feature sloped floors. Use subtle felt pads or adjustable leveling feet under the base legs to ensure equal contact pressure across both uprights.
Pro Tip: Look for wooden ladder shelves with pre-cut base notch-outs! High-end designs include a recessed cutout at the bottom of the side rails to accommodate standard 4-inch baseboard trim, allowing the unit to rest completely flush against the upper wall surface without awkward gaps.

Curating the Taper: Visual Balance and Weight Distribution

Styling a minimalist wooden ladder shelf requires a balanced approach to both visual weight and physical load distribution.

1. Bottom-Heavy Load Strategy

Place your heaviest items on the deepest bottom shelves to lower the unit’s center of gravity:
  • Bottom Tiers (14–16 inches deep): Heavy storage baskets, oversized art books, records, or printer equipment.
  • Middle Tiers (10–12 inches deep): Hardcover literature, framed family photos, and medium-sized ceramics.
  • Top Tiers (6–8 inches deep): Delicate sculpture pieces, trailing houseplants (like pothos), or small decorative accents.
+-----------------------------------------------------------------+
|                   SHELF WEIGHT & DEPTH MATRIX                   |
+-----------------------------------------------------------------+
| TOP TIER (6"-8" Deep)    | Light Accents & Small Plants         |
+--------------------------+--------------------------------------+
| MID TIER (10"-12" Deep)  | Standard Books & Framed Art          |
+--------------------------+--------------------------------------+
| BASE TIER (14"-16" Deep) | Heavy Books, Baskets & Storage Bins  |
+-----------------------------------------------------------------+

2. The Rule of Visual Negative Space

Avoid packing every inch of every shelf from end to end. Leave at least 30% of each shelf tier open to let the background wall show through. This negative space preserves the open, floating feel that makes ladder shelving so appealing.
Hidden Danger Alert: Beware of top-heavy plant placement! Trailing plants look fantastic on top shelves, but overwatering can cause excess runoff to seep into unsealed wood grain, warping the top shelf and creating a top-heavy water hazard if the pot is ceramic or clay. Always use non-porous drip trays beneath indoor planters.

Essential Selection and Care Checklist

Before purchasing or installing your new wooden ladder bookcase, run through this quick checklist:
  • [ ] Timber is high-density solid hardwood (such as Oak, Walnut, or Ash) treated with a protective matte poly finish.
  • [ ] Shelves utilize mortise-and-tenon or recessed dado joinery for maximum weight capacity.
  • [ ] Base legs include notch-outs to clear standard baseboard trim.
  • [ ] Unit includes solid metal anti-tip wall brackets and hardware for mounting into studs.
  • [ ] Heavy items are placed on the lower two tiers to maintain a low center of gravity.
  • [ ] Wood surfaces are dusted with a microfiber cloth and conditioned annually with natural beeswax polish.
Swapping out bulky, dark storage for an elegant ladder bookcase wood feature is one of the most effective ways to open up a room while adding warmth and character. By combining smart spatial physics with solid timber joinery, you can build an executive workspace that feels organized, open, and timeless.
How is storage currently configured in your home office or living room? Are you working with traditional closed cabinets or looking to transition to open, leaning architecture? Drop a comment below with your setup or questions—I’d love to help you plan your next space upgrade!

Achieving Professional Finishes: Scaling Production with the Texture Wall Roller

Source:https://static.wixstatic.com

Early in my career, I got called in to rescue a DIY home remodel where the owner tried to create a custom knockdown wall finish across a 400-square-foot living room using a handheld drywall trowel and a putty knife. Six hours into his project, he was exhausted, his forearm was cramped, and the wall looked less like a modern Tuscan villa and more like a chaotic mud slide with uneven, patchy peaks. I handed him a specialized texture wall roller, mixed up a fresh batch of joint compound, and showed him how to cover the remaining walls in less than forty-five minutes with uniform, seamless patterns.

Over my ten-plus years in residential contracting and interior finish work, I’ve learned that achieving high-end architectural wall textures isn’t about possessing artist-level hand dexterity. It’s about leveraging the right mechanical delivery tools.
While heavy hopper sprayers are messy and manual hand-troweling is painfully slow, a high-quality texture wall roller sits in the perfect sweet spot for scaling interior finish production. Whether you are repairing damaged drywall patches, disguising wall imperfections, or applying decorative patterns across an entire home, understanding how to control wet-film thickness, mud consistency, and roller sleeve dynamics will elevate your finishing game from amateur to professional grade.

The Physics of Wall Texturing: Why Rollers Outperform Manual Trowels

To understand why a texture wall roller accelerates wall finishing, you have to look at how fluid compound behaves under roller pressure.
When you apply joint compound or textured paint manually with a trowel, achieving consistent thickness across large surfaces is nearly impossible because human arm fatigue naturally alters your blade angle and pressure.
Think of a texture roller like a rolling printing press for heavy compound. Instead of sliding flat across the wall, the patterned foam or loop sleeve rolls continuously, picking up liquid mud from the tray and depositing a mathematically uniform layer across the drywall surface.
+-----------------------------------------------------------------------+
|                     TEXTURE APPLICATION DYNAMICS                      |
|                                                                       |
|   [ Heavy Mud Reservoir ] ---> [ Patterned Roller Sleeve ]            |
|                                         |                             |
|                                         v (Uniform Rolling Pressure)  |
|   [ Uniform Knockdown Peaks ] <--- [ Equal Fluid Release ]            |
+-----------------------------------------------------------------------+
By maintaining uniform wet-film thickness across every square foot, you eliminate flat spots, prevent premature drying, and create an ideal baseline for knock-down flattening or stippling effects.

Sleeve Architecture: Matching Patterns to Roller Materials

Not all texture sleeves are created equal. The material composition and open-cell geometry of your texture wall roller sleeve dictate the final texture height, peak density, and visual style.
+-----------------------------------------------------------------+
|                   ROLLER SLEEVE SELECTION MATRIX                |
+----------------------+--------------------+---------------------+
| Sleeve Material      | Surface Pattern    | Best Application    |
+----------------------+--------------------+---------------------+
| Loop/Crow's Foot Foam| Heavy Stipple/Orange| Knockdown & Accent |
| Embossed Rubber      | Woodgrain/Brick    | Feature Walls       |
| Deep-Nap Slit Foam   | Medium Stipple     | Ceiling Texturing   |
| Patterned Mesh Fabric| Soft Linen/Weave   | Subtle Modern Walls |
+----------------------+--------------------+---------------------+

1. Loop and Porous Open-Cell Foam Sleeves

  • Mechanics: Engineered with a porous, sponge-like structure that grabs heavy joint compound and pulls it into fine, stippled peaks as the roller lifts away from the wall.
  • Best Use: The ultimate choice for creating classic orange peel, heavy stipple, and baseline knockdown finishes before flattening with a trowel.

2. Patterned Rubber and Hard-Core Sleeves

  • Mechanics: Features laser-engraved or embossed raised rubber patterns (such as bark, stone, or geometric weaves). Instead of pulling peaks, it presses a continuous relief stamp into smooth mud.
  • Best Use: Creating high-end decorative feature walls and custom focal accents without purchasing expensive stamps.

3. Slit-Foam and Heavy-Nap Fabric Sleeves

  • Mechanics: Utilizes deeply cut vertical slits across high-density foam to hold maximum fluid capacity without crushing under pressure.
  • Best Use: Covering large ceiling spans and high-volume residential production runs where speed and mud capacity are top priorities.

Mix Consistency: The Secret to Professional Flow

If your joint compound is too thick, your texture wall roller will skid across the drywall like a sled on ice, leaving giant clumps. If it’s too thin, the mud will run down your walls, leaving watery streaks that flatten out into nothing.
+-----------------------------------------------------------------+
|                     MUD VISCOSITY BALANCE                       |
|                                                                 |
|   Too Thick:   [ Clumpy Mud ] ===> Skids & Drags Across Drywall |
|                                                                 |
|   Too Thin:    [ Watery Mud ] ===> Sagging Streaks & No Peaks   |
|                                                                 |
|   Just Right:  [ Heavy Batter] ==> Smooth Rolling & Crisp Peaks  |
+-----------------------------------------------------------------+

Achieving the “Pancake Batter” Benchmark

  1. Start with standard pre-mixed lightweight or all-purpose joint compound in a 5-gallon bucket.
  2. Slowly add clean water in small increments while mixing with a heavy-duty drill and paddle attachment.
  3. Mix until you reach the consistency of thick pancake batter or heavy cream—it should flow off your paddle in a smooth, continuous ribbon without breaking.
Pro Tip: Always let your mixed joint compound sit (slake) for 10 minutes before loading your roller! This allows dry polymers in the powder to hydrate fully, eliminating air bubbles that cause unsightly pinholes in your final cured wall finish.

Step-by-Step Production Protocol: Rolling to Perfection

Achieving a uniform, high-speed texture finish requires a rhythm. Follow this professional workflow to maximize speed and quality.

Step 1: Substrate Preparation and Masking

Texture hides minor drywall flaws, but it will not stick to dust or unprimed surfaces.
  • Prime First: Apply a coat of PVA drywall primer over fresh drywall and tape joints. Unprimed drywall mud absorbs moisture from wet texture rapidly, causing uneven drying and cracking.
  • Mask Thoroughly: Texture rolling produces fine splatter. Mask floors, trim, and ceilings with heavy painter’s plastic and high-tack tape.

Step 2: Loading the Texture Wall Roller

Dip your sleeve into a deep roller tray filled with thinned compound. Roll back and forth across the tray grid until the sleeve is saturated uniformly without dripping heavy goops from the edges.

Step 3: Application Pattern (The “W” Technique)

Roll the thinned compound onto the wall in an overlapping “W” or “N” pattern across a $4\text{ ft} \times 4\text{ ft}$ section. Once the mud is transferred to the wall, roll vertically from ceiling to floor with light, consistent pressure to uniform the peak distribution.
+-----------------------------------------------------------------+
|                   KNOCKDOWN TIMING WINDOW                       |
+-----------------------------------------------------------------+
| 0 MINS   | Roll texture onto wall using textured sleeve          |
+----------+------------------------------------------------------+
| 5–10 MINS| Flash-off phase: Wait until wet sheen dulls slightly |
+----------+------------------------------------------------------+
| 12+ MINS | Knockdown phase: Skim peaks lightly with broad blade |
+-----------------------------------------------------------------+

Step 4: The Knockdown Pass (Optional)

If you want a popular knockdown finish, let the wet stipple peaks “flash off” for 5 to 10 minutes until they lose their wet glossy shine. Then, lightly glide a flexible 18-inch or 24-inch plexiglass or stainless steel knockdown knife over the peaks, flattening the tops into smooth, Spanish-style islands.
Hidden Danger Alert: Do not press hard with your knockdown knife! You are not scraping mud off the wall; you are simply skimming the sharp tips of the wet peaks. Applying excessive pressure will smear the compound into a solid, ugly flat patch.

Essential Maintenance and Quality Audit Checklist

To keep your texturing tools operational and ready for your next project, run through this post-job checklist:
  • [ ] Substrate is fully primed with PVA drywall primer prior to texture application.
  • [ ] Joint compound is thoroughly thinned to a smooth, pourable “pancake batter” consistency.
  • [ ] Roller sleeve is washed immediately with warm water before joint compound dries and hardens inside the open-cell foam.
  • [ ] Knockdown knife or trowel is kept completely clean and wiped free of dried mud build-up during active skimming passes.
  • [ ] Textured wall is allowed to dry for a full 24 hours before applying topcoat latex wall paint.
Scaling your production and achieving high-end architectural wall finishes doesn’t require decades of plastering mastery. By picking the right texture wall roller sleeve, dialing in your mud viscosity, and timing your finishing passes, you can transform plain, flat drywall into a textured masterpiece in a fraction of the time.
What kind of wall texture are you planning for your next home project? Are you attempting a classic orange peel, a smooth knockdown, or a bold decorative feature wall? Drop a comment below with your project details or questions—I’d love to help you dial in your technique!

Strategic Aesthetic Branding: Data-Driven Selection of Interior Paint Colors

Source:https://media.admiddleeast.com

A homeowner once brought me into her newly renovated open-concept living room, nearly in tears. She had spent over $1,200 on premium velvet-finish paint in a soft, trending “warm beige” she saw on Pinterest. But under her home’s modern LED recessed lighting, her walls didn’t look cozy—they looked like a dingy, sickly greenish-yellow. She looked at me and asked, “How did a paint swatch that looked so perfect in the store turn into such a disaster on my wall?”

Over my ten-plus years in residential contracting and color consultation, I’ve seen this exact heartbreak happen dozens of times. Most people pick wall paint emotional-first: they fall in love with a tiny paper chip under bright fluorescent hardware store lighting, take it home, and expect magic.
Selecting the right interior paint colors isn’t an artistic guessing game; it is an analytical process grounded in optical physics, light reflectance metrics, and spatial psychology. Whether you’re refreshing a home office or branding an entire residential layout, taking a data-driven approach ensures the color on your walls performs exactly as intended. Let’s look into how to navigate undertones, light metrics, and sheath finishes like an expert.

The Science of Light Reflectance Value (LRV) and Photometric Behavior

To master wall color selection, you first need to understand the fundamental metric that professional designers rely on: Light Reflectance Value (LRV).
LRV is a technical scale running from 0 (absolute black, absorbing 100% of light) to 100 (pure white, reflecting 100% of light). This number is printed right on the back of professional paint swatches, yet 90% of homeowners completely ignore it.
Think of LRV like the sponge factor of your wall. A paint with a high LRV acts like a mirror, bouncing available natural light back into the room. A paint with a low LRV acts like a velvet sponge, soaking up light and creating deep, atmospheric shadows.
+-----------------------------------------------------------------------+
|                       LIGHT REFLECTANCE DYNAMICS                      |
|                                                                       |
|   [ Ambient Light ] ----(Strikes High LRV > 70)----> [ Bounces Out ]  |
|                                                                 |     |
|                                                       (Brightens Space)
|                                                                 v     |
|   [ Dim Space ] <---(Absorbed by Low LRV < 30)---- [ Deep Shadows ]   |
+-----------------------------------------------------------------------+

Why LRV Dictates Room Feel

  • North-Facing Rooms: Recieved cool, indirect natural light. Painting a north-facing space with a low LRV cool gray (LRV < 40) will make the room feel cold and dreary.
  • South-Facing Rooms: Flooded with warm, intense sunlight all day. These spaces can handle lower LRV shades or cooler tones to balance out the natural warmth without feeling washed out.

Decoding Mass Tone vs. Hidden Undertones

The biggest trap in selecting interior paint colors is failing to separate a color’s mass tone (its dominant color) from its undertone (its underlying secondary hue).
When you look at a neutral paint chip, you might see “gray.” But beneath that mass tone lies a hidden base created during color tinting—typically red, green, blue, or purple.
+-----------------------------------------------------------------+
|                   UNDERTONE REVEAL MATRIX                       |
+----------------------+--------------------+---------------------+
| Mass Tone            | Hidden Base Tint   | Lighting Vulnerability|
+----------------------+--------------------+---------------------+
| Warm Gray (Greige)   | Green or Yellow    | Unfavorable under LED|
| Cool Gray            | Blue or Violet     | Looks Blue at Night |
| Creamy White         | Yellow or Pink     | Clashes with Wood   |
| Muted Green          | Gray or Blue       | Muddy in Dim Light  |
+----------------------+--------------------+---------------------+

The White Sheet Test

How do you uncover a paint’s hidden undertone before buying gallons of it?
  1. Take your prospective color swatch and place it directly on a sheet of pure white printer paper.
  2. View it under natural daylight, then under your home’s artificial lighting.
  3. The stark contrast against pure white will instantly force the hidden undertone—whether pink, green, or blue—to pop out.

Navigating Paint Sheens: From Flat Architectural Finishes to High-Gloss

Color is only half of the equation; the sheen or finish dictates durability, light diffusion, and cleanability.
+-----------------------------------------------------------------+
|                      SHEEN DENSITY PROFILE                      |
|                                                                 |
|   Flat/Matte:   [ Smooth Surface ] ===> (Diffuses Light Softly) |
|                                                                 |
|   Semi-Gloss:   [ Hardened Film  ] ===> (Bounces Direct Glare)  |
+-----------------------------------------------------------------+

1. Flat / Matte (0% – 5% Gloss)

  • Performance: Non-reflective surface that absorbs light, hiding wall imperfections, drywall patches, and telegraphing joints.
  • Best Use: Low-traffic areas, ceilings, and primary bedrooms. Avoid in kitchens or kids’ rooms, as scrubbability is poor.

2. Eggshell and Satin (10% – 25% Gloss)

  • Performance: The ultimate sweet spot for residential interiors. Offers a subtle, washable sheen with enough durability to withstand wiping without stripping the color layer.
  • Best Use: Living rooms, hallways, dining areas, and bedrooms.

3. Semi-Gloss and Gloss (35% – 80%+ Gloss)

  • Performance: Creates a hardened, moisture-resistant acrylic film that repels water and resists scrub wear, but amplifies every dent and uneven plaster line beneath it.
  • Best Use: Trim, baseboards, doors, cabinetry, and high-humidity bathrooms.
Pro Tip: Never use cheap contractor-grade flat paint in high-humidity bathrooms or kitchens! Non-reflective flat paint lacks adequate binder density, meaning moisture will penetrate the paint film, creating water spots, surfactant leaching, and mold growth.

A Data-Driven System: Sampling and CCT Matching

Never commit to a full paint job based on a 2-inch paper swatch. To ensure guaranteed success with your interior paint colors, execute this professional sampling protocol.

1. Match Your Color Temperature (CCT) First

Before choosing paint, inspect your light bulbs’ Correlated Color Temperature (CCT), measured in Kelvin (K):
  • 2700K (Warm Incandescent): Amplifies reds, yellows, and oranges; turns cool grays muddy.
  • 3000K (Soft White Neutral): The ideal residential baseline for accurate color rendering.
  • 4000K+ (Cool White / Daylight): Enhances blues and greens; can make warm creams look stark and sterile.

2. The Moveable Sample Board Method

Instead of painting swatches directly onto your drywall, paint large $2\text{ ft} \times 2\text{ ft}$ foam-core poster boards with two coats of your test color. Move the board around the room—near windows, behind lamps, and into dark corners—and observe it at three key times: 8:00 AM, 1:00 PM, and 8:00 PM.
+-----------------------------------------------------------------+
|                  MOVABLE SAMPLE AUDIT TIMELINE                  |
+-----------------------------------------------------------------+
| 8:00 AM  | Morning Light  | Check for cool/blue undertone shifts |
+----------+----------------+-------------------------------------+
| 1:00 PM  | Midday Sun     | Check if color washes out (LRV test)|
+----------+----------------+-------------------------------------+
| 8:00 PM  | Lamp Light     | Check for muddy/dark undertone pops |
+-----------------------------------------------------------------+
Hidden Danger Alert: Do not paint sample swatches directly over existing dark wall paint without a white border! The surrounding dark color will trick your eyes through simultaneous contrast, making your new sample look far lighter or cooler than it actually is. Always leave a 2-inch white border around your sample board.

Summary Checklist for Strategic Paint Selection

Run through this data-driven checklist before making your final paint purchase:
  • [ ] LRV of selected paint is checked against room orientation and natural light levels.
  • [ ] Undertone is verified using the pure white paper contrast test.
  • [ ] Light bulb color temperature (CCT) across the room is standardized (preferably 3000K).
  • [ ] Paint sheen is selected based on traffic level and substrate texture.
  • [ ] Large sample boards ($2\text{ ft} \times 2\text{ ft}$) are tested across morning, afternoon, and evening lighting conditions.
  • [ ] Premium low-VOC / zero-VOC 100% acrylic latex paint is specified for superior indoor air quality.
Transforming your home’s aesthetic through interior paint colors doesn’t have to be a stressful trial-and-error process. By understanding how light reflectance, undertones, and finishes interact with your home’s unique environment, you can choose wall colors with absolute confidence and build a space that feels curated, intentional, and balanced.
What color projects are you planning for your home right now? Have you ever dealt with a sneaky undertone that ruined your vision? Leave a comment below with your setup or questions—I’d love to help you dial in your color palette!

Optimizing Personnel Wellness: Improving Air Quality with the Air Purifier

Source:https://hisoair.com

I remember walking into a home office conversion project a few years back where the homeowner was constantly complaining of midday brain fog, dry eyes, and unexplained fatigue. He blamed his busy schedule, but as soon as I pulled off the intake grille of his HVAC return vent, the real culprit became instantly obvious. The ducting was caked in fine drywall dust from a previous remodel, pet dander, and microscopic soot that had been continuously re-circulating across his workspace for months.

Over my ten-plus years in residential contracting and indoor environmental remediation, I’ve seen this exact situation play out time and again. We invest thousands of dollars in ergonomic chairs, standing desks, and premium lighting to boost comfort and productivity, yet we completely ignore the invisible medium we breathe every single second: the air.
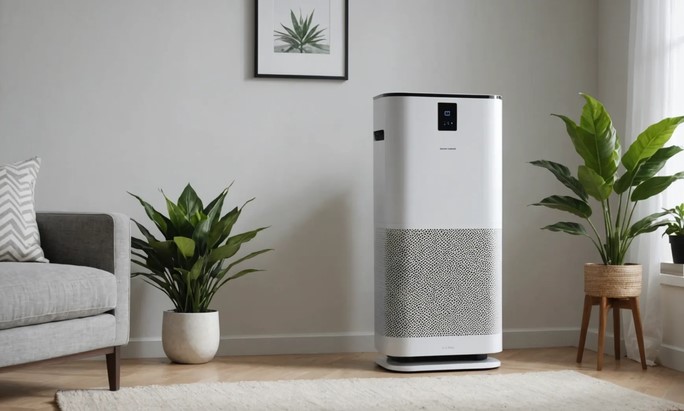
Integrating a high-performance air purifier into your living or working environment isn’t a luxury gadget purchase; it is a foundational upgrade in indoor environmental quality. By actively scrubbing microscopic particulates, volatile organic compounds (VOCs), and airborne pathogens from your personal breathing zone, a properly sized filtration unit restores vitality and protects long-term health. Let’s break down how this vital technology works, how to navigate complex filtration specs, and how to optimize your setup like an expert.

The Hidden Threat: Why Indoor Air Quality Demands Action

According to environmental health studies, indoor air can be two to five times—and occasionally up to 100 times—more polluted than outdoor air. Because modern homes are engineered to be tightly sealed for energy efficiency, toxic particles become trapped inside with nowhere to go.
Think of your room’s air supply like a public swimming pool. If you never run a filtration pump, body oils, dust, and debris accumulate until the water becomes murky and unlivable.
+-----------------------------------------------------------------------+
|                    THE INDOOR POLLUTION CYCLE                         |
|                                                                       |
|   [ Off-Gassing & Dust ] ---> [ Sealed Living Space ] ---> [ Trapped VOCs ]
|                                                                  |    |
|                                                          (Re-circulates)
|                                                                  v    |
|   [ Health Fatigue & Fog ] <---(Inhaled Daily)--- [ Particulate Build-up ]
+-----------------------------------------------------------------------+
When you breathe unfiltered indoor air, your lungs act as the primary filter. Fine particulate matter—specifically particles sized at PM2.5 or smaller—bypasses your body’s natural respiratory defenses, entering deep into your lung tissue and bloodstream, triggering systemic inflammation, fatigue, and allergic reactions.

Decoding Filtration Mechanics: HEPA, Carbon, and CADR

When shopping for an air purifier, marketing buzzwords can easily mislead you. To make an informed decision, you need to understand the core technical metrics that govern real-world performance.
+-----------------------------------------------------------------+
|                   FILTRATION MEDIA COMPARISON                   |
+----------------------+--------------------+---------------------+
| Filter Stage         | Target Pollutant   | Replacement Cycle   |
+----------------------+--------------------+---------------------+
| Pre-Filter Mesh      | Hair, Dust, Lint   | Washable (Monthly)  |
| True HEPA (H13/H14)  | PM2.5, Pollen, Mold| 6 – 12 Months       |
| Activated Carbon     | VOCs, Smells, Smoke| 3 – 6 Months        |
| PECO / Photocatalytic| Bacteria & Viruses | 6 – 12 Months       |
+----------------------+--------------------+---------------------+

1. True HEPA vs. “HEPA-Type”

  • True HEPA (High-Efficiency Particulate Air): Certified to capture at least 99.97% of airborne particles down to 0.3 microns in size. This includes mold spores, dust mites, pet dander, and fine smoke.
  • HEPA-Type / HEPA-Like: Uncertified marketing terms for low-grade filters that miss tiny, sub-micron particulates. Always insist on True HEPA (H13 or H14 rating).

2. Activated Carbon Media

While HEPA captures solid particles, it cannot stop gaseous pollutants like formaldehyde off-gassing from furniture, cooking odors, or aerosol sprays. An activated carbon filter uses highly porous carbon pellets to adsorb volatile organic compounds (VOCs) through chemical bonding.

3. Understanding CADR and ACH

  • CADR (Clean Air Delivery Rate): Indicates how fast the unit removes pollen, dust, and smoke from a room, measured in Cubic Feet per Minute (CFM).
  • ACH (Air Changes per Hour): Look for a unit that provides at least 4 to 5 ACH for your specific room square footage. This ensures the entire volume of room air passes through the filter every 12 to 15 minutes.

Placement Ergonomics: Where Should Your Air Purifier Live?

Buying a top-tier unit is only half the battle; placing it incorrectly will severely restrict its airflow physics and cleaning efficiency.
+-----------------------------------------------------------------+
|                      ROOM AIRFLOW DYNAMICS                      |
|                                                                 |
|   [ Wall / Corner Obstruction ]                                 |
|               |                                                 |
|               v (Restricts Air Intake)                          |
|   [ Air Purifier ] <==== (360° Free Airflow) ====> [ Breathing Zone ]
+-----------------------------------------------------------------+

1. Clear Intake Boundaries

  • Maintain Clearance: Keep at least 12 to 18 inches of open space around all intake grilles. Tucking a unit directly against a couch, behind a curtain, or tight into a corner starves the motor and creates dead zones in the room.
  • Elevate Small Units: If using a compact tabletop unit, place it at nightstand or desk height—closer to your actual breathing zone—rather than on the floor.

2. Strategic Airflow Alignment

Position your unit near known pollution sources—such as next to a home office desk, near a pet bed, or across from a doorway—to intercept incoming contaminants before they settle into soft fabrics and carpets.
Pro Tip: Keep windows and exterior doors closed while running your air purifier! Leaving a window cracked while operating a purifier is like running your vehicle’s air conditioner with the doors wide open—you will exhaust the motor while constantly filtering outdoor ambient air.

Maintenance Protocols and Hidden Traps

An unmaintained filter turns your clean air machine into an active source of secondary pollution. Over my years servicing home systems, I’ve pulled open purifiers that were actively blowing trapped mold spores back into the room because the owner forgot to change the media.

Filter Lifecycle Management

  • Vacuum the Pre-Filter: Most units feature an outer mesh pre-filter. Vacuum or wash this screen every 30 days to catch pet hair and heavy dust before it clogs the expensive HEPA layer beneath.
  • Respect Replacement Timelines: Replace True HEPA filters every 6 to 12 months, and carbon filters every 3 to 6 months depending on local air quality and usage patterns.
Hidden Danger Alert: Beware of cheap units with un-bypassable ionizers or ozone generators! While marketed as air fresheners, ozone is a harsh respiratory irritant that can trigger asthma attacks and damage lung tissue. Ensure any secondary ionization features are certified zero-ozone or can be permanently turned off.

Summary Checklist for Pure Indoor Air

Run through this quick environmental safety audit to get the most out of your home setup:
  • [ ] Unit utilizes a certified True HEPA (H13+) filter combined with a heavy pelletized activated carbon layer.
  • [ ] CADR rating is properly sized to deliver 4 to 5 Air Changes per Hour (ACH) for your room dimensions.
  • [ ] Fixture is placed in an unobstructed location with 12+ inches of surrounding clearance.
  • [ ] Ionizer / UV features are tested and certified zero-ozone (CARB certified).
  • [ ] Outer pre-filter mesh is cleaned monthly, and primary filter media is scheduled for timely replacement.
  • [ ] Windows and doors remain sealed during active purification cycles.
Investing in an air purifier is one of the most immediate, impactful steps you can take to upgrade your living environment and support daily well-being. By removing microscopic stress from your respiratory system, you create a space where you can focus clearly, rest deeply, and breathe effortlessly.
How is the air quality in your home or workspace right now? Are you currently running a dedicated filtration system, or dealing with stubborn dust and morning allergies? Drop a comment below with your setup or questions—I’d love to help you optimize your indoor air!

Recreational Asset Logistics: Systematic Management with the Golf Bag Organizer

Source:https://baligo.cc

I still cringe thinking about a garage audit I did for a client a few years back. He was an avid golfer who had invested over $4,000 in custom graphite-shaft irons, a carbon-faced driver, and premium leather staff bags. Yet, when I opened his garage door, those pristine clubs were slumped in a damp corner, squeezed between a muddy lawnmower and a leaning stack of fertilizer bags. The moisture from the concrete floor was already pitting his steel shafts, and a stray bag of ice had leaked right into his favorite carry bag.

In my decade of residential design and garage organization, I’ve seen this scene play out time and again. Homeowners spend thousands on high-performance sports equipment, only to treat it like cheap yard tools once the weekend ends.
Integrating a dedicated golf bag organizer isn’t just a matter of neatness—it’s an essential protocol in recreational asset logistics. It protects delicate equipment from moisture and mechanical impact, streamlines your weekend departure routine, and transforms garage clutter into an organized home hub. Let’s break down how to properly manage your golf gear using systematic spatial organization.

The Hidden Cost of Chaos: Why Casual Golf Storage Ruins Your Gear

To understand why a golf bag organizer is a necessary investment, you need to understand how humidity, temperature, and static pressure damage your equipment over time.
Golf bags are heavy, highly structured pieces of luggage filled with delicate carbon-fiber composites, metal alloys, rubber grips, and soft leather. Leaving them resting on bare concrete or wedged haphazardly against garage walls introduces three silent enemies:
+-----------------------------------------------------------------------+
|                       THE STORAGE DEGRADATION TRIAD                   |
|                                                                       |
|   [ Concrete Hydrostatic Pressure ] ---> [ Moisture Absorption ]      |
|                                                 |                     |
|                                                 v                     |
|   [ Shaft Pitting / Mold Growth ] <--- [ Shaft Bending & Scratches ]   |
+-----------------------------------------------------------------------+
  1. Concrete Hydrostatic Moisture: Raw garage floors pull moisture up from the soil below. When a nylon or leather golf bag sits directly on concrete, it acts like a sponge, trapping damp air around metal ferrules and shafts, leading to hidden rust.
  2. Shaft Bending Stress: When a bag leans against a wall at an angle, the internal dividers force club shafts to carry continuous lateral load. Over several months, this static pressure can warp composite shafts or loosen internal epoxy bonds in the clubheads.
  3. Grip Oxidation & Mold: Dark, damp, unventilated corners breed mildew inside bag pockets, deteriorating expensive multi-compound grips and ruining leather headcovers.

Anatomy of an Elite Golf Bag Organizer: Structural Essentials

Walk into any home improvement store, and you’ll find racks ranging from lightweight wire frames to heavy-duty powder-coated steel stations. Choosing the right design depends on your available footprint and total asset weight.
+-----------------------------------------------------------------+
|                   ORGANIZER ARCHITECTURE MATRIX                 |
+----------------------+--------------------+---------------------+
| Feature / Spec       | Budget Wire Rack   | Commercial Steel    |
+----------------------+--------------------+---------------------+
| Frame Material       | Thin Wire / Plastic| Heavy-Gauge Tubing  |
| Weight Capacity      | 50 – 75 lbs        | 150 – 200+ lbs      |
| Leveling System      | Fixed Plastic Feet | Adjustable Threaded |
| Accessory Storage    | Basic Side Hooks   | Bins, Shelves, Drawers|
+----------------------+--------------------+---------------------+

1. Load-Bearing Frame Geometry

A single fully loaded cart bag with 14 clubs, balls, shoes, and rain gear can easily top 35 to 45 pounds. If you host family members or friends, a double-bag station needs to support 100+ pounds of static load without racking or swaying.
  • Material Matters: Insist on powder-coated tubular steel frame construction over hollow plastic or thin wire mesh.
  • Adjustable Feet: Garages are purposefully sloped toward the driveway for drainage. An organizer with threaded leveling feet keeps your gear perfectly vertical, preventing heavy bags from tipping forward.

2. Integrated Utility Zones

A functional rack should manage your entire golfing ecosystem, not just hold the bag upright:
  • Footwear Compartments: Open-mesh metal shelves allow dirty golf spikes to air out after 18 holes, preventing odor buildup.
  • Enclosed Bins: Dedicated wire baskets keep extra sleeves of balls, tees, rangefinders, and divot tools from getting lost on workbench surfaces.
  • Side Hooks: Exterior hanging points give towels, rain hoods, and umbrellas a dedicated spot to drip dry completely before storage.

Spatial Zoning: Where Should Your Storage Hub Live?

In home improvement logistics, workflow is everything. Think of your garage like an assembly line: you want your equipment positioned to minimize movement when loading and unloading your vehicle.
+-----------------------------------------------------------------+
|                      GARAGE ZONING FLOW                         |
|                                                                 |
|   [ Outdoor Play ] ===> [ Vehicle Trunk ] ===> [ Transition Zone ]
|                                                        |        |
|                                                        v        |
|   [ Restock & Air Dry ] <=== [ Golf Bag Organizer Storage Hub ] |
+-----------------------------------------------------------------+

1. The Trunk-Adjacent Transition Zone

The optimal placement for a golf bag organizer is within 5 to 10 feet of your vehicle’s trunk door, elevated off the main driving lane. This transition zone eliminates long carries across wet or dirty garage bays, reducing the risk of dropping a bag on hard concrete.

2. Climate Considerations

If your garage reaches extreme temperatures (above 100°F/38°C in summer or well below freezing in winter), take note:
  • High heat degrades the specialized epoxy glues holding clubheads onto shafts over time.
  • Cold weather hardens rubber grips, causing them to dry-rot and crack prematurely.
  • Expert Recommendation: In harsh climates, choose an elevated rolling organizer. You can keep your gear in the garage during playing season, then smoothly wheel the entire unit into a mudroom or utility closet during the off-season.
Pro Tip: Never store a soaked golf bag straight into a closed cabinet or closet after a rainy round! Always place it on your organizer with all pocket zippers fully open for at least 24 hours to air-dry thoroughly.

Step-by-Step Systemization: Organizing Your Gear Like a Caddie

Once your organizer is assembled and leveled, follow this systematic loading hierarchy to keep your station neat and fully functional.
+-----------------------------------------------------------------+
|                   EQUIPMENT PLACEMENT FLOW                      |
+-----------------------------------------------------------------+
| TOP SHELF      | Rangefinders, GPS units, ball boxes, hats     |
+----------------+------------------------------------------------+
| MAIN BAY       | Golf bags (Secured upright with straps)        |
+----------------+------------------------------------------------+
| MIDDLE BINS    | Gloves, tees, ball markers, towel backstock    |
+----------------+------------------------------------------------+
| BOTTOM SHELF   | Golf shoes (Placed on breathable wire mesh)    |
+----------------+------------------------------------------------+

Step 1: Base Anchor Security

Place your heaviest cart or staff bags in the main lower bays. Ensure the bottom plate of the organizer elevates your bags at least 2 to 4 inches off the floor to isolate them from moisture, road salt, and dirt.

Step 2: Vertical Accessory Sorting

Use vertical stacking to your advantage. Place lightweight consumables—boxes of balls, tees, spike wrenches, and rain covers—on upper tiers so you can quickly inventory your stock before headquartering out for a morning tee time.
Hidden Danger Alert: Watch out for dead batteries! Storing electronic rangefinders or GPS units in unconditioned garage spaces over winter can drain and corrupt lithium-ion cells. Always remove sensitive electronics from your bag and store them indoors at room temperature during the off-season.

Seasonal Maintenance and Asset Audit Checklist

To keep your recreational storage hub in peak condition, perform a quick 10-minute audit at the start and end of every golf season:
  • [ ] Organizer frame is level, resting securely on adjustable feet or locked casters.
  • [ ] Storage base elevates golf bags clear of bare concrete or standing floor water.
  • [ ] Wire mesh shoe racks are brushed free of dried grass, dirt, and mud.
  • [ ] All bag pockets are opened, dried out, and cleared of old food or wet towels.
  • [ ] Grips are cleaned with warm soapy water and dried before long-term rack storage.
  • [ ] Electronic rangefinders and batteries are removed for indoor winter storage.
Taking control of your home’s recreational gear isn’t just about sweeping up clutter—it’s about protecting the investments that bring you joy on the weekends. A dedicated golf bag organizer brings order to your garage layout, protects your equipment from environmental wear, and turns frantic morning packing into a smooth, stress-free routine.
How do you currently store your sports gear at home? Are your golf bags tucked into a proper organizer, or are they leaning precariously in a corner right now? Leave a comment below with your setup or any questions—I’d love to help you optimize your garage space!