Achieving Professional Finishes: Scaling Production with the Texture Wall Roller

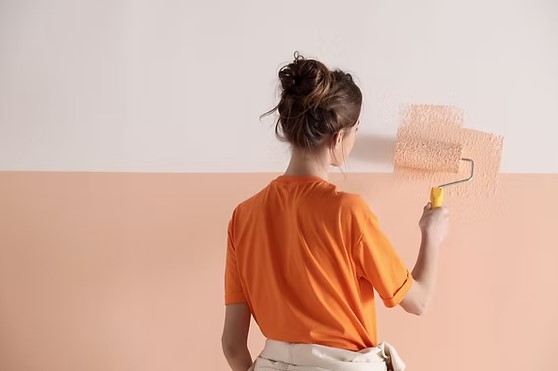
Source:https://static.wixstatic.com

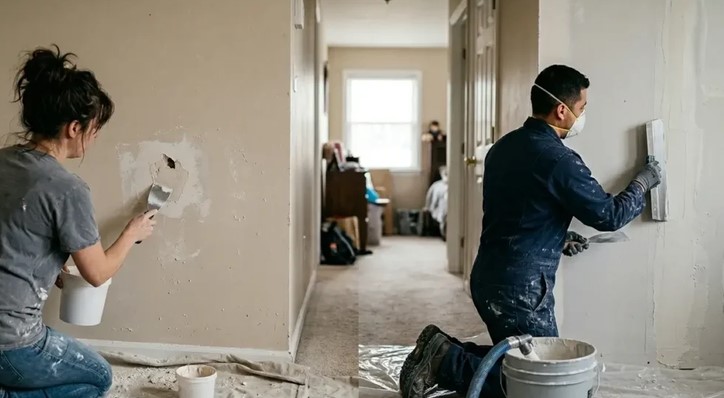
Early in my career, I got called in to rescue a DIY home remodel where the owner tried to create a custom knockdown wall finish across a 400-square-foot living room using a handheld drywall trowel and a putty knife. Six hours into his project, he was exhausted, his forearm was cramped, and the wall looked less like a modern Tuscan villa and more like a chaotic mud slide with uneven, patchy peaks. I handed him a specialized texture wall roller, mixed up a fresh batch of joint compound, and showed him how to cover the remaining walls in less than forty-five minutes with uniform, seamless patterns.

Over my ten-plus years in residential contracting and interior finish work, I’ve learned that achieving high-end architectural wall textures isn’t about possessing artist-level hand dexterity. It’s about leveraging the right mechanical delivery tools.
While heavy hopper sprayers are messy and manual hand-troweling is painfully slow, a high-quality texture wall roller sits in the perfect sweet spot for scaling interior finish production. Whether you are repairing damaged drywall patches, disguising wall imperfections, or applying decorative patterns across an entire home, understanding how to control wet-film thickness, mud consistency, and roller sleeve dynamics will elevate your finishing game from amateur to professional grade.

The Physics of Wall Texturing: Why Rollers Outperform Manual Trowels

To understand why a texture wall roller accelerates wall finishing, you have to look at how fluid compound behaves under roller pressure.
When you apply joint compound or textured paint manually with a trowel, achieving consistent thickness across large surfaces is nearly impossible because human arm fatigue naturally alters your blade angle and pressure.
Think of a texture roller like a rolling printing press for heavy compound. Instead of sliding flat across the wall, the patterned foam or loop sleeve rolls continuously, picking up liquid mud from the tray and depositing a mathematically uniform layer across the drywall surface.
+-----------------------------------------------------------------------+
|                     TEXTURE APPLICATION DYNAMICS                      |
|                                                                       |
|   [ Heavy Mud Reservoir ] ---> [ Patterned Roller Sleeve ]            |
|                                         |                             |
|                                         v (Uniform Rolling Pressure)  |
|   [ Uniform Knockdown Peaks ] <--- [ Equal Fluid Release ]            |
+-----------------------------------------------------------------------+
By maintaining uniform wet-film thickness across every square foot, you eliminate flat spots, prevent premature drying, and create an ideal baseline for knock-down flattening or stippling effects.

Sleeve Architecture: Matching Patterns to Roller Materials

Not all texture sleeves are created equal. The material composition and open-cell geometry of your texture wall roller sleeve dictate the final texture height, peak density, and visual style.
+-----------------------------------------------------------------+
|                   ROLLER SLEEVE SELECTION MATRIX                |
+----------------------+--------------------+---------------------+
| Sleeve Material      | Surface Pattern    | Best Application    |
+----------------------+--------------------+---------------------+
| Loop/Crow's Foot Foam| Heavy Stipple/Orange| Knockdown & Accent |
| Embossed Rubber      | Woodgrain/Brick    | Feature Walls       |
| Deep-Nap Slit Foam   | Medium Stipple     | Ceiling Texturing   |
| Patterned Mesh Fabric| Soft Linen/Weave   | Subtle Modern Walls |
+----------------------+--------------------+---------------------+

1. Loop and Porous Open-Cell Foam Sleeves

  • Mechanics: Engineered with a porous, sponge-like structure that grabs heavy joint compound and pulls it into fine, stippled peaks as the roller lifts away from the wall.
  • Best Use: The ultimate choice for creating classic orange peel, heavy stipple, and baseline knockdown finishes before flattening with a trowel.

2. Patterned Rubber and Hard-Core Sleeves

  • Mechanics: Features laser-engraved or embossed raised rubber patterns (such as bark, stone, or geometric weaves). Instead of pulling peaks, it presses a continuous relief stamp into smooth mud.
  • Best Use: Creating high-end decorative feature walls and custom focal accents without purchasing expensive stamps.

3. Slit-Foam and Heavy-Nap Fabric Sleeves

  • Mechanics: Utilizes deeply cut vertical slits across high-density foam to hold maximum fluid capacity without crushing under pressure.
  • Best Use: Covering large ceiling spans and high-volume residential production runs where speed and mud capacity are top priorities.

Mix Consistency: The Secret to Professional Flow

If your joint compound is too thick, your texture wall roller will skid across the drywall like a sled on ice, leaving giant clumps. If it’s too thin, the mud will run down your walls, leaving watery streaks that flatten out into nothing.
+-----------------------------------------------------------------+
|                     MUD VISCOSITY BALANCE                       |
|                                                                 |
|   Too Thick:   [ Clumpy Mud ] ===> Skids & Drags Across Drywall |
|                                                                 |
|   Too Thin:    [ Watery Mud ] ===> Sagging Streaks & No Peaks   |
|                                                                 |
|   Just Right:  [ Heavy Batter] ==> Smooth Rolling & Crisp Peaks  |
+-----------------------------------------------------------------+

Achieving the “Pancake Batter” Benchmark

  1. Start with standard pre-mixed lightweight or all-purpose joint compound in a 5-gallon bucket.
  2. Slowly add clean water in small increments while mixing with a heavy-duty drill and paddle attachment.
  3. Mix until you reach the consistency of thick pancake batter or heavy cream—it should flow off your paddle in a smooth, continuous ribbon without breaking.
Pro Tip: Always let your mixed joint compound sit (slake) for 10 minutes before loading your roller! This allows dry polymers in the powder to hydrate fully, eliminating air bubbles that cause unsightly pinholes in your final cured wall finish.

Step-by-Step Production Protocol: Rolling to Perfection

Achieving a uniform, high-speed texture finish requires a rhythm. Follow this professional workflow to maximize speed and quality.

Step 1: Substrate Preparation and Masking

Texture hides minor drywall flaws, but it will not stick to dust or unprimed surfaces.
  • Prime First: Apply a coat of PVA drywall primer over fresh drywall and tape joints. Unprimed drywall mud absorbs moisture from wet texture rapidly, causing uneven drying and cracking.
  • Mask Thoroughly: Texture rolling produces fine splatter. Mask floors, trim, and ceilings with heavy painter’s plastic and high-tack tape.

Step 2: Loading the Texture Wall Roller

Dip your sleeve into a deep roller tray filled with thinned compound. Roll back and forth across the tray grid until the sleeve is saturated uniformly without dripping heavy goops from the edges.

Step 3: Application Pattern (The “W” Technique)

Roll the thinned compound onto the wall in an overlapping “W” or “N” pattern across a $4\text{ ft} \times 4\text{ ft}$ section. Once the mud is transferred to the wall, roll vertically from ceiling to floor with light, consistent pressure to uniform the peak distribution.
+-----------------------------------------------------------------+
|                   KNOCKDOWN TIMING WINDOW                       |
+-----------------------------------------------------------------+
| 0 MINS   | Roll texture onto wall using textured sleeve          |
+----------+------------------------------------------------------+
| 5–10 MINS| Flash-off phase: Wait until wet sheen dulls slightly |
+----------+------------------------------------------------------+
| 12+ MINS | Knockdown phase: Skim peaks lightly with broad blade |
+-----------------------------------------------------------------+

Step 4: The Knockdown Pass (Optional)

If you want a popular knockdown finish, let the wet stipple peaks “flash off” for 5 to 10 minutes until they lose their wet glossy shine. Then, lightly glide a flexible 18-inch or 24-inch plexiglass or stainless steel knockdown knife over the peaks, flattening the tops into smooth, Spanish-style islands.
Hidden Danger Alert: Do not press hard with your knockdown knife! You are not scraping mud off the wall; you are simply skimming the sharp tips of the wet peaks. Applying excessive pressure will smear the compound into a solid, ugly flat patch.

Essential Maintenance and Quality Audit Checklist

To keep your texturing tools operational and ready for your next project, run through this post-job checklist:
  • [ ] Substrate is fully primed with PVA drywall primer prior to texture application.
  • [ ] Joint compound is thoroughly thinned to a smooth, pourable “pancake batter” consistency.
  • [ ] Roller sleeve is washed immediately with warm water before joint compound dries and hardens inside the open-cell foam.
  • [ ] Knockdown knife or trowel is kept completely clean and wiped free of dried mud build-up during active skimming passes.
  • [ ] Textured wall is allowed to dry for a full 24 hours before applying topcoat latex wall paint.
Scaling your production and achieving high-end architectural wall finishes doesn’t require decades of plastering mastery. By picking the right texture wall roller sleeve, dialing in your mud viscosity, and timing your finishing passes, you can transform plain, flat drywall into a textured masterpiece in a fraction of the time.
What kind of wall texture are you planning for your next home project? Are you attempting a classic orange peel, a smooth knockdown, or a bold decorative feature wall? Drop a comment below with your project details or questions—I’d love to help you dial in your technique!

Strategic Aesthetic Branding: Data-Driven Selection of Interior Paint Colors

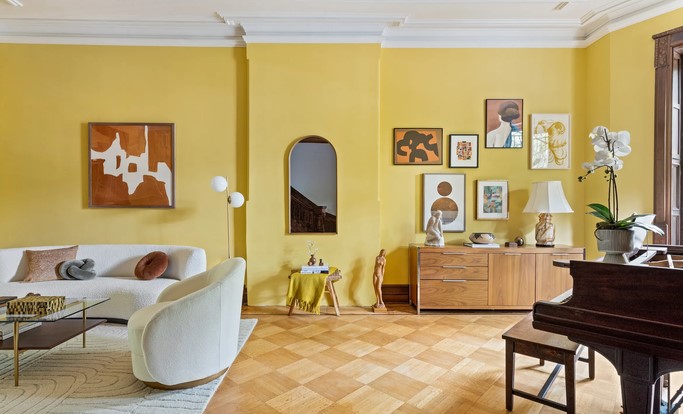
Source:https://media.admiddleeast.com

A homeowner once brought me into her newly renovated open-concept living room, nearly in tears. She had spent over $1,200 on premium velvet-finish paint in a soft, trending “warm beige” she saw on Pinterest. But under her home’s modern LED recessed lighting, her walls didn’t look cozy—they looked like a dingy, sickly greenish-yellow. She looked at me and asked, “How did a paint swatch that looked so perfect in the store turn into such a disaster on my wall?”

Over my ten-plus years in residential contracting and color consultation, I’ve seen this exact heartbreak happen dozens of times. Most people pick wall paint emotional-first: they fall in love with a tiny paper chip under bright fluorescent hardware store lighting, take it home, and expect magic.
Selecting the right interior paint colors isn’t an artistic guessing game; it is an analytical process grounded in optical physics, light reflectance metrics, and spatial psychology. Whether you’re refreshing a home office or branding an entire residential layout, taking a data-driven approach ensures the color on your walls performs exactly as intended. Let’s look into how to navigate undertones, light metrics, and sheath finishes like an expert.

The Science of Light Reflectance Value (LRV) and Photometric Behavior

To master wall color selection, you first need to understand the fundamental metric that professional designers rely on: Light Reflectance Value (LRV).
LRV is a technical scale running from 0 (absolute black, absorbing 100% of light) to 100 (pure white, reflecting 100% of light). This number is printed right on the back of professional paint swatches, yet 90% of homeowners completely ignore it.
Think of LRV like the sponge factor of your wall. A paint with a high LRV acts like a mirror, bouncing available natural light back into the room. A paint with a low LRV acts like a velvet sponge, soaking up light and creating deep, atmospheric shadows.
+-----------------------------------------------------------------------+
|                       LIGHT REFLECTANCE DYNAMICS                      |
|                                                                       |
|   [ Ambient Light ] ----(Strikes High LRV > 70)----> [ Bounces Out ]  |
|                                                                 |     |
|                                                       (Brightens Space)
|                                                                 v     |
|   [ Dim Space ] <---(Absorbed by Low LRV < 30)---- [ Deep Shadows ]   |
+-----------------------------------------------------------------------+

Why LRV Dictates Room Feel

  • North-Facing Rooms: Recieved cool, indirect natural light. Painting a north-facing space with a low LRV cool gray (LRV < 40) will make the room feel cold and dreary.
  • South-Facing Rooms: Flooded with warm, intense sunlight all day. These spaces can handle lower LRV shades or cooler tones to balance out the natural warmth without feeling washed out.

Decoding Mass Tone vs. Hidden Undertones

The biggest trap in selecting interior paint colors is failing to separate a color’s mass tone (its dominant color) from its undertone (its underlying secondary hue).
When you look at a neutral paint chip, you might see “gray.” But beneath that mass tone lies a hidden base created during color tinting—typically red, green, blue, or purple.
+-----------------------------------------------------------------+
|                   UNDERTONE REVEAL MATRIX                       |
+----------------------+--------------------+---------------------+
| Mass Tone            | Hidden Base Tint   | Lighting Vulnerability|
+----------------------+--------------------+---------------------+
| Warm Gray (Greige)   | Green or Yellow    | Unfavorable under LED|
| Cool Gray            | Blue or Violet     | Looks Blue at Night |
| Creamy White         | Yellow or Pink     | Clashes with Wood   |
| Muted Green          | Gray or Blue       | Muddy in Dim Light  |
+----------------------+--------------------+---------------------+

The White Sheet Test

How do you uncover a paint’s hidden undertone before buying gallons of it?
  1. Take your prospective color swatch and place it directly on a sheet of pure white printer paper.
  2. View it under natural daylight, then under your home’s artificial lighting.
  3. The stark contrast against pure white will instantly force the hidden undertone—whether pink, green, or blue—to pop out.

Navigating Paint Sheens: From Flat Architectural Finishes to High-Gloss

Color is only half of the equation; the sheen or finish dictates durability, light diffusion, and cleanability.
+-----------------------------------------------------------------+
|                      SHEEN DENSITY PROFILE                      |
|                                                                 |
|   Flat/Matte:   [ Smooth Surface ] ===> (Diffuses Light Softly) |
|                                                                 |
|   Semi-Gloss:   [ Hardened Film  ] ===> (Bounces Direct Glare)  |
+-----------------------------------------------------------------+

1. Flat / Matte (0% – 5% Gloss)

  • Performance: Non-reflective surface that absorbs light, hiding wall imperfections, drywall patches, and telegraphing joints.
  • Best Use: Low-traffic areas, ceilings, and primary bedrooms. Avoid in kitchens or kids’ rooms, as scrubbability is poor.

2. Eggshell and Satin (10% – 25% Gloss)

  • Performance: The ultimate sweet spot for residential interiors. Offers a subtle, washable sheen with enough durability to withstand wiping without stripping the color layer.
  • Best Use: Living rooms, hallways, dining areas, and bedrooms.

3. Semi-Gloss and Gloss (35% – 80%+ Gloss)

  • Performance: Creates a hardened, moisture-resistant acrylic film that repels water and resists scrub wear, but amplifies every dent and uneven plaster line beneath it.
  • Best Use: Trim, baseboards, doors, cabinetry, and high-humidity bathrooms.
Pro Tip: Never use cheap contractor-grade flat paint in high-humidity bathrooms or kitchens! Non-reflective flat paint lacks adequate binder density, meaning moisture will penetrate the paint film, creating water spots, surfactant leaching, and mold growth.

A Data-Driven System: Sampling and CCT Matching

Never commit to a full paint job based on a 2-inch paper swatch. To ensure guaranteed success with your interior paint colors, execute this professional sampling protocol.

1. Match Your Color Temperature (CCT) First

Before choosing paint, inspect your light bulbs’ Correlated Color Temperature (CCT), measured in Kelvin (K):
  • 2700K (Warm Incandescent): Amplifies reds, yellows, and oranges; turns cool grays muddy.
  • 3000K (Soft White Neutral): The ideal residential baseline for accurate color rendering.
  • 4000K+ (Cool White / Daylight): Enhances blues and greens; can make warm creams look stark and sterile.

2. The Moveable Sample Board Method

Instead of painting swatches directly onto your drywall, paint large $2\text{ ft} \times 2\text{ ft}$ foam-core poster boards with two coats of your test color. Move the board around the room—near windows, behind lamps, and into dark corners—and observe it at three key times: 8:00 AM, 1:00 PM, and 8:00 PM.
+-----------------------------------------------------------------+
|                  MOVABLE SAMPLE AUDIT TIMELINE                  |
+-----------------------------------------------------------------+
| 8:00 AM  | Morning Light  | Check for cool/blue undertone shifts |
+----------+----------------+-------------------------------------+
| 1:00 PM  | Midday Sun     | Check if color washes out (LRV test)|
+----------+----------------+-------------------------------------+
| 8:00 PM  | Lamp Light     | Check for muddy/dark undertone pops |
+-----------------------------------------------------------------+
Hidden Danger Alert: Do not paint sample swatches directly over existing dark wall paint without a white border! The surrounding dark color will trick your eyes through simultaneous contrast, making your new sample look far lighter or cooler than it actually is. Always leave a 2-inch white border around your sample board.

Summary Checklist for Strategic Paint Selection

Run through this data-driven checklist before making your final paint purchase:
  • [ ] LRV of selected paint is checked against room orientation and natural light levels.
  • [ ] Undertone is verified using the pure white paper contrast test.
  • [ ] Light bulb color temperature (CCT) across the room is standardized (preferably 3000K).
  • [ ] Paint sheen is selected based on traffic level and substrate texture.
  • [ ] Large sample boards ($2\text{ ft} \times 2\text{ ft}$) are tested across morning, afternoon, and evening lighting conditions.
  • [ ] Premium low-VOC / zero-VOC 100% acrylic latex paint is specified for superior indoor air quality.
Transforming your home’s aesthetic through interior paint colors doesn’t have to be a stressful trial-and-error process. By understanding how light reflectance, undertones, and finishes interact with your home’s unique environment, you can choose wall colors with absolute confidence and build a space that feels curated, intentional, and balanced.
What color projects are you planning for your home right now? Have you ever dealt with a sneaky undertone that ruined your vision? Leave a comment below with your setup or questions—I’d love to help you dial in your color palette!