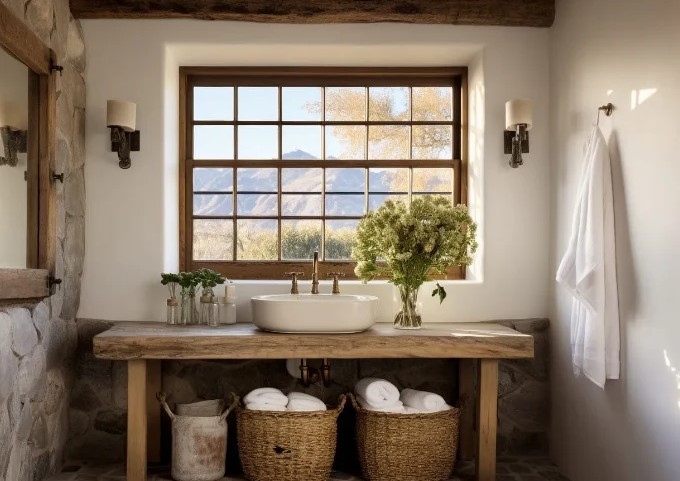
Picture this: You step into a newly renovated bathroom. The tiles are pristine white, the chrome fixtures sparkle like diamonds, and the glass shower door is spotless. Yet, despite the clean finish and thousands of dollars spent, the space feels cold, sterile, and eerily like a surgical clinic or a high-end hospital room.
If this sterile atmosphere sounds familiar, your space is lacking tactile warmth. Over my ten years of hands-on experience designing and executing residential renovations, I have witnessed this exact design pitfall dozens of times. Homeowners invest heavily in stone and metal, completely forgetting that human psychology craves organic texture to balance hard, cold surfaces.
The solution does not require knocking down walls or replacing expensive plumbing. Integrating a well-crafted bathroom shelf wood feature is the single most effective way to introduce organic warmth, soften harsh acoustics, and transform a clinical space into a cozy, personal sanctuary.
The Biophilic Science Behind Wooden Accents
In the world of architectural design, we talk a lot about biophilic design—the innate human tendency to seek connections with nature. When we introduce natural grain patterns into moisture-heavy environments, we trigger a psychological relaxation response.
Cold surfaces like ceramic, porcelain, and chrome reflect light and sound aggressively. Wood, on the other hand, absorbs light and breaks up acoustic resonance, making the room feel noticeably quieter and visually softer.
Think of your bathroom like a cup of dark, bitter espresso. The tiles, glass, and metal represent the strong, sharp base. A rich bathroom shelf wood element is like a pour of steamed milk—it cuts through the harshness, balances the acidity, and smooths out the entire experience.
+-------------------------------------------------------------------+
|                     ATMOSPHERIC BALANCE MATRIX                    |
+------------------------------------+------------------------------+
| All-Tile/Metal Bathroom            | Wood-Accented Organic Space  |
+------------------------------------+------------------------------+
| • Cold, clinical visual aesthetic  | • Warm, inviting spa feeling |
| • High acoustic echo/reverberation | • Softened room acoustics    |
| • Harsh light reflection           | • Diffused, natural warmth   |
| • Sterile aesthetic branding       | • High-end boutique character|
+------------------------------------+------------------------------+
Timber Selection: Navigating Species and Moisture Resistance
Not all timber belongs in a high-humidity environment. Selecting the wrong wood species will lead to warping, fungal rot, and finish failure within a few months of daily hot showers.
1. Naturally Resilient Hardwoods (The Gold Standard)
-
Teak: The undisputed king of wet environments. Packed with natural oils and silica, teak resists moisture, decay, and fungal growth naturally. It ages into a gorgeous silvery-grey if left untreated, or maintains a deep golden-brown when oiled regularly.
-
White Oak: Unlike Red Oak, White Oak features closed-cell tyloses within its pore structure. This structural characteristic makes it remarkably resistant to water absorption and rot.
-
Cedar and Redwood: Outstanding lightweight options with natural aromatic tannins that ward off mold, making them perfect for decorative floating setups.
2. Engineered vs. Solid Wood
Avoid Medium-Density Fiberboard (MDF) or cheap particle board with wood-look vinyl stickers at all costs. Steam will breach the edges, causing the material to swell like a sponge. Always insist on solid hardwood or high-grade marine plywood with genuine hardwood edge-banding.
Engineering and Finishing for High-Humidity Zones
Bringing timber into a bathroom requires technical discipline. The secret to long-lasting beauty lies in the sealant coat and structural mounting system.
Protective Coatings: Oil vs. Polyurethane
-
Penetrating Hardwax Oils (e.g., Rubio Monocoat, Danish Oil): These soak deep into the grain, enhancing the natural texture while allowing the wood to breathe. They are easy to spot-repair but require reapplication every 12 to 18 months.
-
Marine-Grade Conversion Varnish / Polyurethane: Forms an impenetrable barrier over the timber. I recommend a matte or satin finish to keep the natural look without the artificial plasticky sheen of high-gloss polyurethane.
Floating Bracket Systems vs. Exposed Brackets
For a clean, minimalist aesthetic, a floating bathroom shelf wood installation uses hidden steel blind shelf supports anchored deep into wall studs. If you prefer a rustic or industrial aesthetic, matte black iron or brushed brass brackets offer high weight capacities and additional visual contrast against light tiles.
+-------------------------------------------------------------------+
|                    WOOD SPECIES SELECTION GUIDE                   |
+----------------------+----------------------+---------------------+
| Wood Species         | Moisture Resistance  | Ideal Finish Style  |
+----------------------+----------------------+---------------------+
| Teak                 | Exceptional (High)   | Natural Oil / Wax   |
| White Oak            | Very High            | Matte Polyurethane  |
| Western Red Cedar    | High (Rot Resistant) | Penetrating Stain   |
| MDF / Particle Board | Extremely Low (Avoid)| N/A (Do Not Use)    |
+----------------------+----------------------+---------------------+
Step-by-Step Installation: Mounting onto Tiled Walls
Mounting heavy timber onto a tiled bathroom wall can intimidate even confident DIYers. Following this systematic approach ensures your installation remains rock-solid for years.
Step 1: Locate Studs and Mark Centerlines
Never rely solely on hollow-wall anchors for solid timber shelves. Use a deep-scanning stud finder to locate 2×4 framing studs behind the drywall and tile. Mark your mounting points carefully using painter’s tape on top of the tile surface.
Step 2: Drill Tile Without Cracking
Place a strip of masking tape over your marked spot to prevent the drill bit from skidding. Use a specialized diamond-tipped core bit at low RPMs. Keep a small spray bottle of water nearby to spritz the bit, keeping friction heat from cracking the glaze.
Step 3: Seal the Anchor Penetration
Before driving your lag screws or wall anchors through the tile, inject a small dab of 100% silicone sealant directly into the drilled hole. This critical step prevents stray shower steam from creeping behind the tile and causing hidden dry rot in your wall framing.
Expert Advice: Hidden Traps & Technical Nuances
Over a decade in the field teaches you a few hard lessons about wood in wet environments. Here are the technical nuances most design blogs fail to mention:
-
Watch Out for End-Grain Absorption: The ends of a cut board act like a bundle of drinking straws. Even if you seal the top and bottom of your shelf perfectly, unsealed end-grain will drink ambient steam, causing the board to bow or split. Apply two extra coats of sealant to all cut edges.
-
Maintain the Back-Wall Gap: Never press a wooden shelf tightly flush against a wet tiled wall in a shower zone. Leave a tiny micro-gap (1/16 inch) using clear rubber bumpers behind the shelf. This allows trapped water droplets to drain freely rather than sitting against the wood.
-
Balance Light vs. Heavy Styling: Avoid overloading open wooden shelving with plastic bottles. Pair your bathroom shelf wood installation with amber glass pump bottles, rolled white cotton hand towels, and a trailing plant (like a Pothos) to complete the luxury spa aesthetic.
Elevate Your Home Aesthetic Today
A thoughtfully selected bathroom shelf wood installation does far more than provide extra storage—it breaks the cold monotony of tile and metal, infusing your room with organic character, warmth, and timeless style.
By choosing the right timber species, applying a resilient protective seal, and mounting it with structural precision, you elevate a simple utility fixture into a central design feature.
Take a look at your current bathroom setup today: Does it feel like a soothing retreat, or just another cold room?
What wood tones or natural textures are you planning to bring into your space? Drop your ideas or installation questions in the comments below—I would love to help you bring your vision to life!