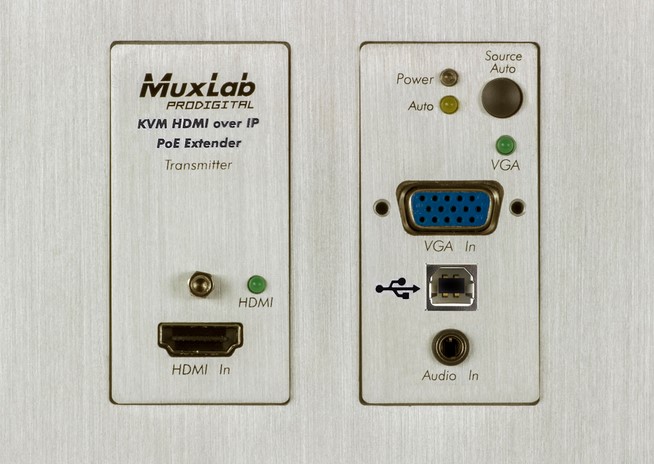
A few months ago, I was finishing up a high-end media room renovation in a modern suburban home. The client had spent thousands on a breathtaking 85-inch 4K OLED display and an AV receiver setup that could rival a local cinema. Yet, hanging directly below that pristine screen was a rat’s nest of black cables dangling down the crisp, freshly painted drywall.
When I brought out a flush-mounted HDMI wall plate modular insert, installed an old-work low-voltage bracket, and routed the cabling hidden behind the wall, the entire room shifted instantly.
The messy tangle vanished, replaced by a clean, architectural finish that made the setup look completely integrated into the home’s structure. Over my 10+ years as a home improvement expert and structural AV specialist, I have learned that messy wiring ruins even the most expensive technology. Incorporating an HDMI wall plate is the ultimate low-cost, high-impact project to achieve professional cable management and streamline home data connectivity.
The Hidden Power of Modern AV Cable Management: Why the HDMI Wall Plate Matters
Think of your home’s internal wiring like municipal plumbing. You would never run water pipes across your living room rug to reach the kitchen sink; you conceal them inside the framing and terminate them with sleek, accessible fixtures at the wall line.
Installing an HDMI wall plate applies that exact structural logic to high-definition video and audio signals. It creates a permanent, professional interface between hidden, in-wall high-speed cables and exterior patch cords connected to media devices like gaming consoles, soundbars, or streaming boxes.
Beyond visual elegance, deploying an HDMI wall plate delivers distinct practical benefits:
-
Strain Relief and Port Protection: Unprotected cables hanging directly out of a wall stress the delicate female ports on expensive TVs. Wall plates transfer mechanical tension to internal structural mounting brackets.
-
Preventing Cable Degradation: In-wall cables remain stationary, protected from foot traffic, vacuum impacts, and sharp bends behind furniture.
-
Modular Upgradability: Using keystone wall plates allows you to mix and match HDMI couplers with RJ45 Ethernet jacks, optical audio ports, or coaxial connectors in a single gang junction box.
+-----------------------------------------------------------------------+
|                    AV Connectivity Infrastructure                     |
|                                                                       |
|  [ Exposed Wire Run ]    --->  Messy, port tension, high damage risk  |
|  [ HDMI Wall Plate System]--->  Flush finish, strain relief, modular, |
|                                 high aesthetic value                  |
+-----------------------------------------------------------------------+
Technical Mechanics: Understanding HDMI Standards, Keystone Couplers, and Signal Loss
Not all wall plates are built identically. Choosing the correct hardware profile requires understanding high-bandwidth digital data transmission physics over copper wires.
Pass-Through Couplers vs. Punch-Down Terminals
-
Female-to-Female Keystone Couplers: The standard choice for DIYers and pros alike. You simply plug a pre-terminated in-wall male HDMI cable directly into the back of the keystone jack mounted inside the faceplate.
-
Pigtail Style Plates: Feature a short flexible HDMI cable extending out from the back of the plate. This style reduces tight bend angles inside shallow drywall cavities.
HDMI Bandwidth Standards and Material Engineering
To support uncompressed 4K at 120Hz or 8K video at 60Hz without screen flickering or handshake errors, your entire signal chain—including the HDMI wall plate coupler—must support the HDMI 2.1 standard (48 Gbps bandwidth).
Look for gold-plated contact pins to minimize signal contact resistance and ensure high-density shielding inside the keystone body to prevent electro-magnetic interference (EMI) from adjacent 120V electrical wiring.
| HDMI Specification | Bandwidth | Max Resolution & Refresh | Essential Features |
| HDMI 1.4 | 10.2 Gbps | 1080p @ 60Hz, 4K @ 30Hz | Basic audio return channel (ARC) |
| HDMI 2.0 | 18.0 Gbps | 4K @ 60Hz | HDR10, ARC, 32 audio channels |
| HDMI 2.1 | 48.0 Gbps | 4K @ 120Hz, 8K @ 60Hz | eARC, VRR, Dynamic HDR |
Step-by-Step Field Execution: Installing Your HDMI Wall Plate Like a Pro
Installing an in-wall pass-through setup is a straightforward weekend DIY project if you follow proper structural techniques:
-
Locate Wall Studs and Cut the Opening: Use an electronic stud finder to locate framing studs. Trace an old-work low-voltage mounting bracket between studs at your desired height, then carefully cut the drywall using a sharp drywall saw.
-
Mount the Low-Voltage Ring: Insert a single-gang low-voltage mounting bracket (drywall caddy) into the cutout and tighten the flip-out locking ears against the back of the sheetrock. Never use a sealed high-voltage metal electrical box for AV cables, as tight space bends will damage internal copper shielding.
-
Run In-Wall Rated Cabling: Pull an CL2 or CL3 fire-rated HDMI cable through the wall cavity from your lower media cabinet to the upper display bracket.
-
Snap and Secure: Plug the in-wall cable into the back of the HDMI wall plate keystone coupler, align the plate over the mounting ring, and secure it flush with faceplate screws.
Pro Tips for Maximum Signal Integrity and Clean Installation
Over a decade of setting up custom residential media centers, I have established strict installation rules:
Pro Tip: Always test your full cable chain before screwing the faceplate into the wall! Plug your media player into the in-wall cable and the HDMI wall plate assembly, then power on your TV to verify video signal lock, HDR handshakes, and eARC audio passthrough before closing up the drywall cavity.
Maintain a minimum 2-inch bend radius on all HDMI cables inside the wall cavity. Forcing a cable into a sharp 90-degree corner degrades internal shielding geometry, causing digital dropouts or complete signal loss.
Hidden Warnings: 3 Traps That Ruin In-Wall AV Projects
Avoid these three frequent mistakes that disrupt data streams or violate local structural codes:
-
Warning 1: Running Non-CL Rated Cables Inside Wall Cavities. Standard HDMI patch cables feature PVC jackets that release toxic fumes when burning. National Electrical Code (NEC) mandates using CL2 or CL3 fire-rated cables for in-wall installations to satisfy home insurance policies and safety standards.
-
Warning 2: Running HDMI Cables Parallel to 120V Power Lines. Running low-voltage data cables directly alongside high-voltage electrical wires creates electromagnetic induction interference. Always cross power lines at a perpendicular 90-degree angle, or maintain at least 6 inches of separation.
-
Warning 3: Exceeding Passive HDMI Distance Limits. Standard passive copper HDMI cables begin losing high-bandwidth signals beyond 15 to 20 feet. For long cable runs over 25 feet behind walls, use an Active Optical HDMI Cable (AOC), which converts electrical signals into laser light pulses.
  [ Improper Parallel Run ]
            ||
            \/
+---------------------------+  <-- 120V High Voltage Line
| Interference Hazard (X)   |  <-- Electromagnetic induction creates noise!
+---------------------------+
| Unshielded Data Cable     |  <-- Keep 6" apart or cross at 90°
Streamlining your home’s digital connectivity does not require hiring expensive commercial AV contractors. By selecting high-bandwidth hardware, utilizing in-wall rated cabling, and mounting a flush HDMI wall plate, you eliminate visual clutter, protect your media equipment ports, and elevate your room’s overall aesthetic value.
Are you planning an AV upgrade or trying to clean up visible cable clutter behind your TV setup? What devices are you connecting in your media area? Share your questions or project plans in the comments below!