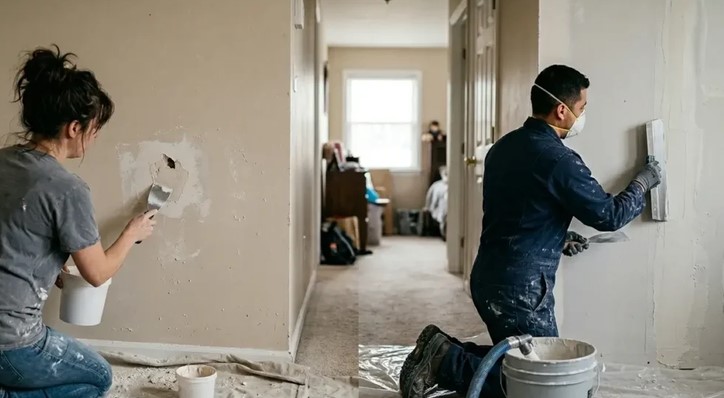
Picture this: You are moving a heavy piece of hardwood furniture down the hallway, lose your footing for half a second, and bam—a door handle or chair leg punches a gaping hole straight through your pristine drywall. You stand there staring at the hollow void in your wall, envisioning hundreds of dollars lost to contractor fees or a weekend wasted trying to mess around with bulky drywall cutouts and wooden backing strips.
If you have ever felt that pit of frustration in your stomach, you are not alone. Over my ten years of hands-on experience restoring interiors and troubleshooting wall damage, I have seen homeowners make the same mistake time and again: assuming that every drywall hole requires a full surgical replacement of the sheetrock.
In reality, most localized punctures can be fixed invisibly in under an hour. The real game-changer in modern surface restoration is the self-adhesive fiberglass wall patch. When executed with proper technique, this simple repair system creates a bond so strong and seamless that even a trained eye cannot spot where the damage occurred.
Why Traditional Drywall Repair Methods Fail Beginners
For decades, the standard approach to repairing a medium-sized wall hole (around 2 to 6 inches) involved cutting out a square section of drywall, screwing wooden support cleats behind the opening, tracing a new piece of sheetrock, and taping the joints.
For a beginner, this method presents multiple failure points. If your cuts are off by even an eighth of an inch, or if you apply paper tape with too little joint compound, the patch will blister, crack, or sag within a few months.
Think of traditional paper tape like a single strip of flat paper. It relies almost entirely on the glue of the joint compound underneath to stick. A woven fiberglass wall patch, on the other hand, acts like rebar inside poured concrete. The crisscrossed glass fibers distribute structural tension in every direction across the void, creating an interwoven matrix that flexes with temperature changes without cracking.
+-------------------------------------------------------------------+
|                     PATCHING METHOD COMPARISON                    |
+------------------------------------+------------------------------+
| Traditional Wood Cleat & Paper Tape| Self-Adhesive Fiberglass Mesh|
+------------------------------------+------------------------------+
| • Requires power tools & saw cuts  | • Toolless, peel-and-stick   |
| • High risk of paper tape blistering| • Open mesh prevents bubbles |
| • Adds thick, bulky compound layers| • Ultra-thin profile blending|
| • Time-intensive multi-day process | • Rapid application under 1hr|
+------------------------------------+------------------------------+
The Mechanical Structure of Mesh Patches
Not all mesh repair units are manufactured equally. Understanding the mechanical components of a professional-grade fiberglass wall patch helps ensure your repair lasts for the lifetime of the structure.
1. High-Tensile Mesh Weave
The outer perimeter consists of woven fiberglass strands coated in an alkali-resistant resin. Glass fibers possess exceptionally high tensile strength—meaning they resist stretching or snapping under stress—ensuring the edges never telegraph (show a hairline crack) through your topcoat.
2. The Perforated Aluminum Backing Plate
At the center of a heavy-duty patch lies a thin, perforated aluminum plate. This metal core spans the empty hole, providing rigid structural backing so your joint compound does not sink into the wall cavity when smoothed over with a taping knife.
3. Pressure-Sensitive Adhesive Layer
Quality patches feature a pressure-sensitive tacking agent pre-applied to the fiberglass mesh. This eliminates the tedious step of applying a bedding layer of mud first, allowing you to stick the patch directly onto cleaned drywall.
Step-by-Step Guide: Executing an Invisible Wall Repair
Achieving a flush, invisible finish is less about raw muscle and more about precise technique. Follow this battle-tested process to restore your damaged surfaces like a pro.
1. Surface Preparation (The Most Skipped Step)
Before reaching for your patch, take a sharp utility knife and carve away any loose paper, crumbling gypsum, or jagged edges around the hole. Dust the perimeter thoroughly with a damp sponge or microfiber cloth. Joint compound will not stick to dry drywall dust.
2. Applying the Fiberglass Wall Patch
Peel the protective backing off your fiberglass wall patch and center the aluminum plate directly over the hole. Press firmly along the mesh borders with your fingers to ensure the adhesive grips the sound drywall.
Pro Tip: Cut away a tiny 45-degree bevel on the outer edges of the surrounding paint layer if it is thick or peeling. This creates a smoother mechanical gradient, allowing your joint compound to feather out smoothly over a wider area.
+-------------------------------------------------------------------+
|                    JOINT COMPOUND SELECTION                       |
+----------------------+----------------------+---------------------+
| Compound Type        | Drying Time          | Best Use Case       |
+----------------------+----------------------+---------------------+
| Setting-Type (Hot Mud)| 20-45 minutes (Chemical)| Base coat over mesh|
| Premixed All-Purpose | 12-24 hours (Evaporation)| Final feather coat |
| Lightweight Spackle  | 1-2 hours            | Micro pinholes only |
+----------------------+----------------------+---------------------+
3. The Two-Coat Feathering Technique
-
First Coat (Setting Compound): Apply a layer of setting-type joint compound (“hot mud”) over the patch using a 6-inch taping knife. Press the mud through the mesh holes to lock into the aluminum plate. Keep this first layer relatively thin—just enough to cover the mesh pattern.
-
Second Coat (Feathering Out): Once dry, switch to a wider 10-inch or 12-inch taping knife and premixed topping compound. Apply the mud in a wide circle extending 6 to 8 inches past the edges of the patch. Wipe the edges down to a paper-thin margin against the original wall.
Sanding and Priming: The Keys to Hiding the Repair
Sanding is where most DIYers ruin a perfectly good patching job by over-sanding directly over the center of the patch, exposing the metal plate or fraying the fiberglass mesh.
Use a 120-grit to 150-grit sanding block in gentle, circular motions along the outer edges. For the center, use a fine 220-grit sponge with minimal pressure just to knock down ridges.
Always seal your sanded joint compound with a dedicated latex drywall primer before applying your wall paint. Raw joint compound absorbs paint at a much higher rate than painted drywall paper—if you skip primer, you will end up with a dull, matte spot known in the industry as “flashing.”
Expert Advice: Hidden Traps & Technical Nuances
A decade in the field teaches you a few hard lessons about wall restoration. Here are the technical nuances most quick-fix videos forget to share:
-
Watch Out for “Fuzzy” Mesh Lines: If you over-sand and expose the glass fibers, do not try to paint over them. The paint will make the frayed threads swell and stand up like bristles. Instead, apply a razor-thin skim coat of joint compound over the frayed area, let it dry, and sand lightly with 220-grit paper.
-
Beware of Door Handle Impact Zones: A fiberglass wall patch restores visual integrity and normal surface strength, but it will not withstand another direct blow from a heavy door handle in the exact same spot. Always install a wall-mounted rubber door stop or hinge pin stop after finishing your repair.
-
Matching Wall Textures: If your walls have an orange peel or knockdown texture, a flat patch will stick out like a sore thumb regardless of how well you feathered it. Buy a can of aerosol wall texture spray, test the pattern on a piece of cardboard, and spray the patch area after priming but before final painting.
Restore Your Surfaces with Confidence
A damaged wall can make an entire room feel neglected, but you do not need an expensive crew or days of messy demolition to fix it. Using a self-adhesive fiberglass wall patch bridges the gap between amateur quick-fixes and professional-grade durability.
By prepping the surface properly, feathering your compound out widely, and priming before you paint, you can turn a nerve-wracking home disaster into a satisfying weekend triumph.
Take a walk around your home today: Do you have a hidden dent behind a door or an old anchor hole waiting for a fresh start?
What is the trickiest wall repair project you have ever tackled at home? Leave your questions or repair stories in the comments below—I would love to help you troubleshoot your next project!