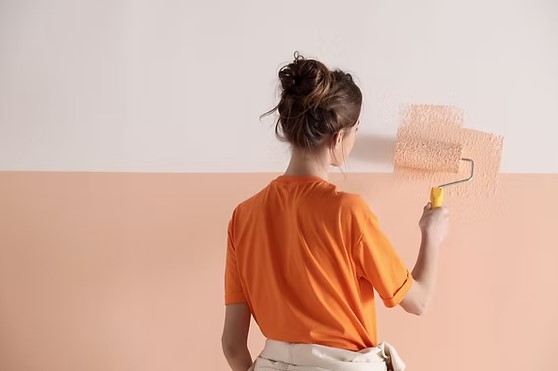
Early in my career, I got called in to rescue a DIY home remodel where the owner tried to create a custom knockdown wall finish across a 400-square-foot living room using a handheld drywall trowel and a putty knife. Six hours into his project, he was exhausted, his forearm was cramped, and the wall looked less like a modern Tuscan villa and more like a chaotic mud slide with uneven, patchy peaks. I handed him a specialized texture wall roller, mixed up a fresh batch of joint compound, and showed him how to cover the remaining walls in less than forty-five minutes with uniform, seamless patterns.
Over my ten-plus years in residential contracting and interior finish work, I’ve learned that achieving high-end architectural wall textures isn’t about possessing artist-level hand dexterity. It’s about leveraging the right mechanical delivery tools.
While heavy hopper sprayers are messy and manual hand-troweling is painfully slow, a high-quality texture wall roller sits in the perfect sweet spot for scaling interior finish production. Whether you are repairing damaged drywall patches, disguising wall imperfections, or applying decorative patterns across an entire home, understanding how to control wet-film thickness, mud consistency, and roller sleeve dynamics will elevate your finishing game from amateur to professional grade.
The Physics of Wall Texturing: Why Rollers Outperform Manual Trowels
To understand why a texture wall roller accelerates wall finishing, you have to look at how fluid compound behaves under roller pressure.
When you apply joint compound or textured paint manually with a trowel, achieving consistent thickness across large surfaces is nearly impossible because human arm fatigue naturally alters your blade angle and pressure.
Think of a texture roller like a rolling printing press for heavy compound. Instead of sliding flat across the wall, the patterned foam or loop sleeve rolls continuously, picking up liquid mud from the tray and depositing a mathematically uniform layer across the drywall surface.
+-----------------------------------------------------------------------+
|                     TEXTURE APPLICATION DYNAMICS                      |
|                                                                       |
|   [ Heavy Mud Reservoir ] ---> [ Patterned Roller Sleeve ]            |
|                                         |                             |
|                                         v (Uniform Rolling Pressure)  |
|   [ Uniform Knockdown Peaks ] <--- [ Equal Fluid Release ]            |
+-----------------------------------------------------------------------+
By maintaining uniform wet-film thickness across every square foot, you eliminate flat spots, prevent premature drying, and create an ideal baseline for knock-down flattening or stippling effects.
Sleeve Architecture: Matching Patterns to Roller Materials
Not all texture sleeves are created equal. The material composition and open-cell geometry of your texture wall roller sleeve dictate the final texture height, peak density, and visual style.
+-----------------------------------------------------------------+
|                   ROLLER SLEEVE SELECTION MATRIX                |
+----------------------+--------------------+---------------------+
| Sleeve Material      | Surface Pattern    | Best Application    |
+----------------------+--------------------+---------------------+
| Loop/Crow's Foot Foam| Heavy Stipple/Orange| Knockdown & Accent |
| Embossed Rubber      | Woodgrain/Brick    | Feature Walls       |
| Deep-Nap Slit Foam   | Medium Stipple     | Ceiling Texturing   |
| Patterned Mesh Fabric| Soft Linen/Weave   | Subtle Modern Walls |
+----------------------+--------------------+---------------------+
1. Loop and Porous Open-Cell Foam Sleeves
-
Mechanics: Engineered with a porous, sponge-like structure that grabs heavy joint compound and pulls it into fine, stippled peaks as the roller lifts away from the wall.
-
Best Use: The ultimate choice for creating classic orange peel, heavy stipple, and baseline knockdown finishes before flattening with a trowel.
2. Patterned Rubber and Hard-Core Sleeves
-
Mechanics: Features laser-engraved or embossed raised rubber patterns (such as bark, stone, or geometric weaves). Instead of pulling peaks, it presses a continuous relief stamp into smooth mud.
-
Best Use: Creating high-end decorative feature walls and custom focal accents without purchasing expensive stamps.
3. Slit-Foam and Heavy-Nap Fabric Sleeves
-
Mechanics: Utilizes deeply cut vertical slits across high-density foam to hold maximum fluid capacity without crushing under pressure.
-
Best Use: Covering large ceiling spans and high-volume residential production runs where speed and mud capacity are top priorities.
Mix Consistency: The Secret to Professional Flow
If your joint compound is too thick, your texture wall roller will skid across the drywall like a sled on ice, leaving giant clumps. If it’s too thin, the mud will run down your walls, leaving watery streaks that flatten out into nothing.
+-----------------------------------------------------------------+
|                     MUD VISCOSITY BALANCE                       |
|                                                                 |
|   Too Thick:   [ Clumpy Mud ] ===> Skids & Drags Across Drywall |
|                                                                 |
|   Too Thin:    [ Watery Mud ] ===> Sagging Streaks & No Peaks   |
|                                                                 |
|   Just Right:  [ Heavy Batter] ==> Smooth Rolling & Crisp Peaks  |
+-----------------------------------------------------------------+
Achieving the “Pancake Batter” Benchmark
-
Start with standard pre-mixed lightweight or all-purpose joint compound in a 5-gallon bucket.
-
Slowly add clean water in small increments while mixing with a heavy-duty drill and paddle attachment.
-
Mix until you reach the consistency of thick pancake batter or heavy cream—it should flow off your paddle in a smooth, continuous ribbon without breaking.
Pro Tip: Always let your mixed joint compound sit (slake) for 10 minutes before loading your roller! This allows dry polymers in the powder to hydrate fully, eliminating air bubbles that cause unsightly pinholes in your final cured wall finish.
Step-by-Step Production Protocol: Rolling to Perfection
Achieving a uniform, high-speed texture finish requires a rhythm. Follow this professional workflow to maximize speed and quality.
Step 1: Substrate Preparation and Masking
Texture hides minor drywall flaws, but it will not stick to dust or unprimed surfaces.
-
Prime First: Apply a coat of PVA drywall primer over fresh drywall and tape joints. Unprimed drywall mud absorbs moisture from wet texture rapidly, causing uneven drying and cracking.
-
Mask Thoroughly: Texture rolling produces fine splatter. Mask floors, trim, and ceilings with heavy painter’s plastic and high-tack tape.
Step 2: Loading the Texture Wall Roller
Dip your sleeve into a deep roller tray filled with thinned compound. Roll back and forth across the tray grid until the sleeve is saturated uniformly without dripping heavy goops from the edges.
Step 3: Application Pattern (The “W” Technique)
Roll the thinned compound onto the wall in an overlapping “W” or “N” pattern across a $4\text{ ft} \times 4\text{ ft}$ section. Once the mud is transferred to the wall, roll vertically from ceiling to floor with light, consistent pressure to uniform the peak distribution.
+-----------------------------------------------------------------+
|                   KNOCKDOWN TIMING WINDOW                       |
+-----------------------------------------------------------------+
| 0 MINS   | Roll texture onto wall using textured sleeve          |
+----------+------------------------------------------------------+
| 5–10 MINS| Flash-off phase: Wait until wet sheen dulls slightly |
+----------+------------------------------------------------------+
| 12+ MINS | Knockdown phase: Skim peaks lightly with broad blade |
+-----------------------------------------------------------------+
Step 4: The Knockdown Pass (Optional)
If you want a popular knockdown finish, let the wet stipple peaks “flash off” for 5 to 10 minutes until they lose their wet glossy shine. Then, lightly glide a flexible 18-inch or 24-inch plexiglass or stainless steel knockdown knife over the peaks, flattening the tops into smooth, Spanish-style islands.
Hidden Danger Alert: Do not press hard with your knockdown knife! You are not scraping mud off the wall; you are simply skimming the sharp tips of the wet peaks. Applying excessive pressure will smear the compound into a solid, ugly flat patch.
Essential Maintenance and Quality Audit Checklist
To keep your texturing tools operational and ready for your next project, run through this post-job checklist:
-
[ ] Substrate is fully primed with PVA drywall primer prior to texture application.
-
[ ] Joint compound is thoroughly thinned to a smooth, pourable “pancake batter” consistency.
-
[ ] Roller sleeve is washed immediately with warm water before joint compound dries and hardens inside the open-cell foam.
-
[ ] Knockdown knife or trowel is kept completely clean and wiped free of dried mud build-up during active skimming passes.
-
[ ] Textured wall is allowed to dry for a full 24 hours before applying topcoat latex wall paint.
Scaling your production and achieving high-end architectural wall finishes doesn’t require decades of plastering mastery. By picking the right texture wall roller sleeve, dialing in your mud viscosity, and timing your finishing passes, you can transform plain, flat drywall into a textured masterpiece in a fraction of the time.
What kind of wall texture are you planning for your next home project? Are you attempting a classic orange peel, a smooth knockdown, or a bold decorative feature wall? Drop a comment below with your project details or questions—I’d love to help you dial in your technique!