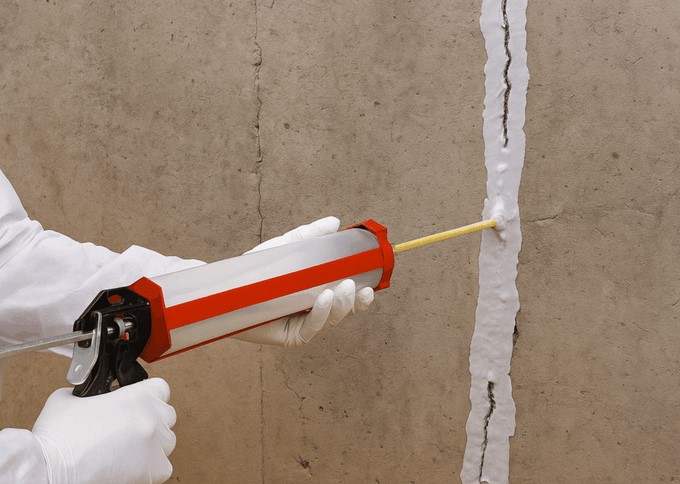
You’ve finally bought that 75-inch OLED TV. You’ve measured the wall, marked the height, and you’re holding the heavy-duty mounting bracket against the drywall. You slide your stud finder across the surface, it beeps confidently, and you drive a three-inch lag bolt into the wall—only to hear the sickening “crunch” of drywall and the hollow whistle of empty space. Or worse, the hiss of a punctured PVC pipe.
In my 10 years of professional renovation, I’ve seen more “Swiss cheese” walls than I care to admit. The culprit usually isn’t a broken tool; it’s a dying Stud Finder Battery. We trust these little plastic boxes to “see” through solid matter, yet we treat the power source as an afterthought. It’s the equivalent of trying to navigate a dark forest with a flashlight that has five minutes of juice left—you’re going to trip eventually.
The Ghost in the Machine: Why Power Equals Precision
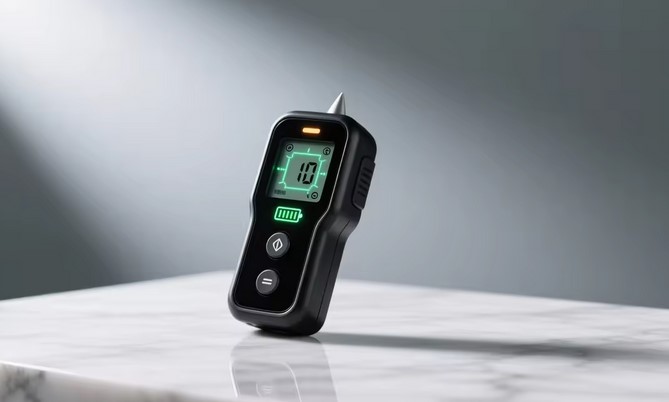
Most homeowners don’t realize that a stud finder is essentially a miniature sonar or radar system. It sends out an electronic signal to measure dielectric constant—a fancy way of saying it’s looking for changes in density.
When your Stud Finder Battery begins to fade, the “ping” it sends into the wall becomes weak and distorted. This leads to “ghost readings,” where the sensor incorrectly identifies a change in density that isn’t there, or misses a 2×4 timber stud entirely. I’ve personally wasted hours on job sites troubleshooting “faulty” sensors, only to realize that a fresh 9V cell was all that stood between a failed project and a perfect mount.
The Analogy of the Fading Radio
Think of your stud finder like a radio. When the signal is strong, the music is crisp and clear. As the signal (or battery) weakens, you get static. In the world of home improvement, that “static” looks like your stud finder telling you a stud is six inches wide, or beeping erratically across the entire wall.
Scaling Reliability: Choosing the Right Stud Finder Battery
Not all batteries are created equal, and in the niche of precision structural detection, the chemistry of your power source actually matters.
1. Alkaline vs. Lithium
For years, the standard 9V Alkaline was the king of the toolbox. However, if you are an intermediate user looking for high-reliability scaling, Lithium 9V batteries are the superior choice.
-
Discharge Curve: Alkaline batteries lose voltage gradually, causing your tool’s sensitivity to drift. Lithium batteries maintain a steady, high voltage until the very end, ensuring your sensor stays calibrated.
-
Shelf Life: I’ve opened many “emergency” toolboxes only to find an alkaline battery has leaked acid everywhere. Lithium doesn’t leak and stays fresh for up to 10 years.
2. The Rechargeable Trap
I love sustainability, but I rarely use rechargeable NiMH (Nickel-Metal Hydride) batteries in my stud finders. They typically output 8.4V instead of a true 9V. For a sensitive electronic instrument, that 0.6V difference can be the difference between finding the edge of a stud and missing it by an inch.
Navigating Complex Walls: Beyond the Beep
Once you’ve ensured your Stud Finder Battery is at peak health, you need to understand what the tool is actually telling you. In modern construction, the “inside” of a wall is a crowded neighborhood of electrical wires, PEX plumbing, and HVAC ducts.
The Center-Finding Method
Don’t just mark the first beep. I always teach my apprentices to approach the stud from the left until it beeps, then from the right until it beeps. The true center is exactly in the middle of those two marks. If your battery is low, these marks will drift further apart each time you pass over them.
Dealing with “False Positives”
Sometimes, a stud finder will track a metal conduit or a water pipe. This is where AC Wire Detection comes in. Most mid-tier scanners have a separate circuit to detect live wires. If your battery is weak, this secondary safety circuit is often the first thing to fail.
💡 Tips Pro: The “Palm Trick”
If your stud finder is acting “jumpy” even with a fresh battery, it might be due to static electricity on the drywall. Place your free hand flat against the wall about 12 inches away from the tool while you scan. This “grounds” the surface and allows the sensor to get a much cleaner reading of the density behind the board.
Technical Maintenance: The Professional’s Checklist
If you want your structural detection to be as reliable as a pro’s, you need to treat the tool with respect.
-
The Battery Pull: If you aren’t going to use your stud finder for more than a month, take the battery out. I’ve seen $200 professional scanners ruined by a $2 battery that leaked over the winter.
-
Contact Cleaning: Every few months, take a cotton swab with a tiny bit of rubbing alcohol and clean the battery terminals. Dust and grime can create resistance, mimicking the effects of a low battery.
-
Calibration is Key: Always calibrate the tool on a “hollow” part of the wall. If you calibrate it directly over a stud, it will think the stud is the “new normal” and won’t beep when it finds the next one.
The “Deep Scan” Battery Drain
Many modern tools offer a Deep Scan mode for thicker walls or double-layered drywall. This mode increases the power sent to the sensor plate, which significantly accelerates the drain on your Stud Finder Battery. If you’ve been doing extensive deep-scanning, your battery might be “exhausted” even if the low-battery light hasn’t turned on yet. Always keep a spare in your pocket during a big project.
Scannable Reliability Guide
| Battery Type | Pros | Cons | Best For |
| Alkaline | Cheap, everywhere. | Voltage drops, can leak. | Quick, one-off projects. |
| Lithium | Constant voltage, no leaks. | More expensive. | Professionals & expensive tools. |
| NiMH Rechargeable | Sustainable. | Lower voltage (8.4V). | Not recommended for precision. |
Conclusion: Don’t Let a $2 Part Ruin a $2,000 Wall
Precision structural detection is the foundation of every successful wall-mounting project. Whether you’re hanging a heavy mirror, a floating shelf, or a new TV, the reliability of your marks is only as good as the energy powering your sensor. By investing in a high-quality Stud Finder Battery and following professional calibration techniques, you eliminate the guesswork and the “oops” holes in your drywall.
I’ve learned the hard way that in home improvement, the “small things” are actually the “big things.” A fresh battery isn’t just about making the tool beep; it’s about the peace of mind that comes with knowing your lag bolt is biting into solid wood, not thin air.
Have you ever had a stud finder “lie” to you? Drop a comment below and tell me about your most frustrating wall-mounting experience—I can probably tell you exactly why it happened and how to avoid it next time!